Dynamic Host Configuration Protocol (DHCP) server is a network protocol that automatically assigns IP addresses. It also distributes network configuration to all connected devices, such as DNS server, subnet mask, and default gateway. But often, errors can appear when renewing, issuing or leasing an IP address. If you receive the “Unable to Contact your DHCP Server” error on Windows 10, try the following fixes that Quantrimang.com suggests.
1. DNS registration
Sometimes, manually starting dynamic registration for DNS names and IP addresses can fix the error. You can do this by registering your DNS through Command Prompt.
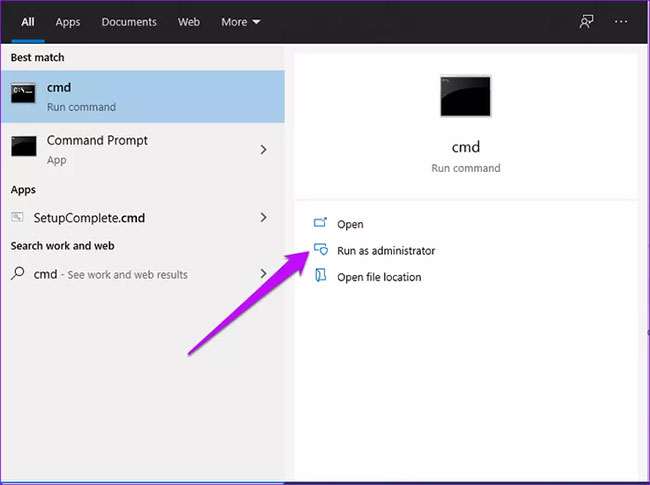
Step 1: Type cmd in the Windows search bar, select Run as administrator on the right hand side to open CMD with admin rights.
Step 2: Enter this command and press Enter:
ipconfig /registerdns
Step 3: Restart the computer and confirm if the error has been resolved. If not, try other fixes.
2. Restart the DHCP server
Errors can occur if DHCP has stopped or the system cannot connect to the service. To resolve this issue, restart the DHCP client service.
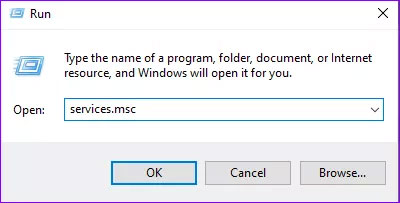
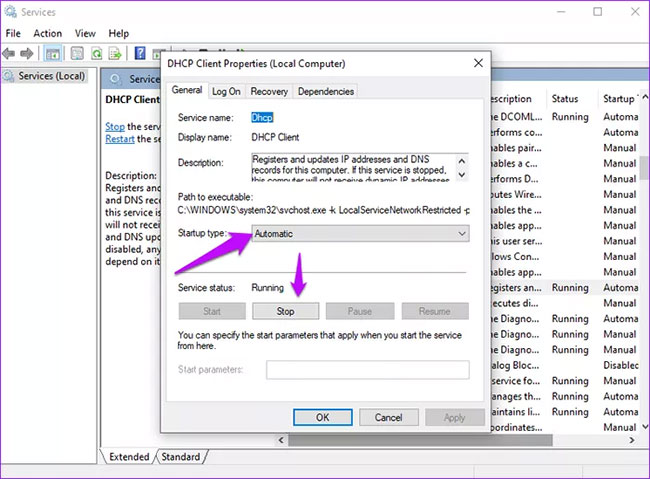
Step 1: Press the key combination Windows + CHEAP, type services.msc into the dialog box Run and press Enter.
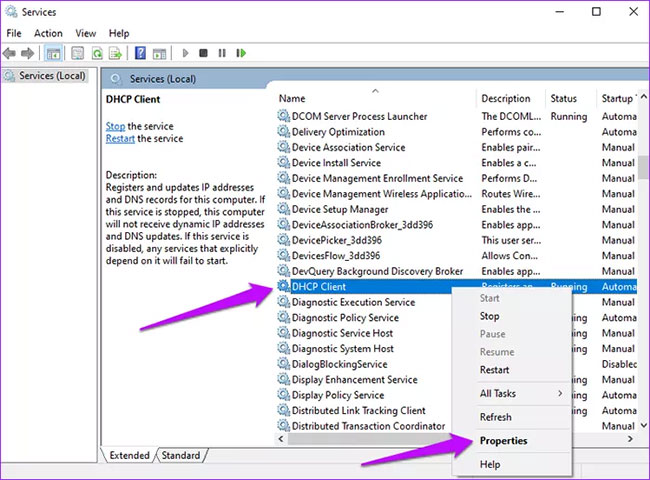
Step 2: Find the DHCP client option, right click on it and select Properties.
Step 3: Transfer Service status Fort Stop.
Step 4: Put Startup type Fort Automatic.
Step 5: Press the button Start, choose OK, then press the button Apply to update the changes.
3. Reset TCP/IP
Reset Winsock and IP stack is another possible solution to fix the error. To reset TCP/IP, follow these steps.
Step 1: Import cmd in the Windows search bar and select Run as administrator.

Step 2: Enter the following commands and press Enter after each command.
netsh winsock resetnetsh int ip resetipconfig /releaseipconfig /renewipconfig /flushdnsStep 3: Restart the computer and see if the error has been eliminated.
4. Update and reinstall the network driver
Old and outdated drivers are a common cause of DHCP server failure to connect. Updating the system will install newer versions that support the current network protocol. Reinstalling the network driver helps find the right driver for the device.
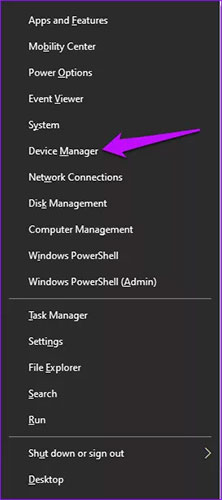
Step 1: Right click on the button Start of Windows and select Device Manager.
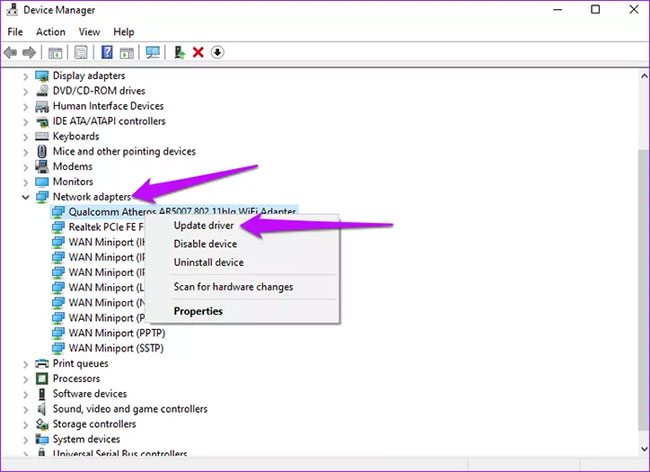
Step 2: Locate Network adapters and expand the list. Select the problematic network adapter and click Update drivers.
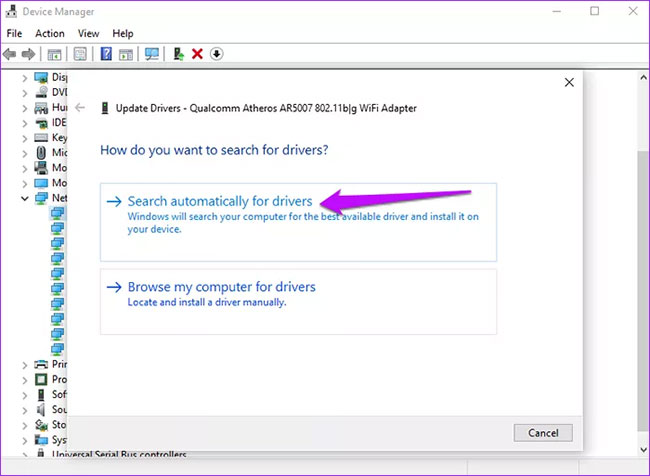
Step 3: Click Search automatically for updated driver software. And when the process is complete, restart the PC.
Alternatively, uninstall then reinstall the problematic driver. Here’s how you can do it.
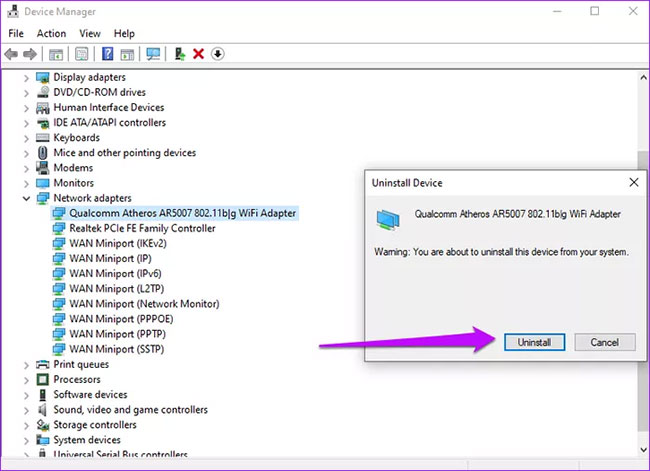
Step 1: On option Network adapters, choose Uninstall device.
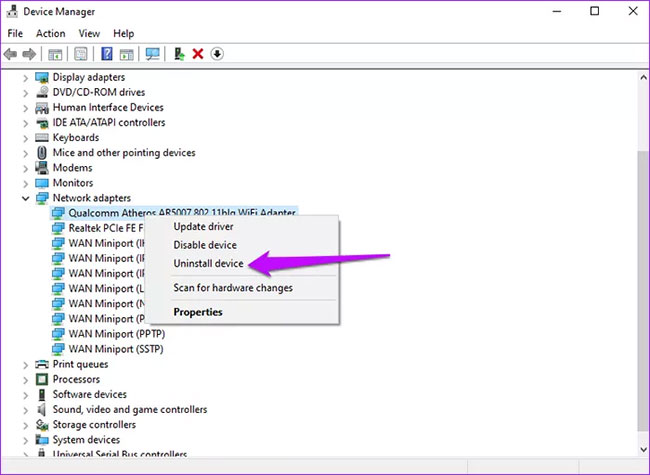
Step 2: Confirm the process by tapping the option Uninstall.
Step 3: At the top of the screen, click Scan for hardware changes.
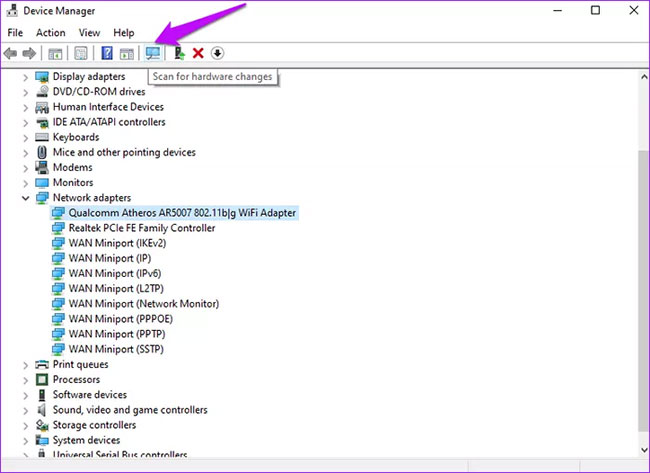
Wait for Windows to complete the process, then restart the device.
Also, consider rolling back to a previous version that worked fine with your computer. Here’s how you can do it.
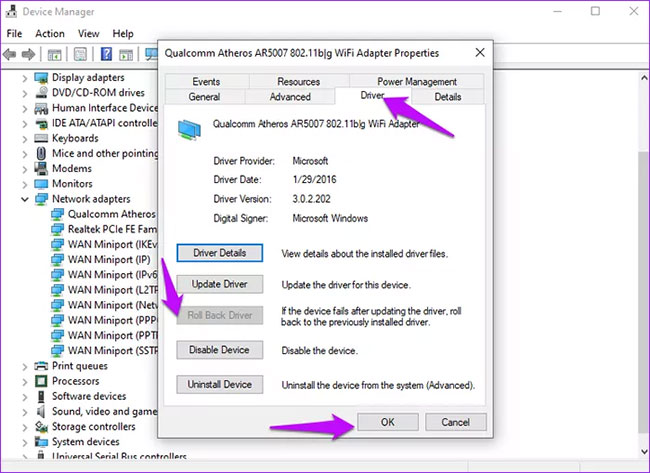
Step 1: Navigate to the problematic network adapter, right click on it and select Properties.
Step 2: Select the Driver tab and find the option Roll Back Driver then select it. Press OK.
NOTE: If the option is grayed out, it means there is no backup file because the driver was not updated recently.
5. Disable IPV6
The error also occurs if IPv6 is enabled and there is no local network to connect to. To fix this problem, follow the instructions in the article: Disable IPv6 to fix Internet connection problems on Windows computers.
Good luck with your troubleshooting!
Source link: 5 ways to fix the “Unable to Contact your DHCP Server” error on Windows 10
– https://techtipsnreview.com/


