
The Ribbon is a toolbar in Microsoft, containing the necessary settings to complete a certain task in Word or change the format in Excel,… This Ribbon can be customized and changed to meet your needs. individual work needs. In case you change computers, you can backup the Ribbon in Word to re-enter it on another computer. The following article will guide you to back up and restore the Ribbon in Word.
1. How to Backup and Restore the Ribbon in Word 2019
Backing up the Ribbon in Word 2019
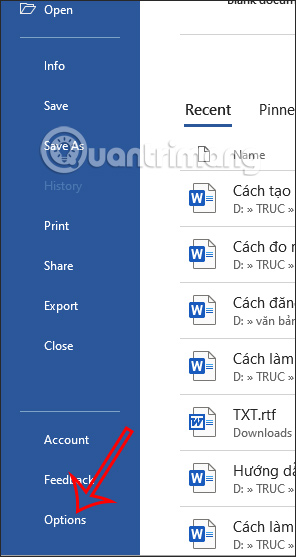
Step 1:
You open Word and then click File, then click on Options to enter the custom interface for Word.
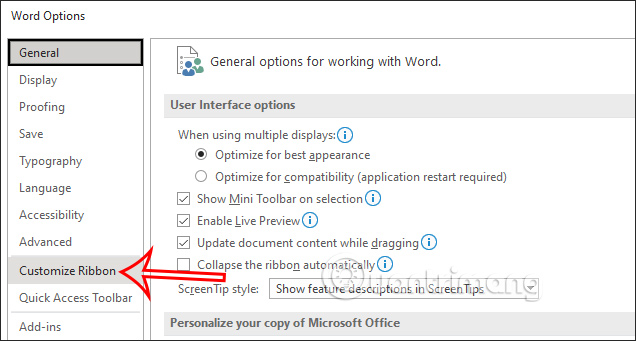
Step 2:
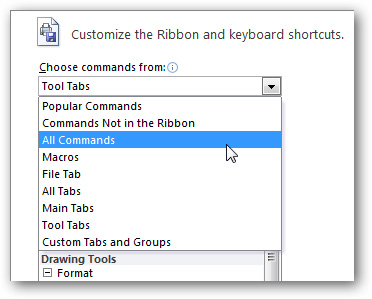
In this interface, users will click on Customize Ribbon in the list on the left side of the interface.
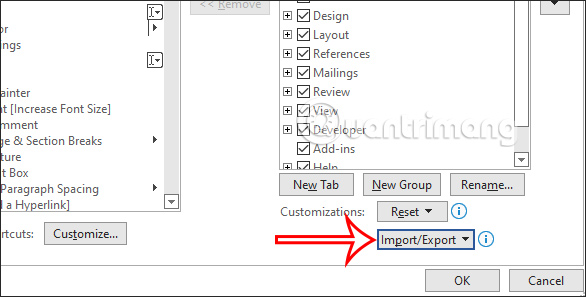
Step 3:
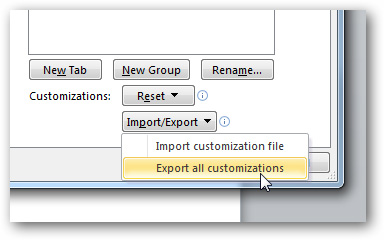
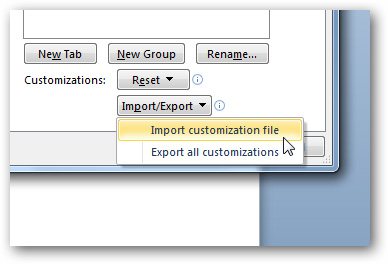
Looking at the content on the right, the user will see all the tools displayed on the Ribbon. You look down below and click Import/Export option.
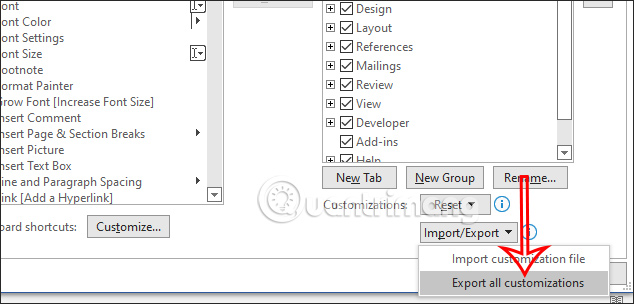
Then we click Export all customizations option to Export the file containing the Ribbon settings with all the settings and customizations that the user has created before.
Step 4:
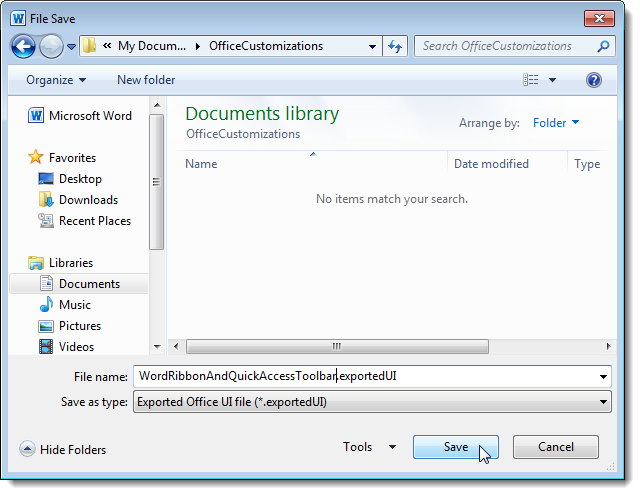
Now display the interface on the computer to proceed save the Ribbon file to your computer as .exportedUI . format. You enter a name and select the location where you want to save this file and then click Save.
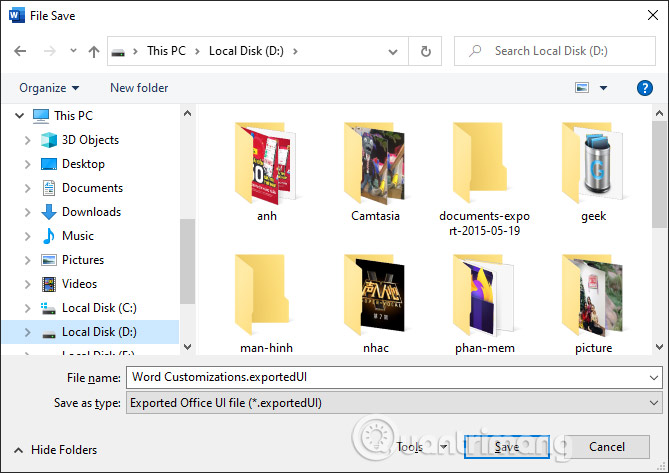
So you have backed up the file containing the Ribbon bar settings to your computer to reuse when needed. Any changes in the Ribbon will not be saved in the backup file after that.
Restore the Ribbon in Word 2019
Restoring the Ribbon in Word is also very simple when you have a backup file of the Ribbon on your computer.
Step 1:
First, you also open the Word interface and click File . Then click on the item Options to open the settings interface for Word.
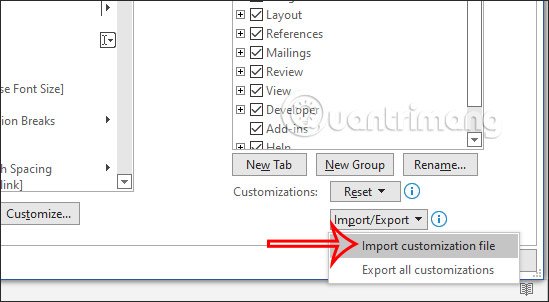
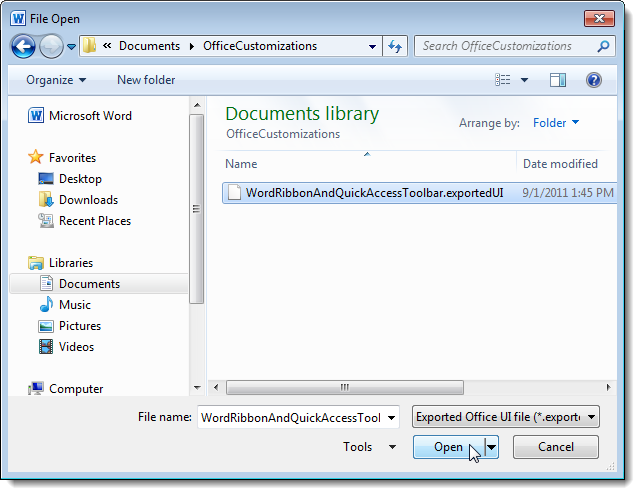
Click Customize Ribbon then click on Import/Export and choose Import customization files in the drop-down list.
Step 2:
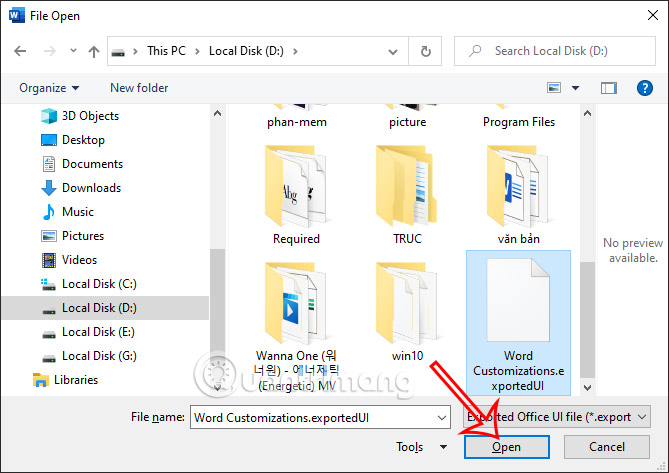
Display the interface on the computer so we can find the Ribbon setup file that you saved earlier. Press Select the file and then click Open to enter settings in Word.
Step 3:
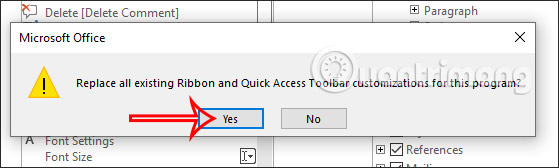
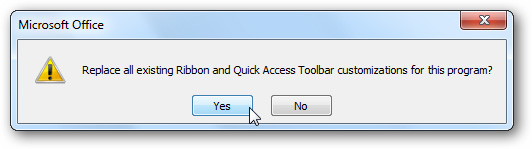
This will display a dialog box asking if you are sure you want to replace the current Ribbon with the Ribbon in the uploaded file, Click Yes to agree.
The results of all settings and settings in the old Ribbon will apply to the Word interface for you to use or continue to change as you like.
Video tutorial to backup and restore Ribbon in Word
2. How to Backup and Restore the Ribbon in Word 2010
Create and backup Customized Tab
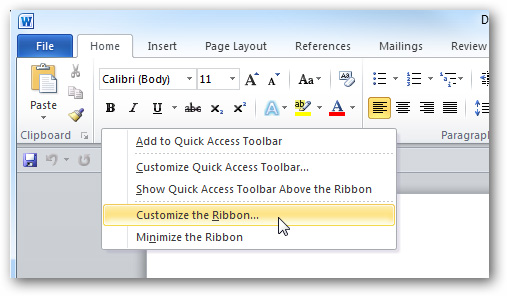
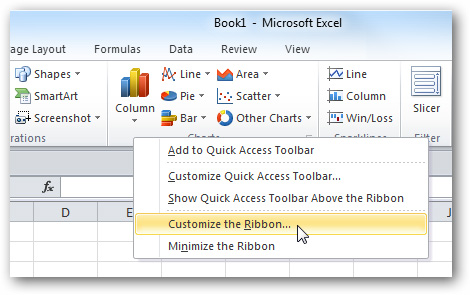
Specifically, in this test, we use Microsoft Office 2010, but with some of the latest versions, you can apply the same way. To get started, right-click an empty space on the toolbar and select Customize the Ribbon:
Screen Word Options displayed, here we can do a lot of options and settings depending on usage needs or personal preferences:

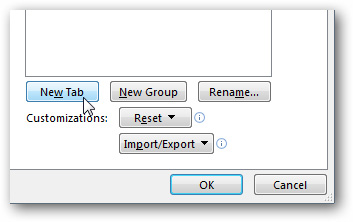
And to create a new customized tab, you press the . button New Tabs:
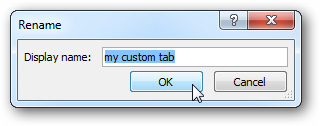
Name this new tab:
The next is quite simple, we just need to drag and drop the corresponding function commands from the left column to the right:
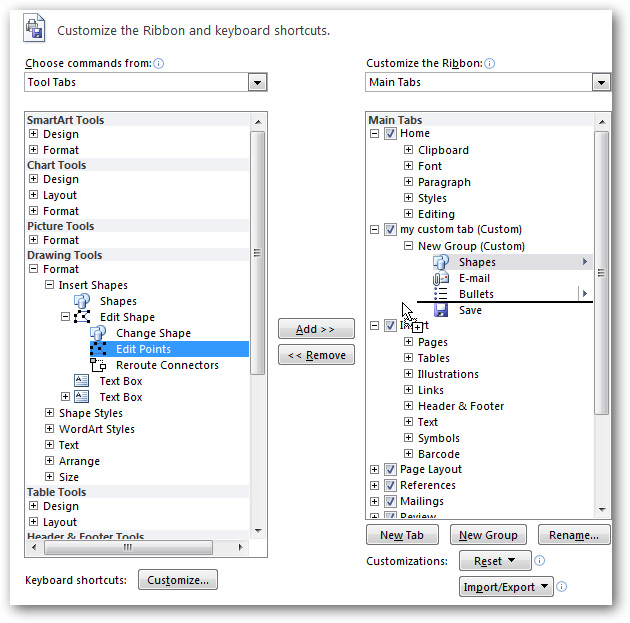
Select the corresponding display method from the dropdown menu by group or all commands:
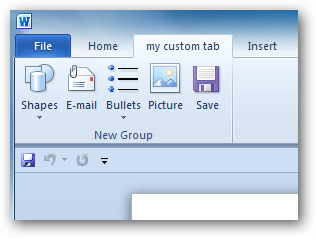
That’s basically it, we’re done creating the custom function tab we want. You can create 1 or more tabs in the same way:
However, you should note that these functional tabs only exist in certain applications or environments. For example, if created in Word will not be displayed in Excel or PowerPoint:
1 pretty useful point we can do more is the ability to extract these customizations for use on other computers with the same version Office. To do this, you choose Customize Ribbon at the bottom of the panel and press Import/Export > Export all customizations.
Then save this file in a folder somewhere on the hard drive.
Restore Ribbon in Word 2010
On another computer, if we want to reuse those settings, we choose Ribbon Customizations > Import customizations filepoint the path to the file just downloaded export at the above step:
The program will display the following message, press Yes:
And here is the output after importing the setup:
Source link: How to Backup and Restore the Ribbon in Word
– https://techtipsnreview.com/


