
With Remote Desktop Connection, Windows users can easily connect and work remotely. However, if you want to allow many people to connect at the same time to a Windows Server computer, how to do it?
In this article, I will show you how to configure multiple Users to connect remotely to Windows Server 2016 using Remote Desktop.
Step 1: Create an account and allow Remote Desktop access
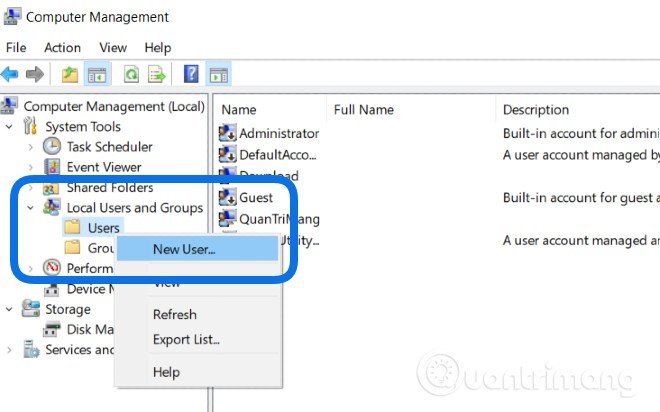
- You need to right click on the button Start then choose Computer Management

- Then you choose Local Users and Groups, right click on User then choose New User
- You create an account to log in with full information like Username, Password and then check the options to allow User to change password or not. Press Create

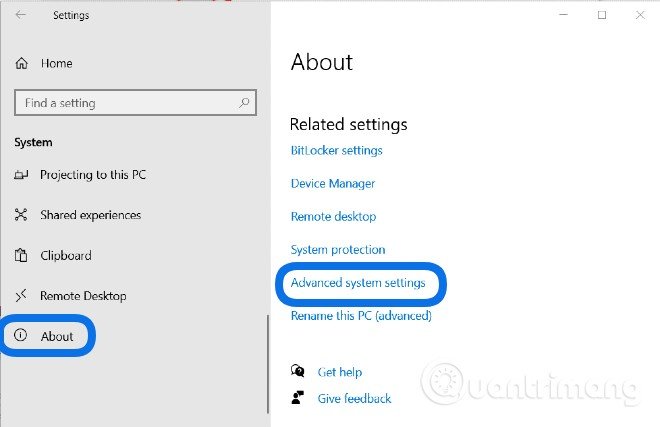
- Next, you need to configure to allow the newly created User to connect to Windows Server via Remote Desktop. Press Windows + I to open Settings then choose System
- Click About in the left sidebar and then scroll down on the right sidebar to select Advanced system settings. If using Control Panel you need access System > Advanced system settings
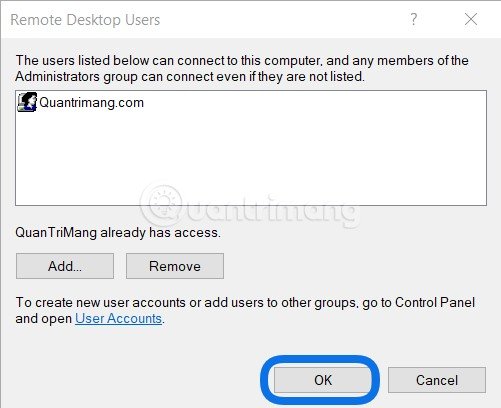
- In the new window that appears, click the Remote then press the button Select Users…

- You press the button Add to add allowed User Remote Desktop to enter. You just need to type the correct User name just created then press Check Names is that the system will automatically find the account with the standard path as shown. You press OK to confirm account selection

- Then a list of accounts allowed to connect will appear
- In this section, make sure that you have selected the Allow connections only from computers…

Step 2: Allow multiple Users to access with Remote Desktop
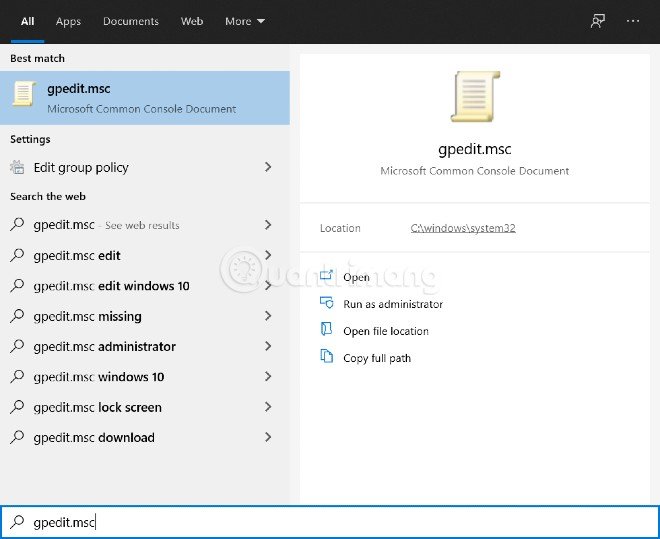
- First, you press the . button Start then enter gpedit.msc then double tap to select/open
- You find the next turn Computer Configuration => Administrative Templates => Windows Components

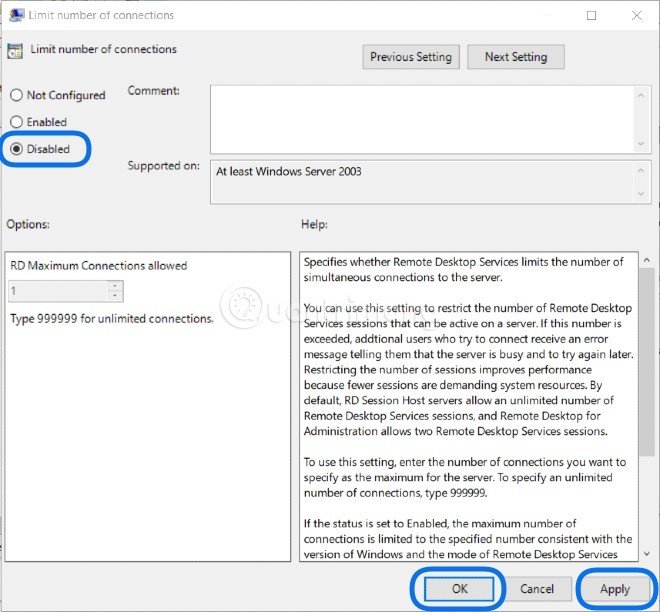
- Continue to visit Remote Desktop Services => Remote Desktop Session Host => Connections then switch to the right search item Limit number of connections, double click to open

- Choose Disable then press OK to limit the number of users to access. Alternatively, you can also choose Enable to enter the number of people allowed to access in the . section RD Maximum Connections allowed. After selecting, press Apply => OK to save
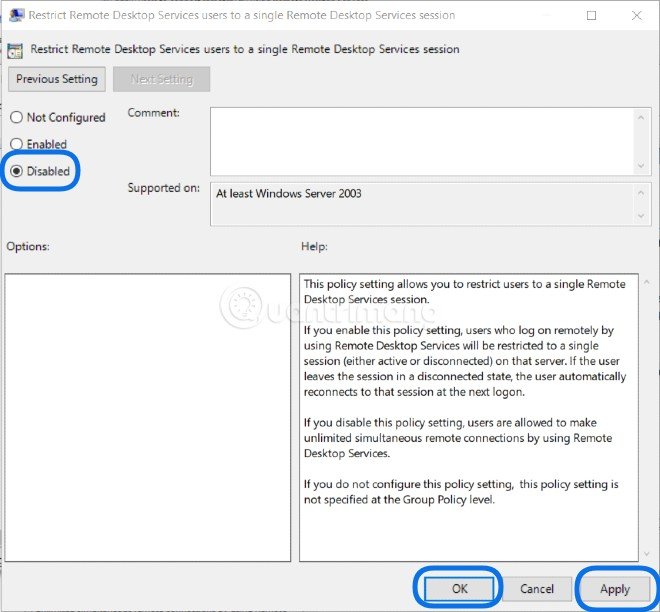
- Continue to select and open Restrict Remote Desktop Services…

- Select Disable and then press Apply => OK
Step 3: Register the service to be able to allow more than 2 Users to access Remote Desktop
This part was done on Windows Server 2016.
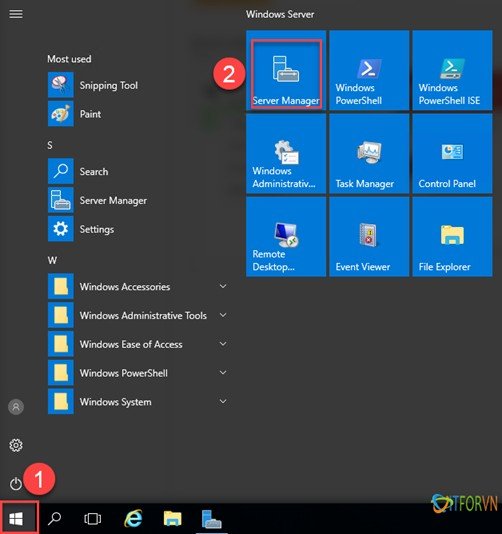
- You press Start then choose Server Manager
- Next, on the right corner of the window Server Manager you choose Manage => Add Roles and Features

- In this new window you press next to continue

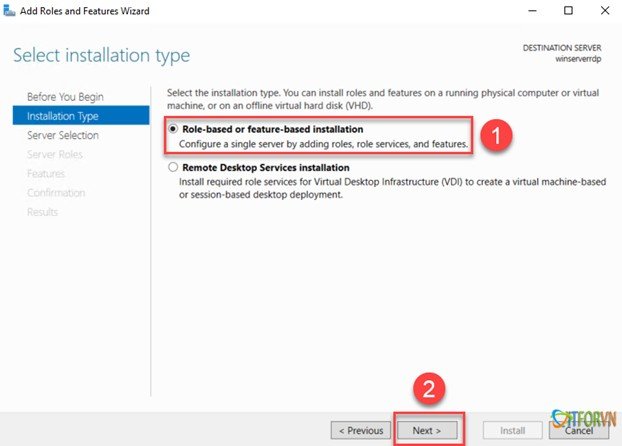
- You choose Role-based or feature-based installation then press next
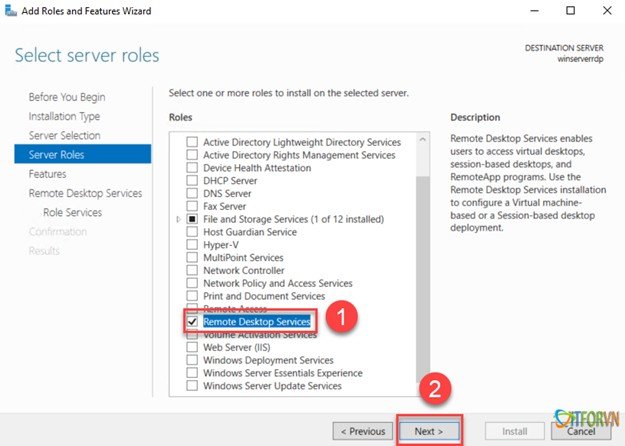
- You tick Remote Desktop Services and keep pressing next

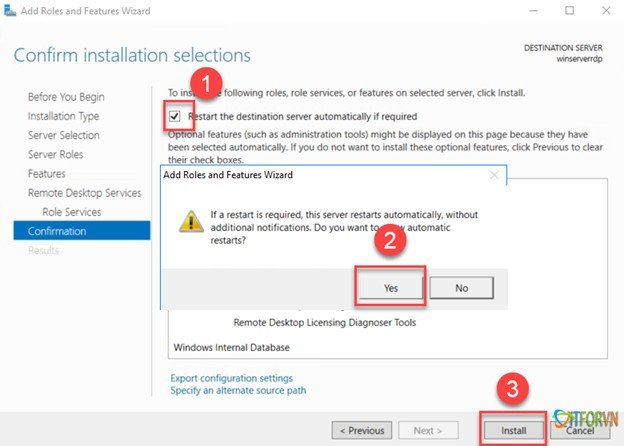
- You tick 3 services are: Remote Desktop Connection Broker, Remote Desktop Licensing, Remote Desktop Session Host. After each tick, a confirmation panel will appear, please press Add features


- Please tick Restart the destination server… to automatically restart the server after installing the service. Press Yes to confirm then press Install
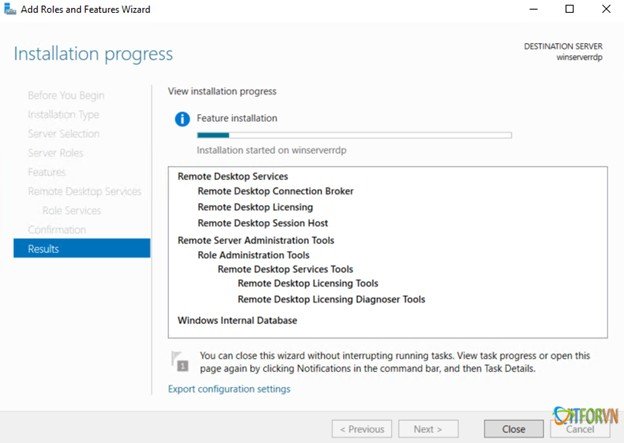
- You wait for the server to finish installing and restarting to complete the setup and be able to connect on 2 computers via Remote Desktop to Windows Server 2016.
Good luck!
Source link: How to configure for multiple Users to connect remotely to Windows Server 2016 using Remote Desktop
– https://techtipsnreview.com/


