Previously, to transfer photos from computer to iPhone, users had to use a cable or iTunes software. However, later there were many applications that supported copying files from iPhone to computer or vice versa, reducing many operations.
Swift Photo File Transfer is an application with such a feature, copying photos, audio, video or other formats from computer to iPhone easily. The application also provides the ability to transfer data from iPhone to computer or iOS devices with Swift Photo File Transfer application installed. The following article will guide you how to transfer PC data to iPhone on Swift Photo File Transfer.
Instructions for using Swift Photo File Transfer application
1. Copy files from PC to iPhone
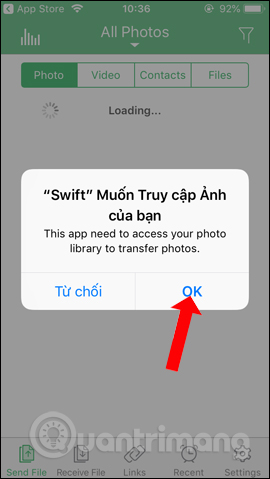
Step 1:
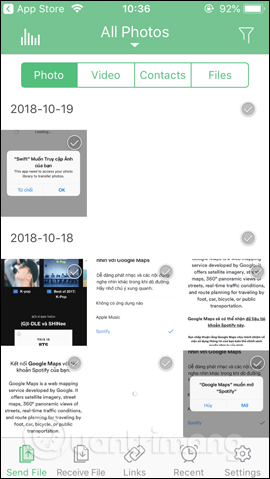
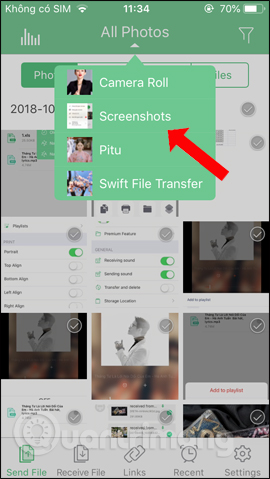
First of all, click on the link below to install the Swift Photo File Transfer application for iPhone. In the first interface the application will need photo album access, press OK. You will then see all the images available on the device. Click triangle icon to select the photo album you want to display.
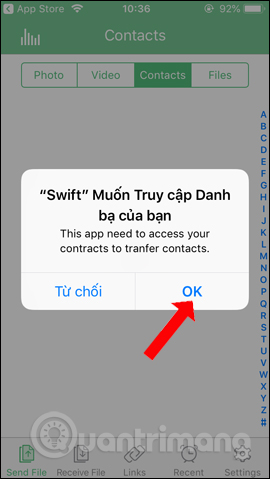
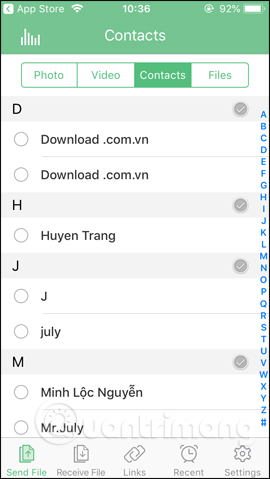
Step 2:
The application also supports transferring contacts from iPhone to other devices, press OK to agree to the application Access Contacts. All contacts will be displayed.
Step 3:
Click on the item Receive File will see the address to access the data transfer page. Go to that address on your computer.

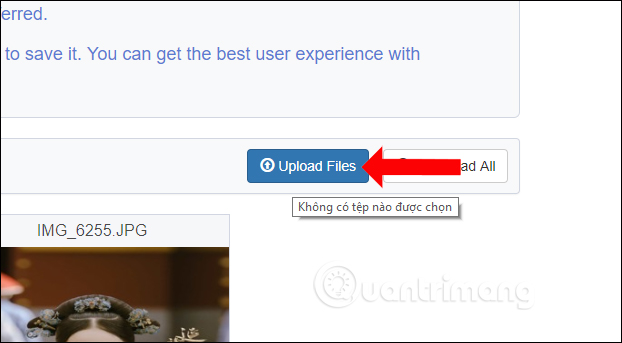
Step 4:
In the Swift Photo File Transfer interface on the computer, press Upload Files button to download the file you want to transfer to iPhone.
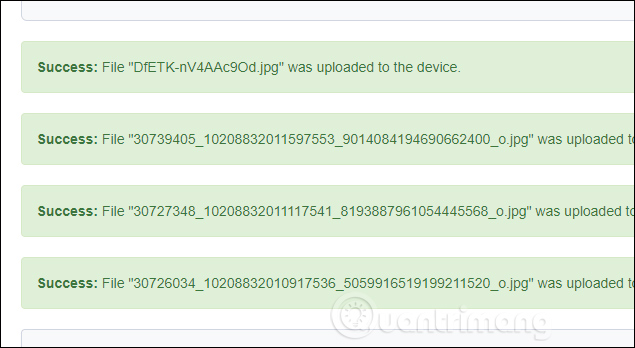
The process of downloading the file and transferring it to iPhone will be done right after that. You can select multiple files to transfer. When recieve Sucess notice as shown below, means the transfer was successful.
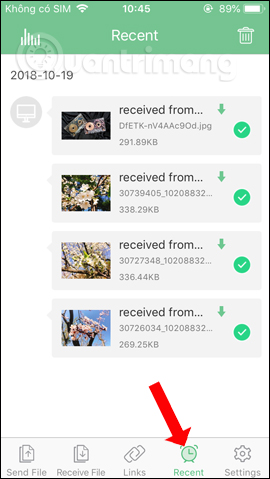
Step 5:
In the application interface at Recent item will display all received data. Here we will know the date of receipt as well as from which device, in the picture is the computer.
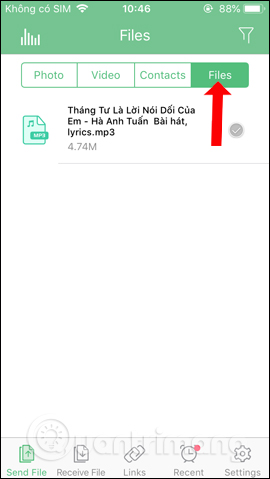
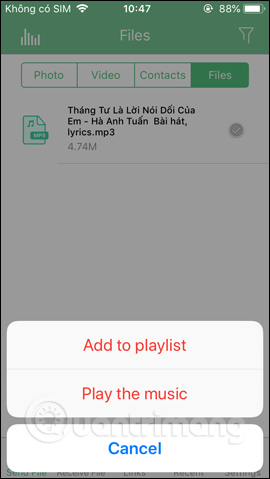
Step 6:
Other formats when transferring from computer to iPhone will be in the Files section of Send File. With audio format (mp3, m4a), clicking on the song will display the option to Play the music (play music) or Add to playlist (create playlist).
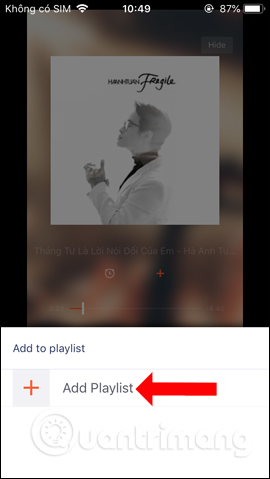
Step 7:
In the music playback interface right on the app, press clock icon to schedule music off. Click next plus symbol add songs to playlist.


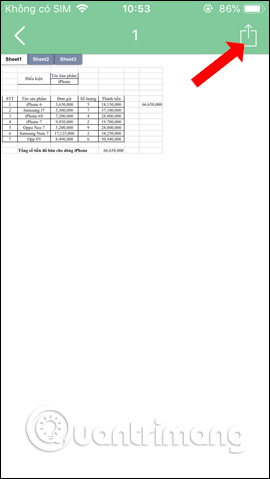
Step 8:
With other file formats like xls files, you can also view them on the app. When you tap share icon will display options to save as well as send the file.

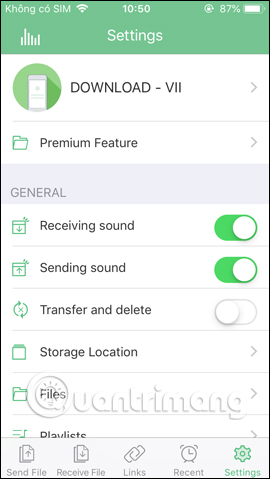
Step 9:
Also when clicking Settings icon will display the application setting interface such as renaming, avatar, allowing to delete files after copying (Transfer and delete), file management and playlists on the application, etc.
2. Transfer files between iOS devices
With this feature, another device needs to install the Swift Photo File Transfer application to receive shared files
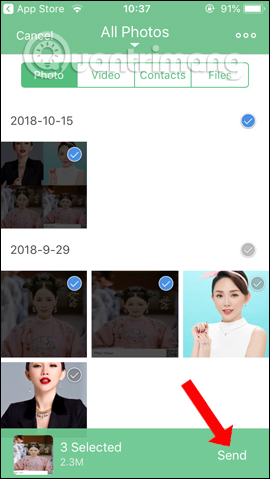
Step 1:
In the large Send File section to transfer photos from iPhone to other devices, click to select the images or videos, contacts, files you want to transfer.
Click the photos you want to transfer and then press Send button. This will display the interface to choose how to share data.
- QR code: Scan the QR code and enter the 6-digit code to download.
- Device List: Click on the device name that appears in the list to share.
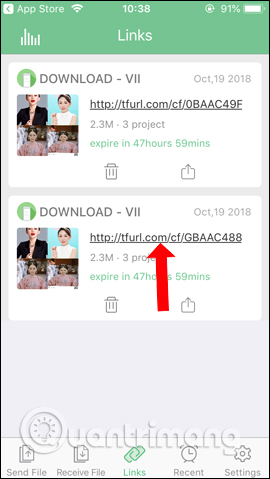
- Share Link: Share via link with 48 hours valid link.

Step 2:
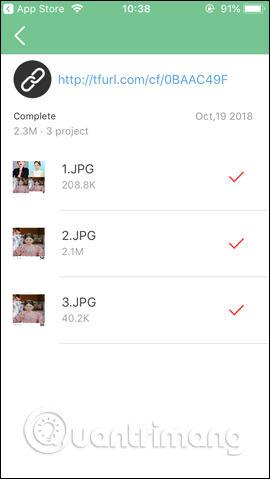
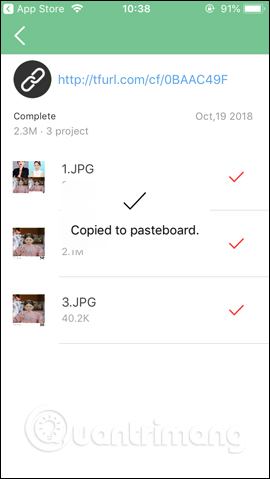
If you click on Share Link, the application will proceed to merge files into the same link. It will then display data sharing link. At each link will display the number of files, file size. Copy this link to send to the recipient of the file.
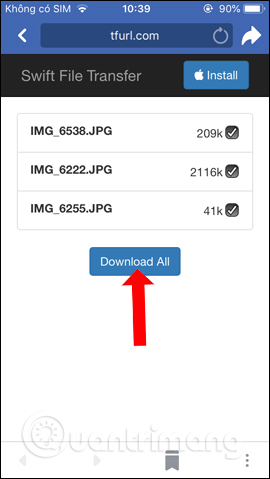
Step 3:
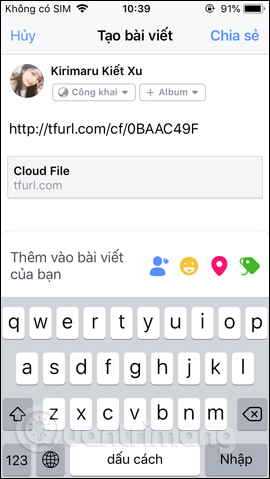
For example, you can paste the link on Facebook, then the recipient just needs to click on the link and then press Download All button to download.
Step 4:
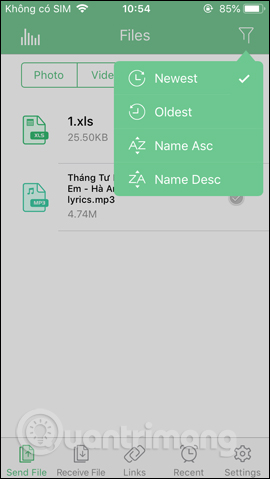
In each item of Send File, there will be features filter to sort data. Particularly for the Files section, there will be an option to sort alphabetically.
Swift Photo File Transfer supports transferring files from PC to iPhone and between iOS devices with the app installed. All formats are supported by the application, from photos, videos, to data files, especially contacts.
See more:
Wishing you success!
Source link: How to copy files from PC to iPhone with Swift Photo File Transfer
– https://techtipsnreview.com/