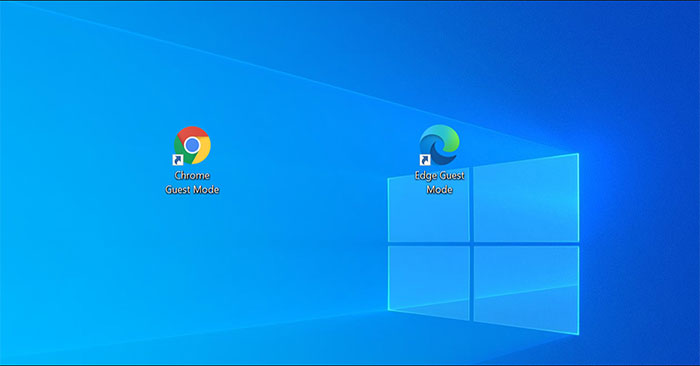
Both Chrome and (new) Edge offer a mode called Guest Mode, which keeps browsing completely separate from your main account. If you often need to access Guest Mode on Chrome or Edge, you can create a corresponding shortcut on the screen for quick access when needed. How to do it is simple.
What is Guest Mode in Chrome and Edge?
Guest mode in Google Chrome and Microsoft Edge is essentially a “guest account” created specifically for certain browsing sessions. When you use guest mode, the browser does not load your main profiles (these have your browsing history, browser personalization preferences, etc.).
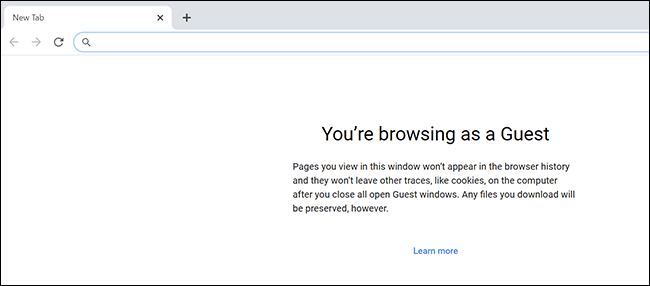
At the same time, when you leave this mode, all browsing activity you have done in it will be completely erased, nothing will be saved. Even the list of files that you have downloaded while surfing the web in Guest Mode is also deleted, although the files themselves will still be retained on the system.
If your computer is often used by many other people (such as family, colleagues, etc.), creating a shortcut for them to use the browser in guest mode is a good solution, helping your browser. does not become a “mess”.
Create a Guest Mode Shortcut for Chrome
Normally, you would click your profile icon in Chrome’s toolbar and select “Guest” to enter guest mode in Chrome. However, you can also create shortcuts for quick access right from the Windows desktop.
First, open the Start menu and search for the keyword “Google Chrome”. Right-click the browser in the list of results returned and select “Open file location”.
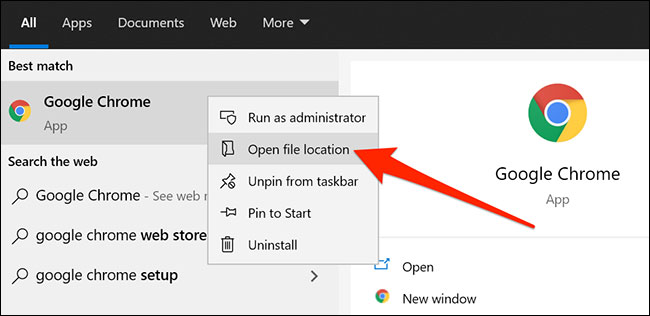
In the File Explorer window, right-click the “Chrome” shortcut and select “Open file location”. What we are looking for is the executable (chrome.exe) of Chrome.
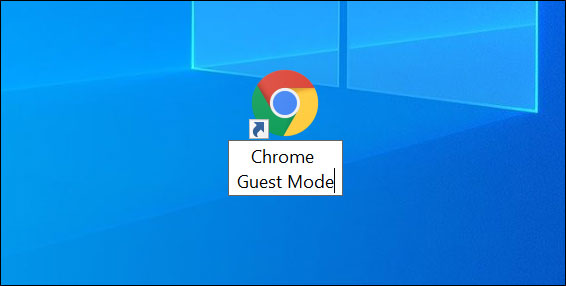
When you see the “chrome.exe” file, right-click on it and select Send to > Desktop (create shortcut).

In the Properties window, click the “Shortcut” tab. Place the mouse pointer at the end of the text in the “Target” field and press the spacebar, and then type the following:
--guest
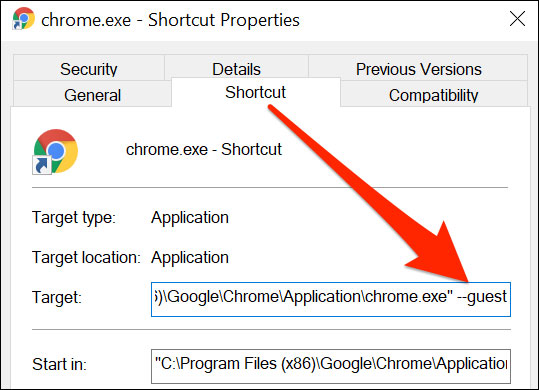
Hit “Apply” and then click “OK” at the bottom to save the changes.
Your guest-mode Chrome access shortcut is now ready to use. Of course, you can also rename this shortcut if needed.
Create a Guest Mode Access Shortcut for Edge
Overall, the process of creating a guest mode shortcut for Edge is quite similar to Chrome.
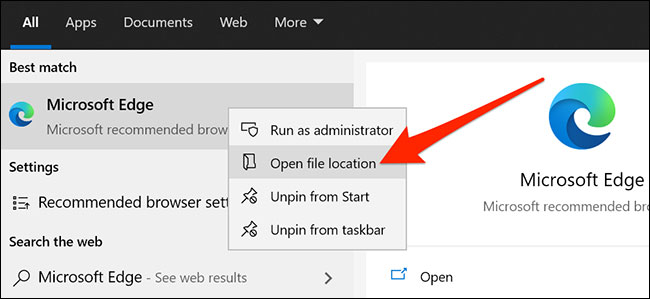
To get started, open the Start menu and search for the keyword “Microsoft Edge”. Right-click on the browser in the returned results and select “Open file location”.
You should now see Edge’s icon in the File Explorer window. Right click on it and select “Open file location” again.
Once you find the “msedge.exe” file, right-click it and select Send to > Desktop (create shortcut). This will create a shortcut of Edge to the desktop.
Click the “Shortcut” tab in the Properties window. Place your cursor after the last character in the “Target” text field, press the spacebar, and then type:
--guest
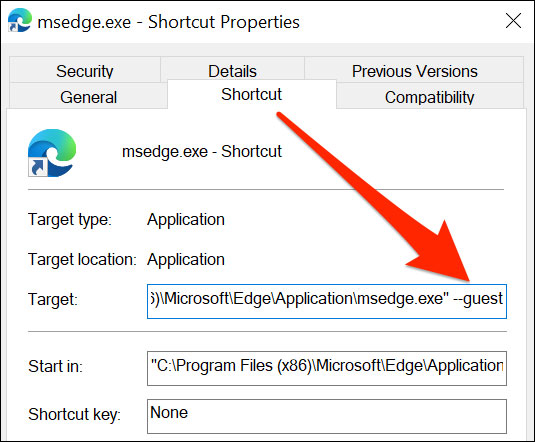
Click “Apply” and then click “OK”. That is all!
Source link: How to create a guest access shortcut for Chrome or Edge
– https://techtipsnreview.com/


