
Yes, currently, there are many ways to create a Windows installation USB, and on the blog, the Admin and the collaborators have also shared with you a lot of ways.
However, there is another very simple way that I have not seen the blog mentioned, which is to use Microsoft’s own Media Creation Tool.
This tool is both to support downloading the latest versions of Windows 11 and Windows 10 on Microsoft’s homepage and also a tool to help you create a USB to install Windows 11 / 10.
That’s why in this article, I will show you how to use the Media Creation Tool to create USB install Windows 11 or USB to install Windows 10 in the simplest and easiest way.
#first. Tools to prepare
The first thing to do is to prepare some of the following tools:
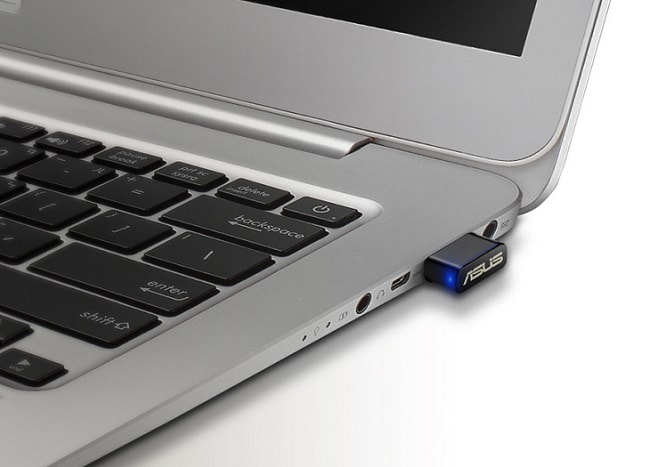
- A USB stick with at least 8 GB capacity.
- A computer with an Internet connection, required.
USB is a very popular storage device today, it is currently quite cheap, safe and flexible storage. Microsoft has also chosen the solution of using USB as the official solution to install a new operating system instead of a CD as before.
#2. How to create a USB to install Windows 11 and Windows 10 is very simple
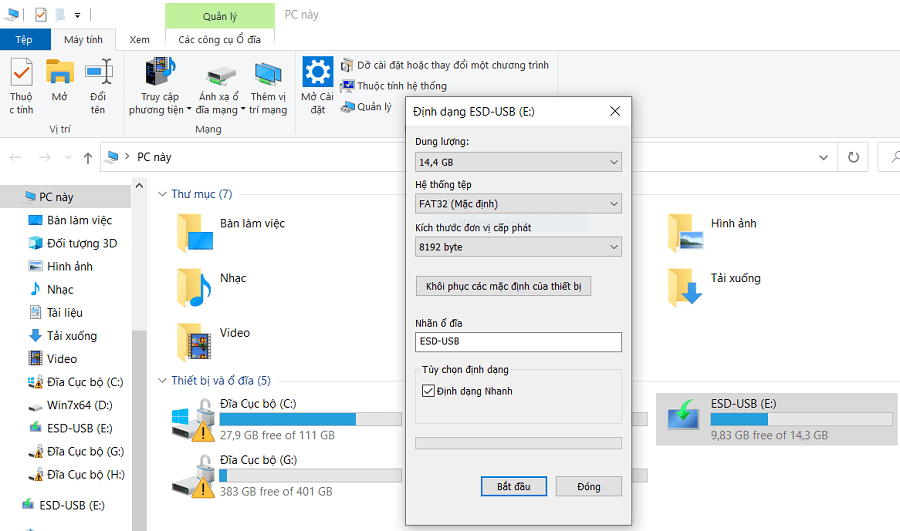
+ Step 1: You plug the USB into the computer or Laptop that you have prepared => then right-click on the USB and select Format => now it will display the interface below => you press Start to Format the USB.
Formatting the USB will erase all data. So if you have any important data in the USB, back it up first.
+ Step 2: After the Format is completed, go to the Microsoft homepage to download the Windows installation toolkit you want to use.
Link for Windows 10 operating system:
Link for Windows 11 operating system:
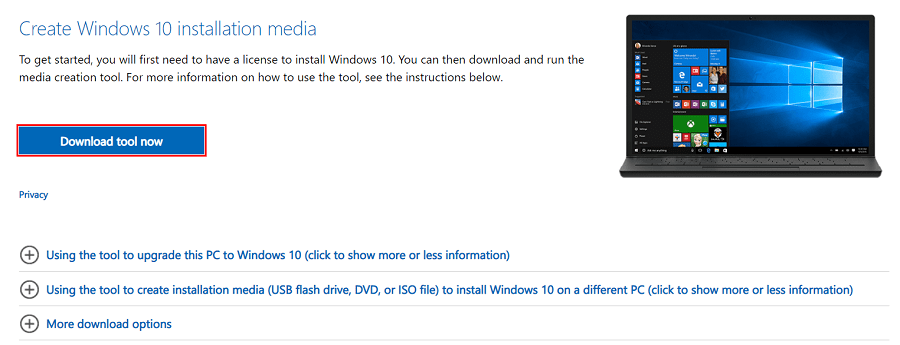
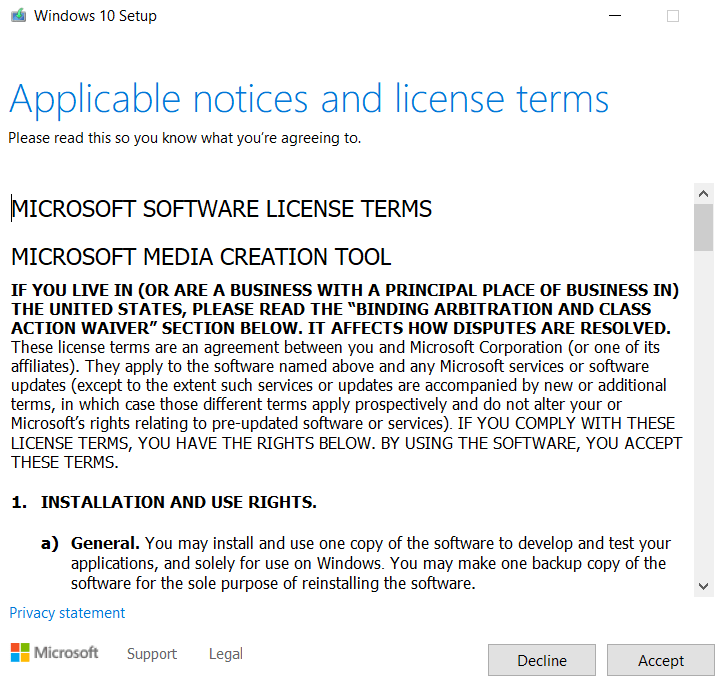
+ Step 3: Click the button Download tool now to download the Media Creation Tool to your computer first. After downloading the Tool => double click to run the Tool => there will be a Window Setup interface as shown below.
=> In the terms of use, click Accept to go to the next step.
NOTE: In this tutorial I will demo how to create a usb to install windows 10 using the media creation tool tooll, with Windows 11 you do the same, no different.
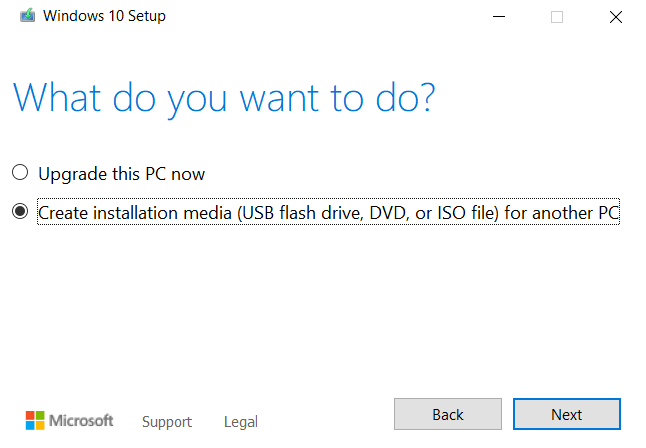
+ Step 4: After going through the next step, there will be the words What do you want to do?, please tick the line Create installation at the bottom => and press Next. This option will help you create a Windows installation USB, or a Windows installation CD…
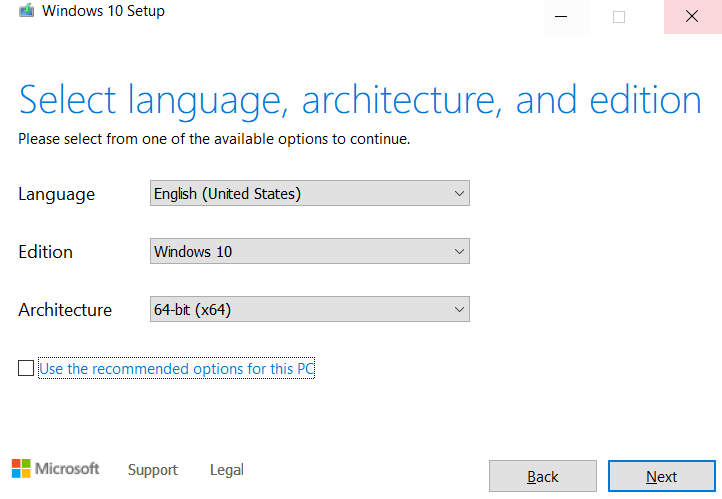
+ Step 5: In the next step, you leave the check mark in the line Use the recommended and you can set it up like me.
+ Step 6: Now the software moves to the next step, please select USB flash drive to create bootable USB. Choose ISO file if you want to create a Windows 10 installer with an ISO file or burn it to DVD.
=> Here I am trying to create an installation USB, so of course I will choose USB flash drive => then press Next.

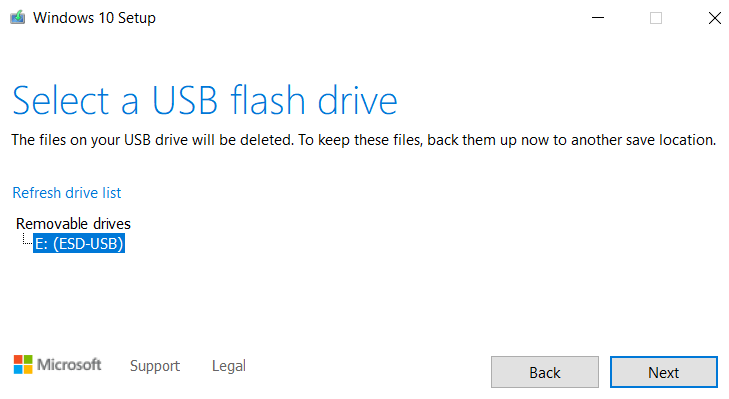
Then comes step Select a USB flash drive, please select the correct USB you use to create USB BOOT => and press Next.
+ Step 7: And this is the last step to complete the Windows 10 (or Windows 11) installation USB, the software will download the latest official Windows installer from Microsoft to the USB, you will not remove the USB during this time until when the program announced Finish Please.
The process of completing quickly or slowly will depend on the network speed as well as the genuineness of the USB. So you just plug in the USB and leave it there until it’s finished and you can use it to install Windows.

#3. Use the newly created USB to install Windows on your computer
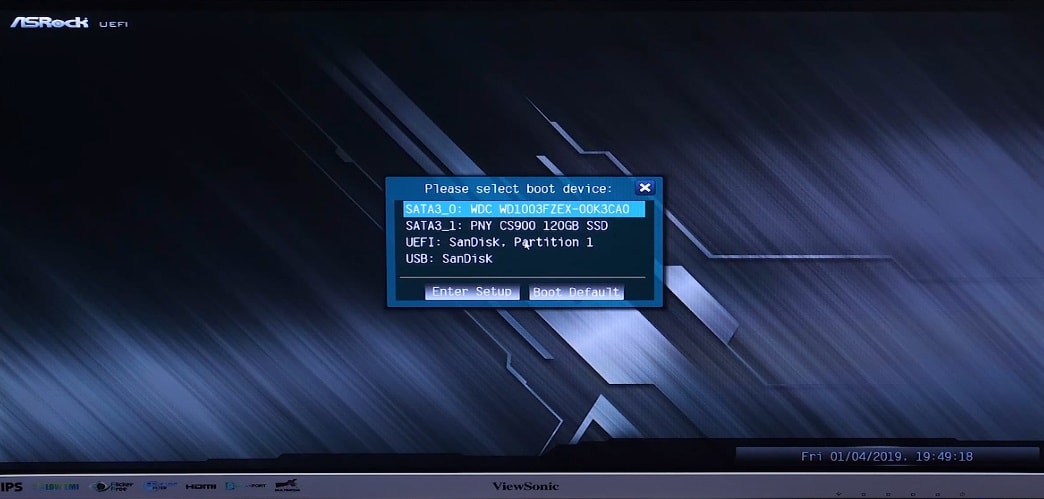
After you have a USB to install Windows, the next job is to use it to install Windows only, find a shortcut to access it. BOOT MENU Please. How to do, Admin has very detailed instructions already, if you do not know, please refer here!
#4. Continue with the installation of Windows 10 and Windows 11
Well, to complete the steps to install Windows, please see the steps in this tutorial. This is the standard procedure of Windows installation in general: What should be done before reinstalling Windows or Ghost on the computer?
Then you can go to this article to see the steps to install Windows 10 in detail!
Or see this article for how to install Windows 11!
That’s it, installing Windows is too simple, and there are already a lot of detailed instructions on the blog, you just need to search through the Search box on the Blog, or see more in the HOW TO INSTALL WINDOWS section. .
Hope this article will be useful to you, good luck!
CTV: Hoang Tuan – techtipsnreview
Edit by Kien Nguyen
Note: Was this article helpful to you? Don’t forget to rate the article, like and share it with your friends and family!
Source: How to create a USB to install Windows 11 / 10 with Microsoft’s tools
– TechtipsnReview


