
NOTE: Welcome to the Knowledge Sharing Blog! If you encounter any errors during use, such as error in download link, slow loading blog, or unable to access a certain page on the blog … please notify me. via Contact page. Thanks!
In this article, I will guide you in detail how to create a standard UEFI – GPT ghost from Microsoft’s original Windows installer or from any Windows installer that you collect online.
But I encourage you to use the original to avoid unnecessary errors in the implementation.
The process of creating Ghost files I will perform on a virtual computer. Therefore, before starting, you should prepare yourself some necessary software and tools below:
#first. What to prepare before creating UEFI – GPT standard Ghost file?
- Virtual computer: If you do not have a virtual computer, you can see the tutorial to create virtual computers using VMware or VirtualBox. You can use any software to create any virtual computer and remember that the virtual drive capacity in the process of creating at least 40 GB.
- A USB with a capacity of> 4 GB.
- A Windows installer (* .iso): You can go here to download the original Windows installer.
- A Boot file (with * .iso format) => to boot into Win Pi (Mini Windows) on a virtual computer. This one, you can download the 2013 DLC, HKboot or Anhdv-Boot. In this article we use HKBoot!
- Create partitions from virtual drive: We will need to create 3 partitions to work with that are: EFI (boot boot partition), 1 WIN partition and 1 partition Backup (storage).
#2. Start creating the UEFI – GPT ghost file
+ Step 1: After creating a virtual computer => you choose the preferred mode as Boot file (.iso) (4) that you have downloaded above there.
In the articles about creating a virtual computer, I have instructed how to choose to start the priority mode, so I will not repeat again => choose the Mini Windows you want to enter (Mini windows 7, 8 or 10 are all okay , no need to distinguish 32bit or 64bit version).
Note: This article is a bit advanced, there are quite a few steps that require prior experience to be easily done. Therefore, for newcomers, please take the time to read and refer to some of the articles I linked to better understand.
+ Step 2: Once you have accessed Mini Windows, open the window cmd up by pressing Windows + R => enter cmd and press Enter to perform.
Next, run the following commands in turn (note after each command, press Enter to do it):
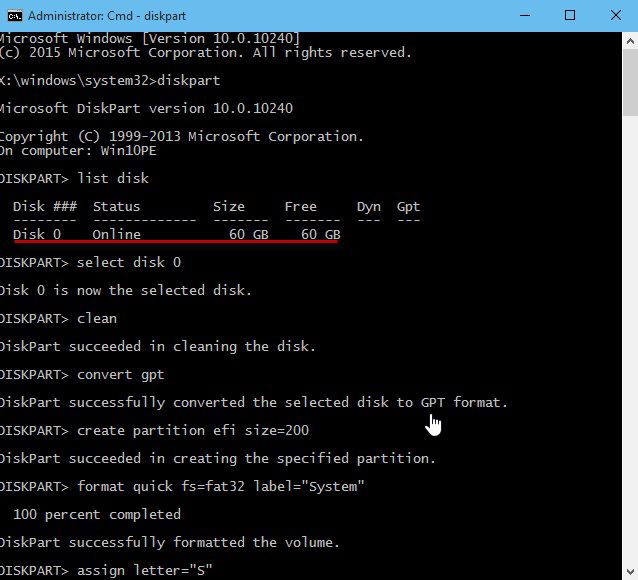
diskpart
list disk : View the list of drives.
At this point a list of drives will appear, but since we are working on the virtual machine, usually only Disk 0 never mind. You enter the command:
select disk n : Inside
nis the drive you want to use. The example in the picture below Disk 0, I enter the full commandselect disk 0clean : Format the drive.
convert gpt : Convert hard drive format from MBR to GPT.
create partition efi size = 200 : Create a boot partition
EFIThere is capacity200 MB.format quick fs = fat32 label = “System” : Format the efi partition with formatting
FAT32take the name isSystem.assign letter = “S” : Set the character for the efi partition you just created. Example is
Screate partition primary size = 30730 : This command will create a partition to install Windows with a size of 30GB (1GB = 1024 MB)
format quick fs = ntfs : Format the Windows partition with NTFS format, and name it
Windows.assign letter = “C” : Set the character for the Windows partition you just created
Ccreate partition primary : Create a storage partition with remaining space.
format quick fs = ntfs label = “Backup” : Format the storage partition with NTFS format and name it
Backup.assign letter = “D” : Set the character for the Windows partition you just created
D. Note that you must not coincide with existing characters.
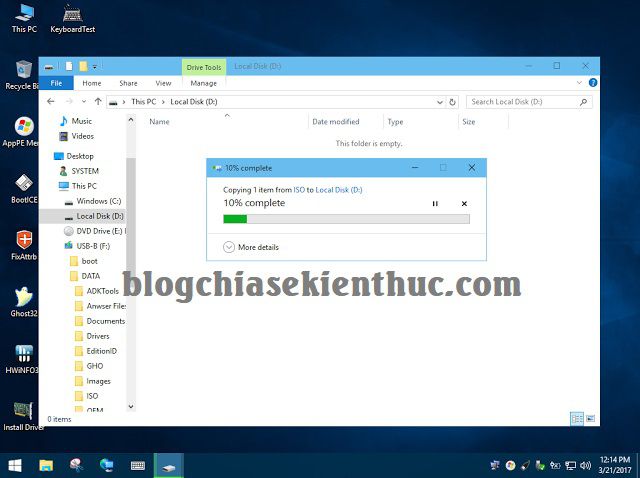
+ Step 3: Please connect the virtual computer to the USB with the virtual computer => then copy the Windows installation file to the storage partition, ie the Backup partition that we created earlier.
Tips: There is a very good way if you do not have USB that you use UltraISO to integrate the Windows installer into the Boot file (* .iso)
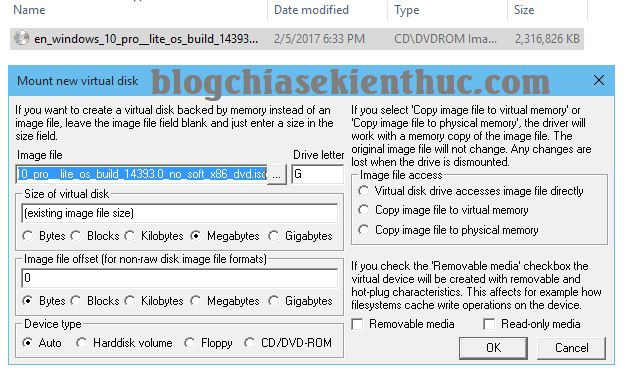
+ Step 4: Mount the Windows installer to the virtual drive.
Perform: Right-click on the file *.iso that => select Mount as ImDisk Virtual Disk to perform Mount installer to virtual drive.
A window appears as shown below, click OK to agree. Now access Computer (This PC) will appear an additional virtual drive containing the Windows installation files in this.
+ Step 5: Now open the software WinNTSetup available in Win Pi to start Win setup.
If you are using Windows 7 and above then switch to the tab Windows Vista / 7/8/10/2008/2012 Please.
Then at: Select location of Windows installation files please click Search …
=> find to install.wim or install.esd are in the directory sources of the virtual drive. (the drive you just created in Bước 4 when performing Mount Win installer out there)
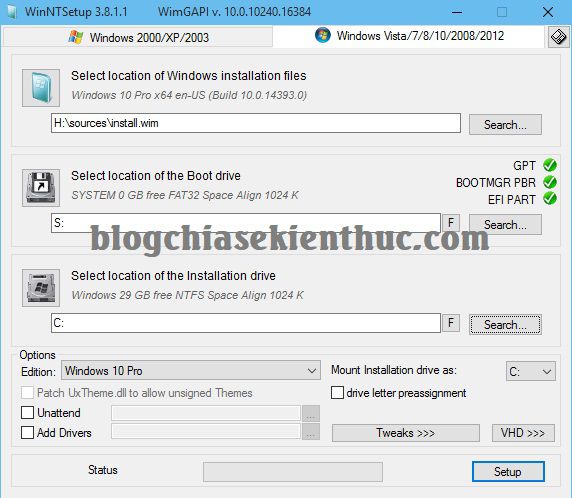
+ Step 6: You set up as follows:
- Select location of the Boot drive: Select the partition Boot is
S(that EFI partition). - Select location of the installation drive: Select the Win partition, as in our example the drive
Cthere. - Option Edittion: You choose the operating system you are installing. Here I choose Windows 10 Pro.
=> Then please click Setup to start the installation. Please wait for the installation to complete, and note that after running the software will ask you to Restart (restart the computer). You press Cancel to skip the boot step.

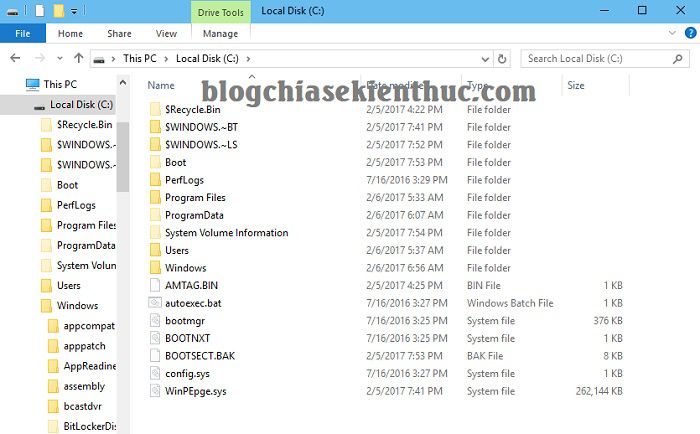
+ Step 7: Now you can test open the drive C See, all system files have appeared in full.
At this point, it is considered that we have completed the process of installing Windows on a virtual drive and can start creating Ghost files.
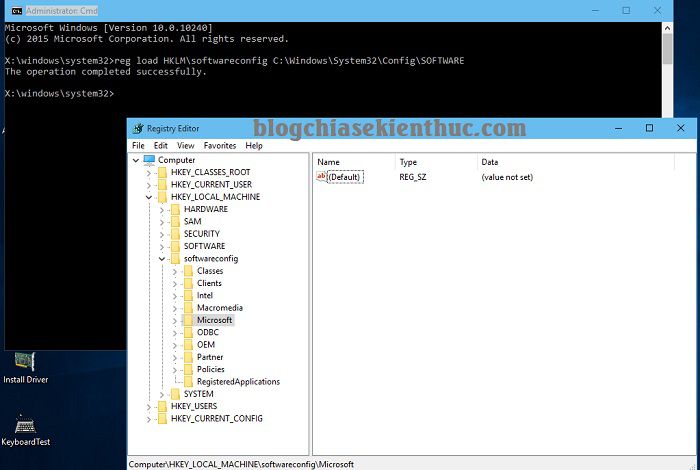
+ Step 8: (This is an advanced step for advanced Ghost masters and knowledgeable about the system. You can skip this step)
If you want to edit something in the Registry, you should first load the file first. Use the following command:
reg load HKLM softwareconfig C: Windows System32 config SOFTWARE
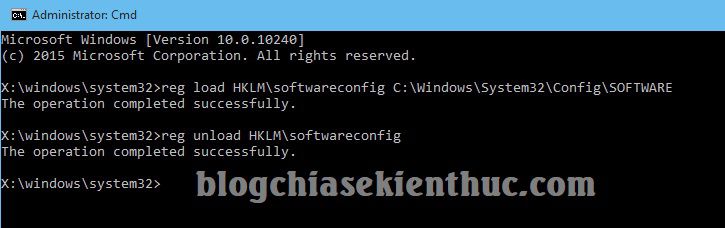
After completing the configuration settings, remember to unload the file with the following command:
reg unload HKLM softwareconfig
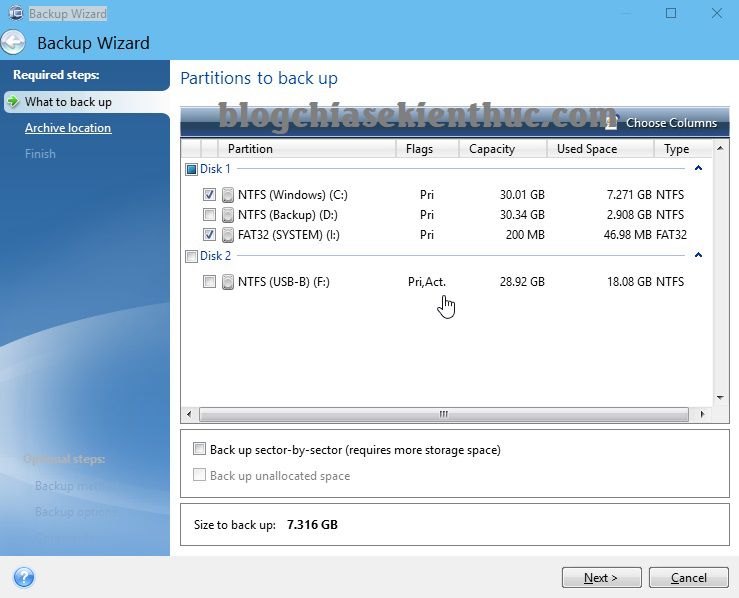
+ Step 9: Now open the software Acronis True Image available in Mini Windows to perform Backup Ghost file. There is already a very detailed tutorial on this issue, if you do not know how to do it, please take a look here!
In this article, I only give a brief guide.
Perform: At the main interface, select the tab Home => select My Disk in section Backup => then please select the partition containing the operating system (C) and the partition containing the Boot file (I) => press Next.
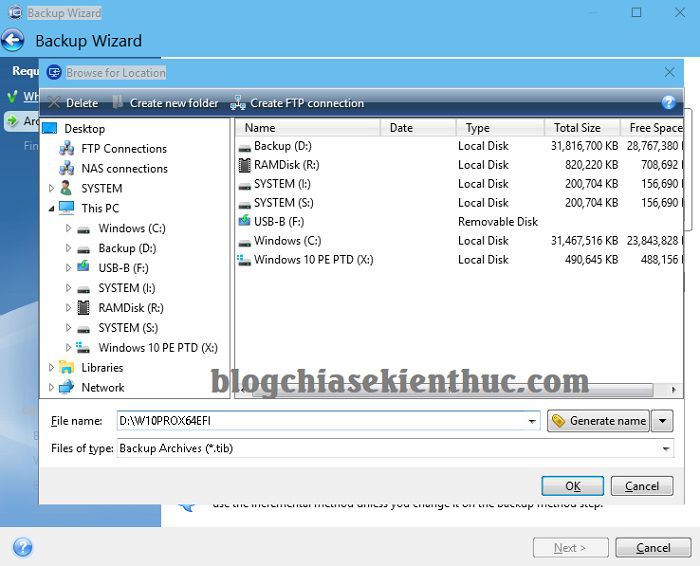
+ Step 10: Name the file and choose where to save the ghost file and partition Backup(D) Please. Then press OK.
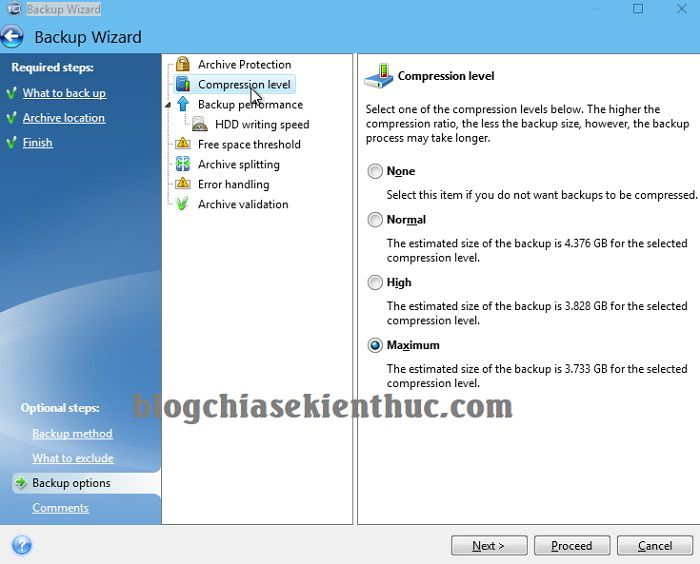
+ Step 11: Alternatively, here you can click on the tab Compression level to choose the level of ghost file compression. You can choose the mode Maximum to choose the highest file compression level => Then click Proceed to start creating the ghost file.
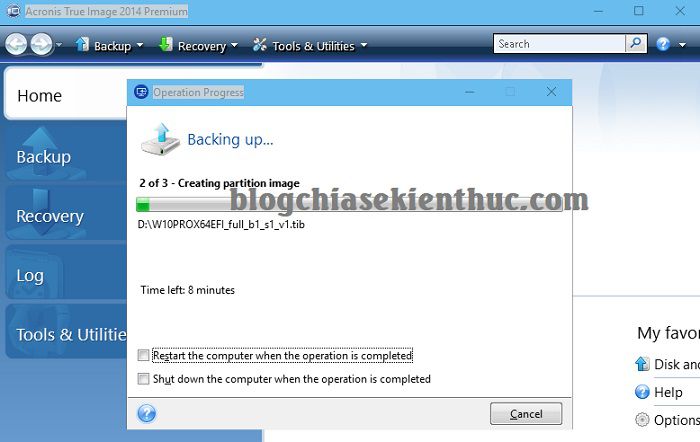
+ Step 12: The process of backing up, creating ghost files is in progress. Now it’s your job to wait ?
+ Step 13: After creating the ghost file, you should copy the ghost to the USB for use whenever you want. Now turn off the virtual computer and go to sleep ?
Epilogue
So I have very detailed instructions for you how to create a standard UEFI – GPT ghost file on a virtual computer Alright.
This is how to create a ghost version of NOSOFT and NODRIVER so it is relatively light, with Windows 8 and above, most of them will automatically receive the driver during ghost extraction, so it’s quite complete ?
Okey, hope the article will be useful to you, wish you success!
See the author’s article: Nguyen Anh Tuan
Complete article by Kien Nguyen
Note: Was this article helpful to you? Don’t forget to rate, like and share with your friends and relatives!
Source: How to create standard UEFI Ghost files
– TechtipsnReview


