
Spell checking feature in Outlook will help users check spelling errors in emails before sending, ensuring you have complete email, without any errors, especially when sending to partners. When we press send Outlook email, then Outlook will check spelling in the email and report spelling errors to you, if any. Users just need to correct the misspellings as suggested by Outlook. The following article will guide you to read how to enable spellchecking in Outlook.
Instructions to turn on spellchecking in Outlook
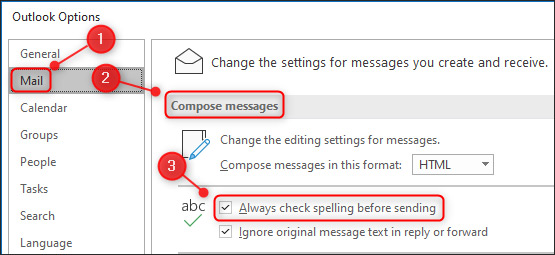
Step 1:
At the interface on Outlook, we click File then press Options. Then the user clicks Mail manager, select the part Compose Messages. Continue to find settings Always check spelling before sending then check the checkbox to turn on spell checking before sending mail in Outlook.
Click OK below to save the new settings.
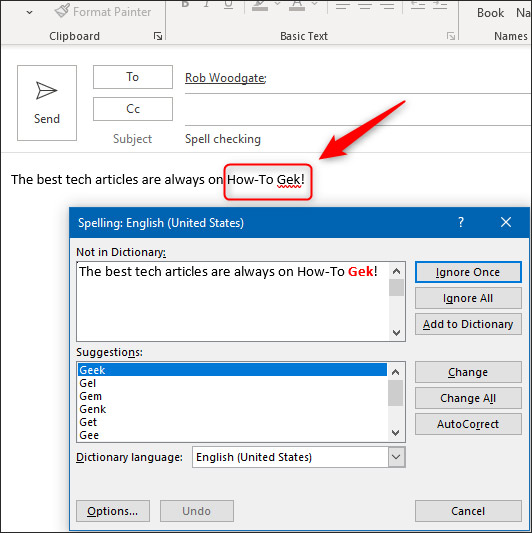
Step 2:
Then we compose the email we want to send in Outlook as usual and press the send button. Then Microsoft Outlook will perform spell check in email and report errors to you as shown below if any. Below will be the correct word for you to use.
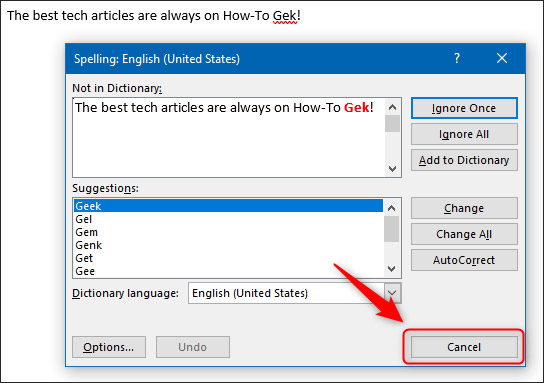
Then we click Cancel button to delay sending Outlook emails.
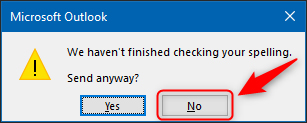
Then Outlook will display a pop-up asking if you are sure you want to cancel sending the email, Press No to not send email.
Note, the spellcheck feature in Microsoft Outlook is for reference only and may be inaccurate or omitted. It is best to review the email content yourself before pressing send.
Spell checker won’t choose wrong words, just misspelled words. This means that the spell checker can only prevent typos, not typos or semantics. If you want to be absolutely certain that your email is written correctly, it is best to read the entire text carefully before clicking “Send”.
How to change spell check language in Outlook Online
Normally, Outlook Online automatically detects the default browser language to check for spelling errors. However, you can also set the spell checker to switch to another language in the list of supported languages. Once you’ve sent the email in that language, you can switch your spell checker back to the original language.
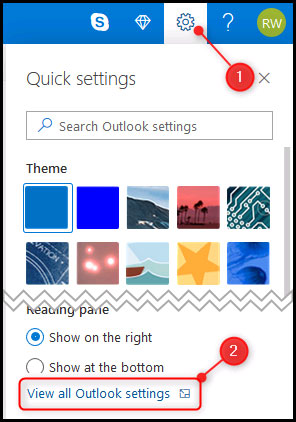
To change the spelling checking language, first sign in to the Outlook Online website as you normally would. Then, click the gear icon in the top right corner of the screen and select “View All Outlook Settings“.
In the settings panel that opens, click Email> Compose And Reply.

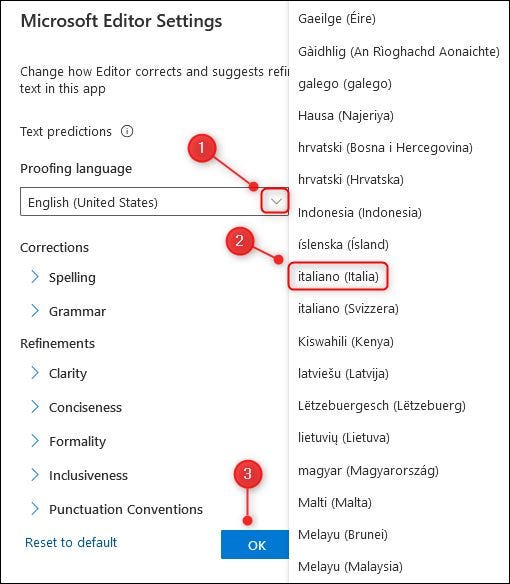
A panel will open, where you click on the down arrow icon to the right of the menu “Proofing Language“. Select the language you want to spell check, then click “OK“.
You can now close the settings panel and start composing the email in your chosen language so that Outlook can check spelling. When you are done and ready to go back to the original language, open the Settings menu, follow the same steps and change the menu “Proofing Language“Back to the original language.
Source link: How to enable spellchecking Outlook email before sending
– https://techtipsnreview.com/


