With the section on How to install Windows on the Blog, I believe you can install Windows by yourself in all cases and genres, right ◉◡◉
However, recently, Intel has launched a new generation chip (Intel Gen 11 – Intel 11th generation chip) that has caused many of you to encounter errors, as well as difficulties in the installation process.
Because the new generation of laptops (using Intel Gen 11 CPUs) use Intel Rapid Storage Technology, with this new technology, the data from the SSD will go directly to the CPU, not through the Chipset like in the world. older processor chip system.
This technology has just been released, so at the moment, Windows 10 version 20H2 still does not support the driver in the best way.
So when reinstalling Windows, many of you get errors, although when entering WinPE (Mini Windows), the machine still receives the SSD hard drive as usual, but when installing, it will report a blue screen error Inaccessible Boot Device.
At the present time, we only have to manually install the missing driver. Perhaps, in the upcoming 20H1 version, Microsoft will integrate the IRST driver into the installer, and then the installation will be more convenient.
How to install Windows on a new generation laptop (Intel 11th gen chip)?
+ Step 1: Please create a USB NHV BOOT first. This rescue USB will boot on computers using new generation chips and supports Touchpads of all new generation Intel and AMD laptops.
=> After the download is complete, you extract the file IRST-INTEL-GEN11.zip out and save in USB or HDD/SSD box.

+ Step 2: You access Mini Windows. NHV-BOOT uses 2 versions of WinPE, 1709 and 20H2, both versions support Intel laptop hard drive recognition gen 10 and gen 11 so you can use either one.
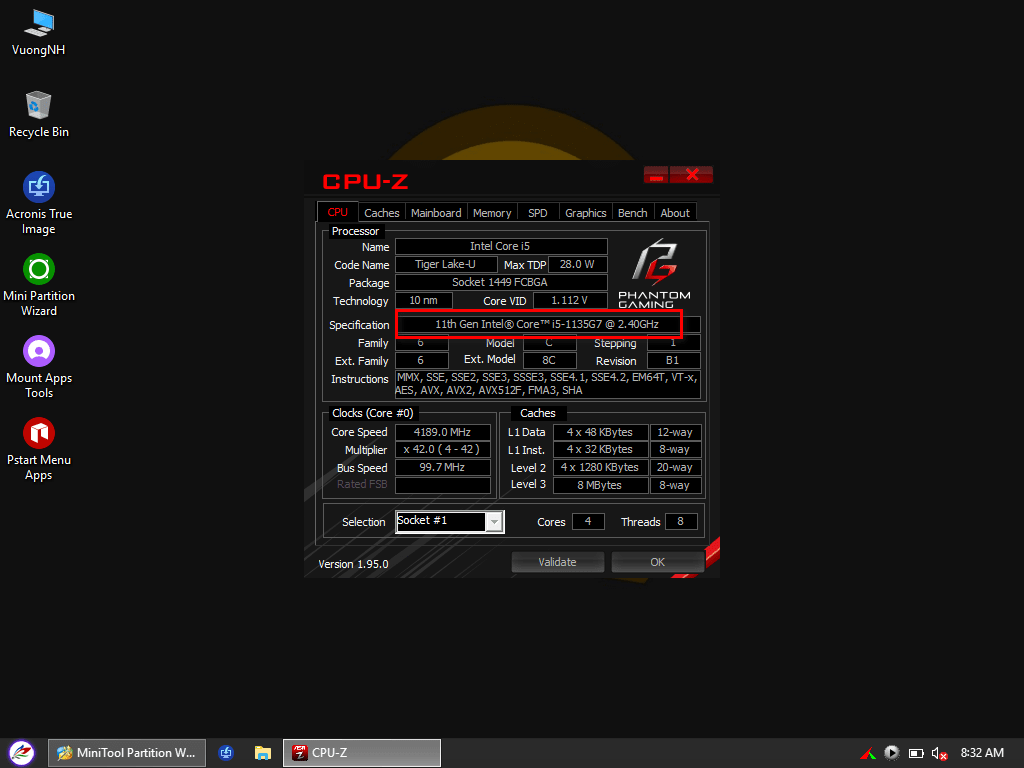
How to know if your Laoptop is using Intel 11th gen chip? Yes, it’s simple, you open CPU Z in Mini Windows => and see as shown below.
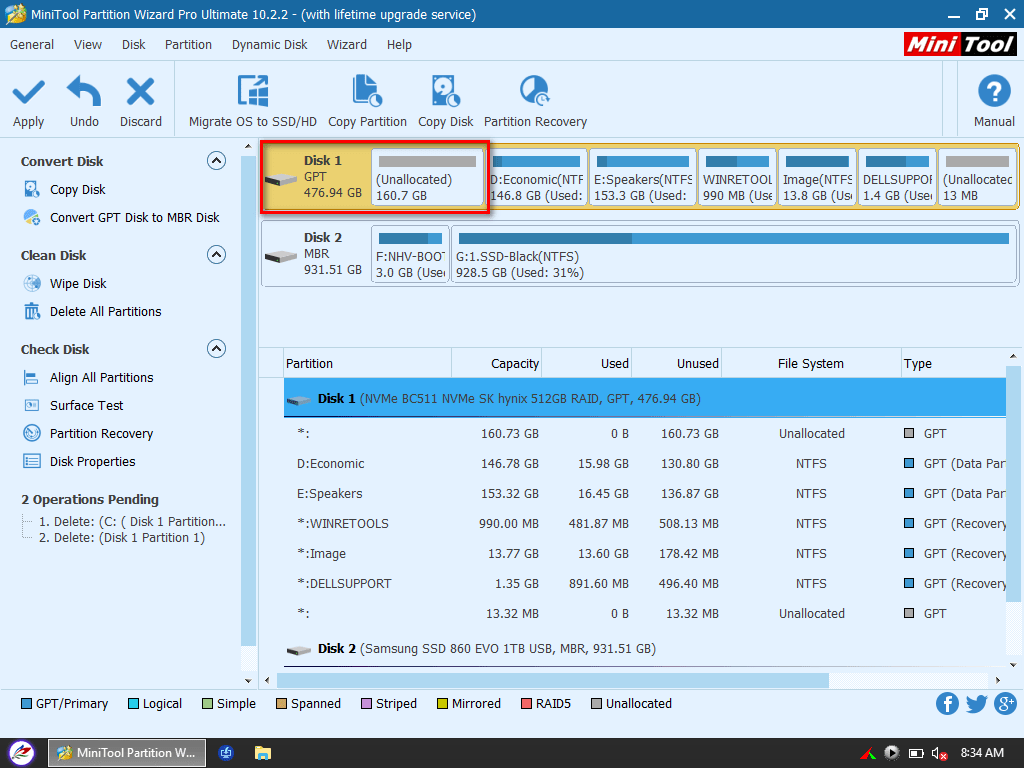
+ Step 3: Now open the MiniTool Partition Wizard => delete the partition that previously installed Windows, or re-partition the hard drive if your Laptop is brand new.
In general, you should create a partition Unallocated with a capacity of about 50GB or more. Depending on your usage needs.
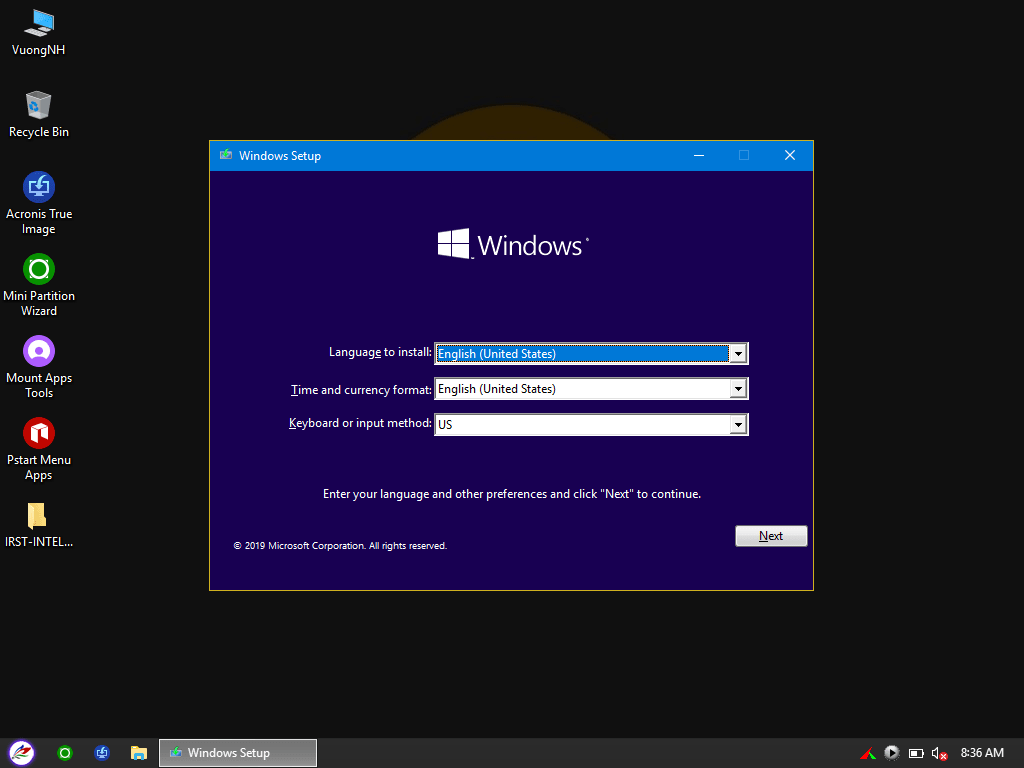
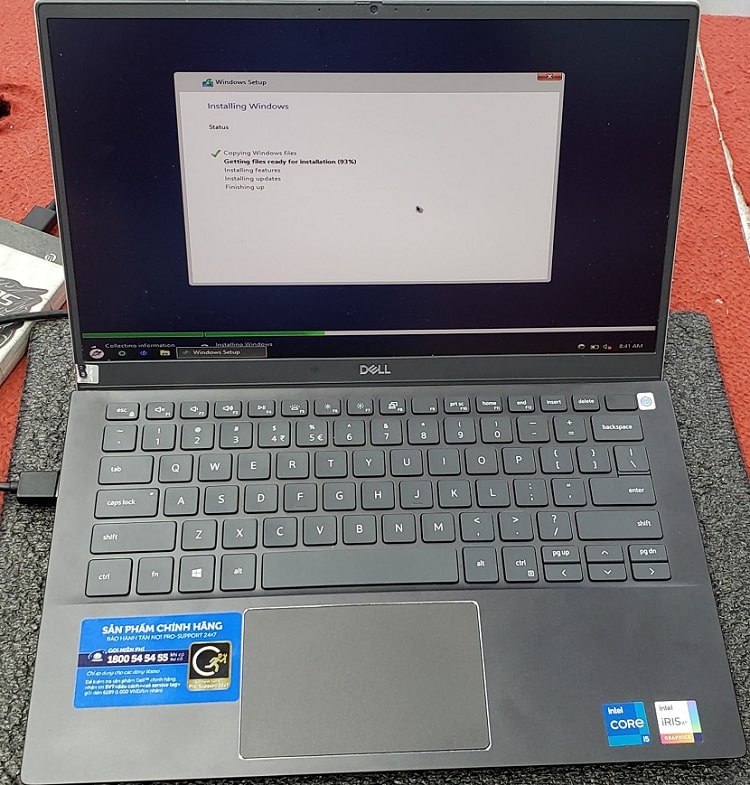
+ Step 4: Okay, in this step, you need to extract the Windows ISO file to a virtual drive and start the installation. You run the file setup.exe to start the installation process.
=> In general, you just install as usual, the important thing is in Step 5 below ^^
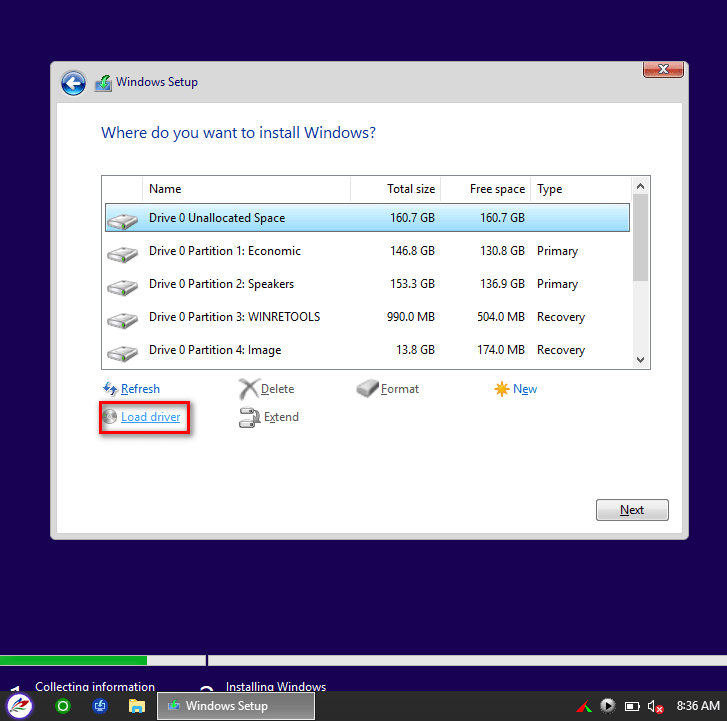
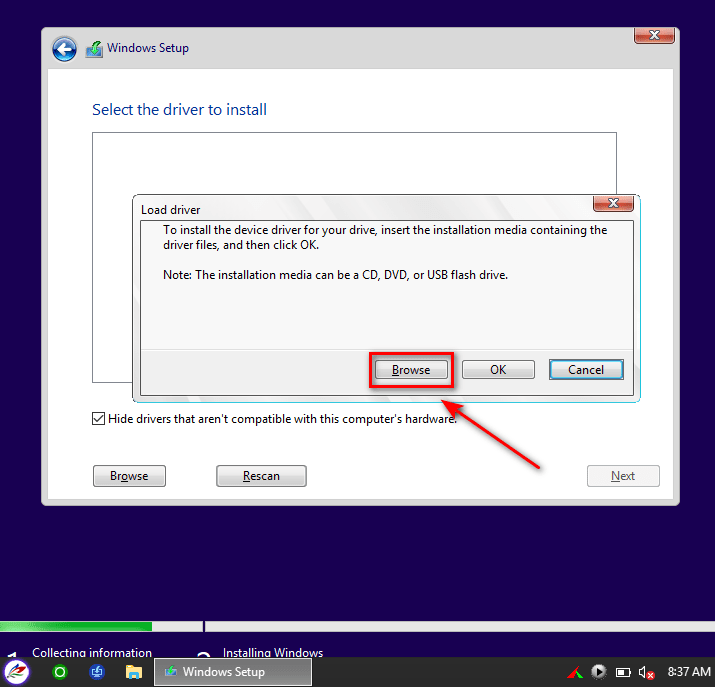
+ Step 5: At this point, please choose Load Driver
You press the button Browse as shown below.
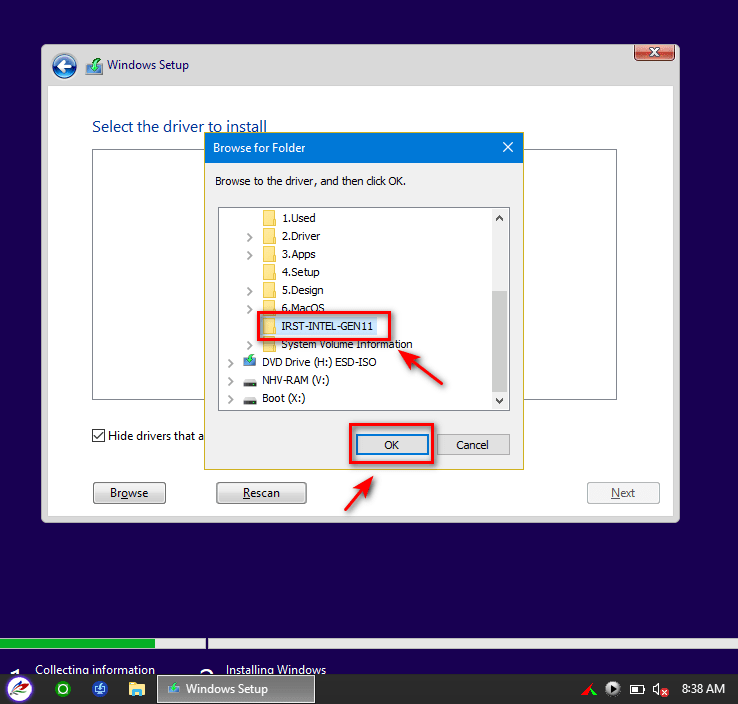
=> Then select to folder IRST-INTEL-GEN 11 To make more IRST drivers, the computer.
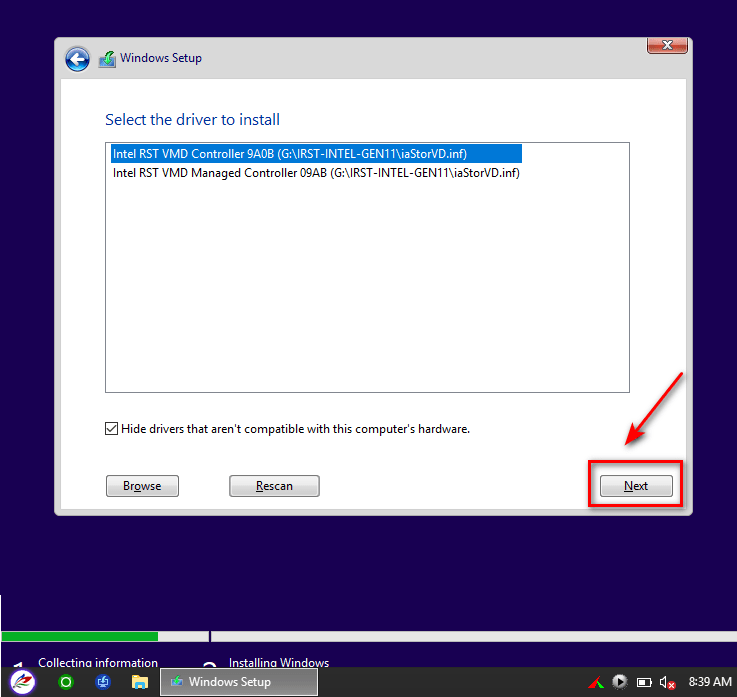
You choose Next as shown below.
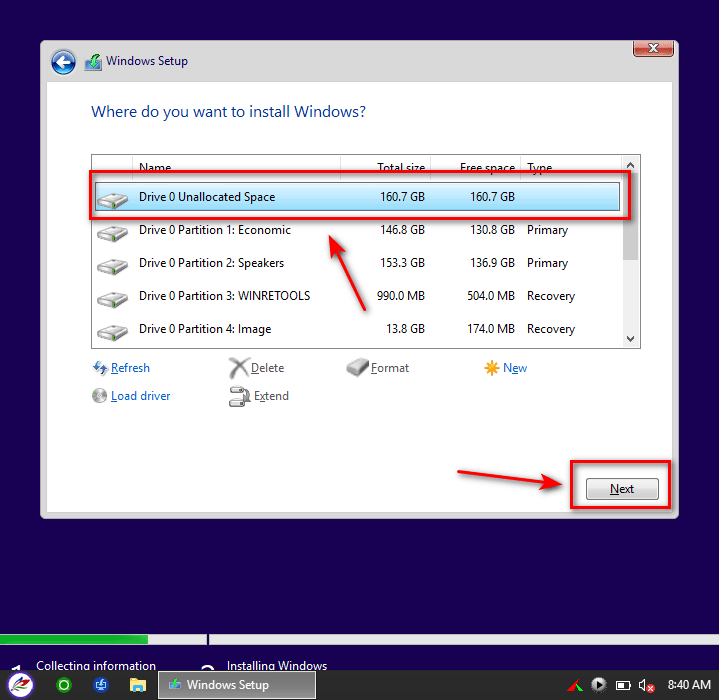
+ Step 6: Next step, please select EXACT partition Unallocated that you have prepared earlier to start installing Windows.
NOTE: Choose the exact partition you want to install, choose the wrong partition and lose your data, please bear with it
+ Step 7: That’s basically it, so you can successfully install Windows on a computer using a new generation Intel chip.
Read more:
Epilogue
Tutorial How to install Windows 10 on a new generation laptop (using Intel gen 11 chip) in order not to fail, not to have a blue screen, to fix the situation of not recognizing the hard drive when installing…
Hope this article will be useful to you, good luck!
Read more great articles:
Reference articles of the author Nguyen Vuong – nhvboot.blogspot.com
Note: Was this article helpful to you? Don’t forget to rate the article, like and share it with your friends and family!
Source: How to reinstall Windows on a new generation laptop (gen 11 chip)
– TechtipsnReview


