
When the Windows operating system boots, by default it will wait for about 10 seconds before launching programs that start with Windows and the software you just opened.
This “latency” helps Windows system services to work completely and then the software starts with Windows, making the computer run a little more smoothly, without lag, Full Disk hard drive. … when you first turn on your computer.
However, if you want, you can completely turn off this “delay time”. Because most of us will open the app / software right after starting the computer. Turning off this “delay time” will help the application open faster, not wasting our time.
Note: This method should only be used for computers that use SSD hard drives only and must have a strong enough configuration (new generation core i5 10, 11 or higher). As for computers that use HDD hard drives, it is not recommended.
#first. Editing via Registry Editor
Registry is a very useful tool. However, if you make a mistake in editing, the chances of your computer being faulty are very high. Therefore, please backup the registry before doing this.
+ Step 1: First, you press the key combination Windows + R to open Run dialog => then type regedit => and press OK.

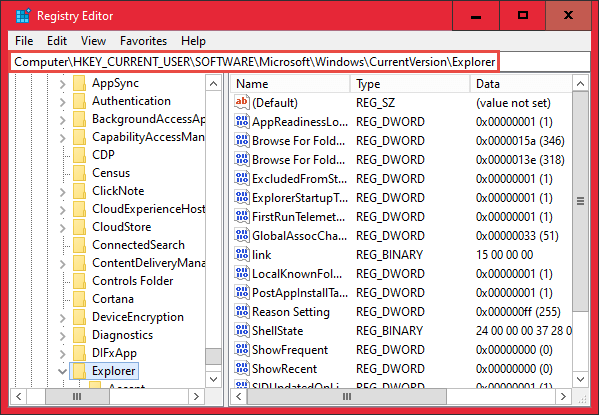
+ Step 2: Then, the Registry Editor dialog box will appear, now go to the following path:
HKEY_CURRENT_USERSOFTWAREMicrosoftWindowsCurrentVersionExplorer
Read more: Quick trick to open any path in the Registry – 1 Click
+ Step 3: Next, you right-click on the key Explorer => then press New => choose Key as shown below.
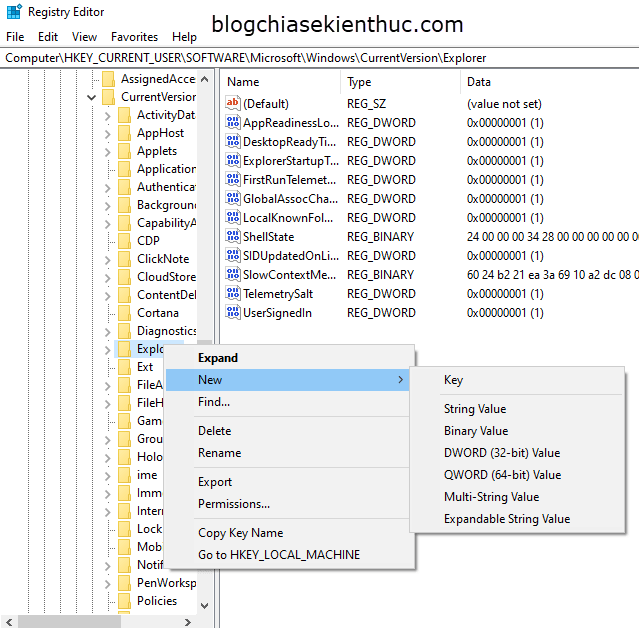
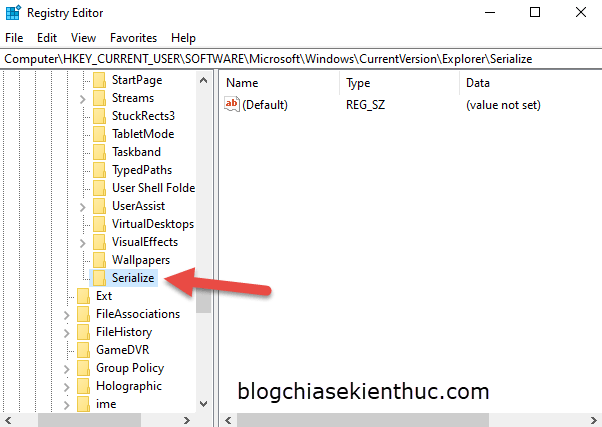
+ Step 4: You enter the key name is Serialize.
+ Step 5: Next, on the right side of the window, right-click and click New => and choose DWORD (32-bit) Value.
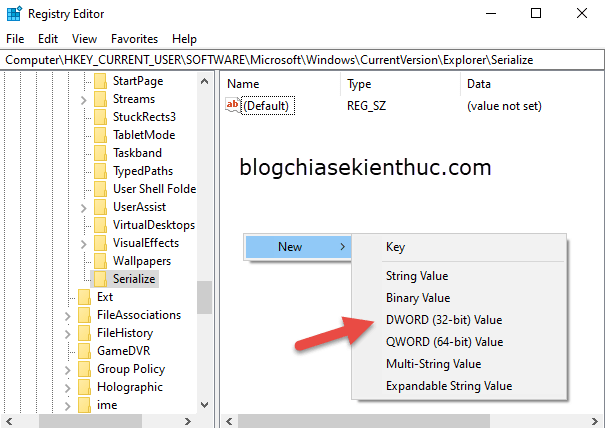
+ Step 6: Next, you name/rename the key to StartupDelayInMSec. Then double click on that key and set the value to 0 => then press OK.
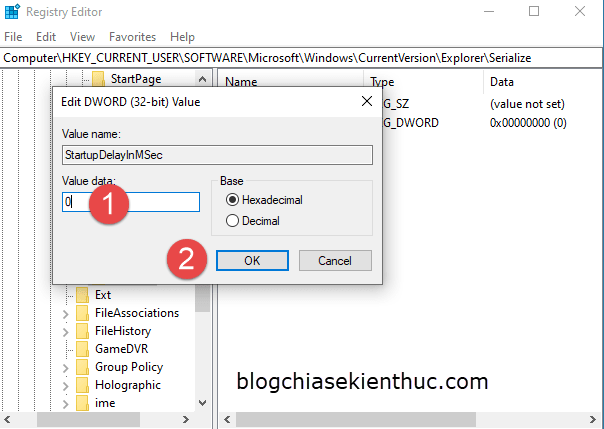
OK, that’s it. Finally, restart your computer to apply. If you want to re-enable this delay feature, you can simply delete this key.
#2. Download the file to disable the delay feature on Windows startup (recommended)
Ok, if you find the steps above too confusing and complicated, or afraid of computer errors, you can download the file that I made available below:
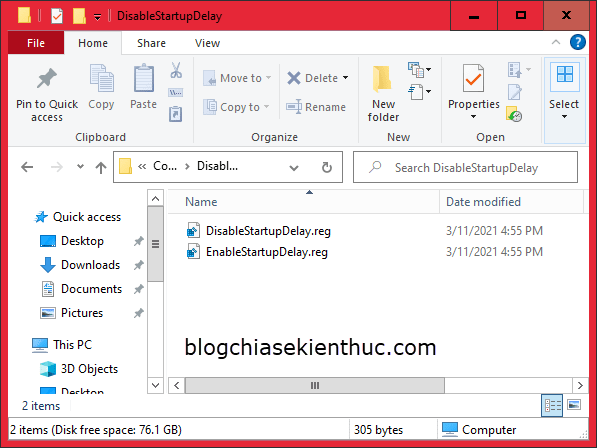
After extracting, there will be the following two files:
- File
DisableStartupDelayis to disable Windows startup delay. - Still files
EnableStartupDelayto re-enable Windows startup delay.
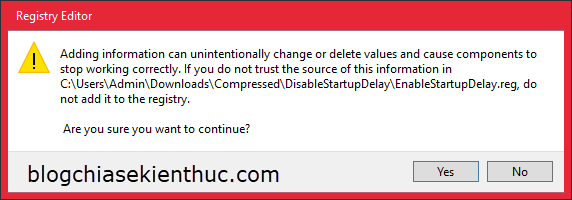
To use is very simple, double click on the file you want to use, there will be a warning that Regedit will change, you click Yes to continue or No to cancel.
After clicking Yes, the following success message will appear. Click OK to finish.
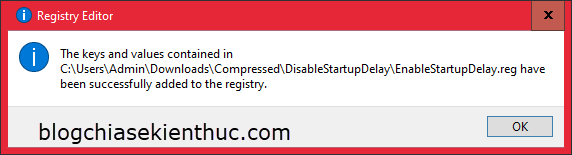
That’s it, now you can restart your computer to apply the changes.
Read more:
#3. Epilogue
Yes, so I have finished showing you how to turn on or turn off startup delay on Windows operating system okay then.
Wish you success and be flexible to use it to suit your computer. Don’t forget to vote 5 stars for the article if you find it useful for you
CTV: Hoang Tuan – techtipsnreview
Note: Was this article helpful to you? Don’t forget to rate the article, like and share it with your friends and family!
Source: How to turn OFF STARTUP SUPPORT on Windows?
– TechtipsnReview


