Are you using Win 7 and want to find a way to turn off the standby screen when it interrupts your work too much? Don’t worry, the shortcuts are simple. Together GhienCongListen learn about How to turn off the Windows 7 standby screen in the article below. Let’s start.

Advertisement
Why are Windows users limited to using the idle screen?
The Screen Saver feature or screen saver is a feature that allows you to turn on the standby screen while you are not using your computer screen anymore. It is useful, but however, many Windows 7 users find it quite annoying every time they watch movies or have to turn it on and off very annoying. Therefore, choosing to turn off the Windows 7 standby screen is an optimal choice. Here’s how to do it.
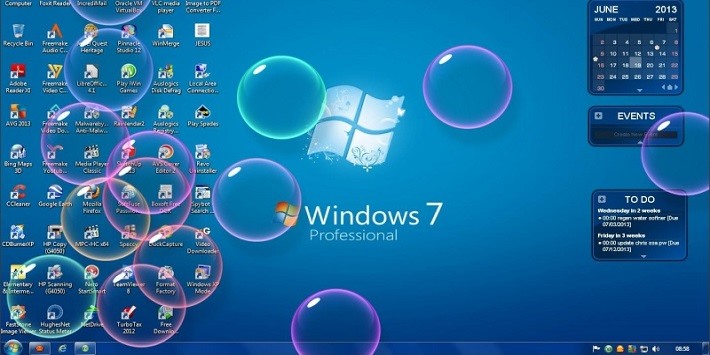
Annoying when the standby screen keeps showing up while working without using the mouse
Instructions on how to turn off the Windows 7 standby screen
How to turn off the Windows 7 standby screen from the main screen
To turn off the Windows 7 standby screen from the main screen, follow these steps:
Advertisement
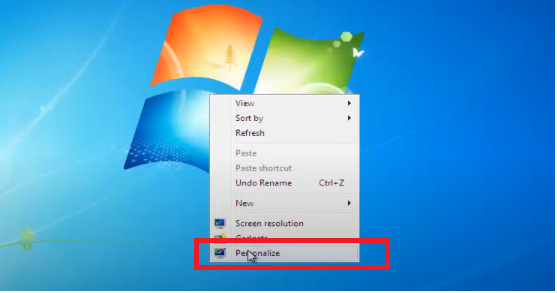
Step 1: Right-click the person on the screen and select Personalization.
Advertisement
Step 2: A dialog box appears, select Screen Saver.
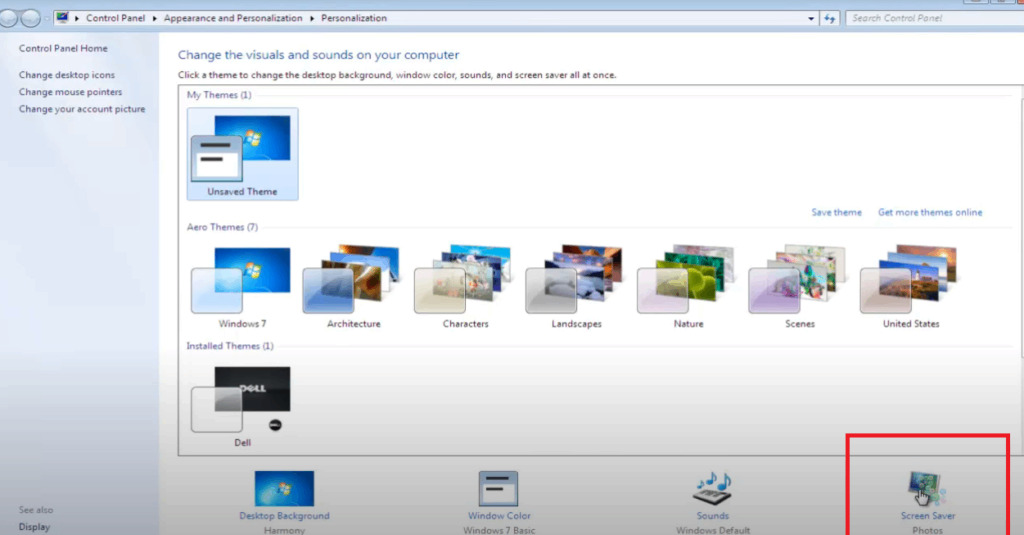
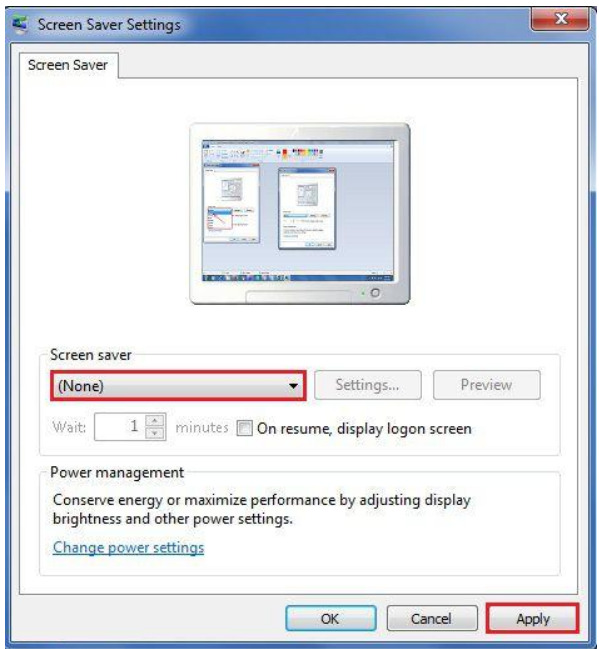
Step 3: The Screen Saver Settings screen appears. You find the Screen Saver section. Select the arrow and select None.
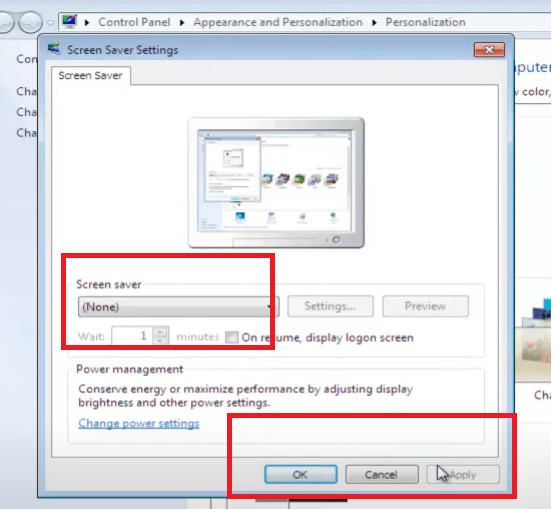
Step 4: Click Apply and OK to complete the process.
How to turn off the Windows 7 standby screen using Control Panel
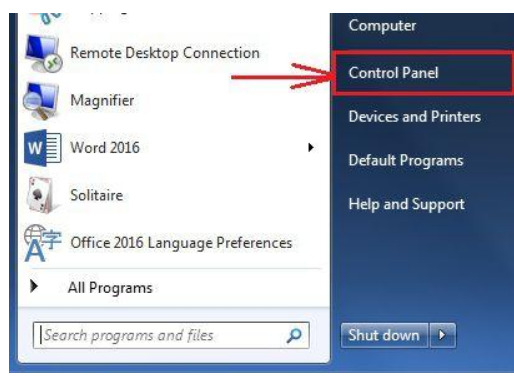
Step 1: Access the Control Panel on your desktop. Or if not, go to Start and select Control Panel.
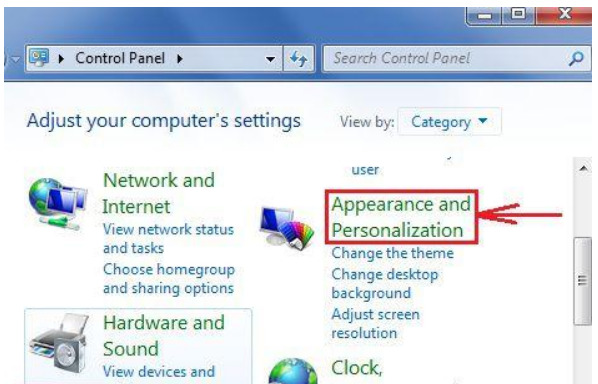
Step 2: Click on Appearance and Personalization.
Step 3: Get and choose Change Screen Saver.
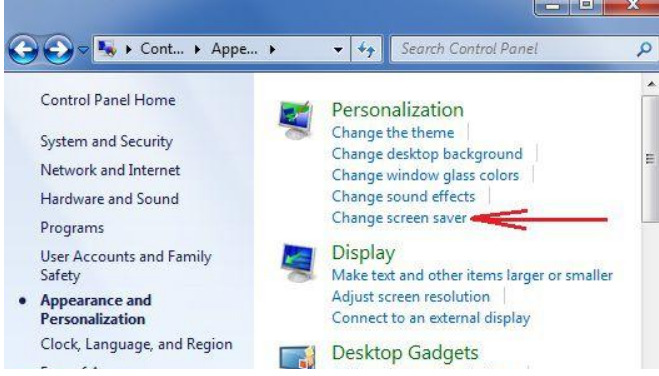
Step 4: The Screen Saver Settings dialog box appears. Find the Screen saver section. Press the arrow and select None. Then click Apply and OK to complete the process.
Change screen timeout Windows 7
In this section we will show you how to change the Windows 7 screen standby time. This is quite different from turning off this feature completely because you basically just need this feature not to automatically activate when you don’t touch your computer and come back for a short period of time.
This ensures that you can still focus on your work and need the standby screen feature ready for when you need it without having to run the installation again. Proceed as follows:
Step 1: Right-click and select Personalize.
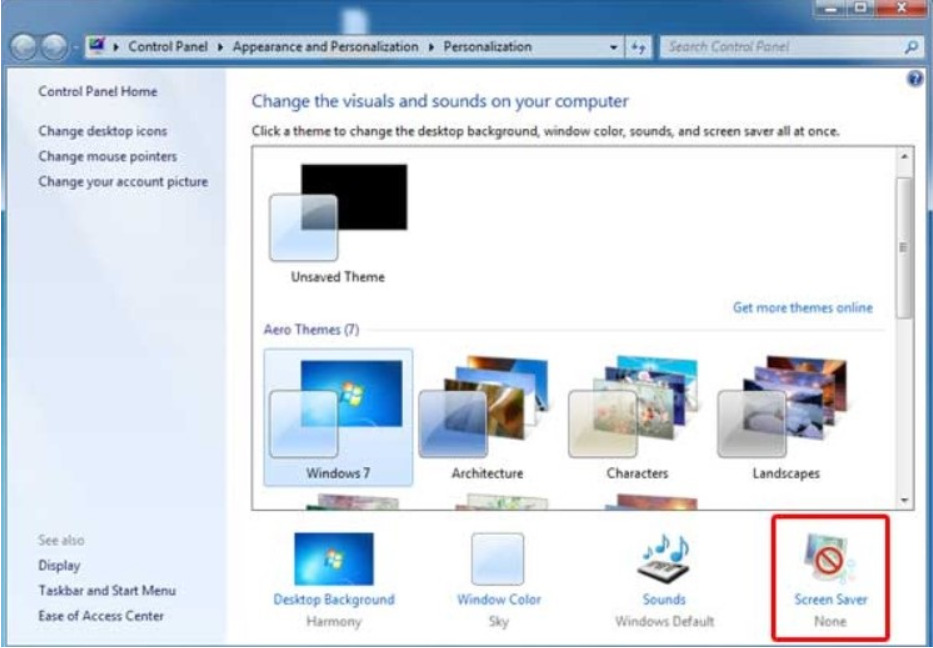
Step 2: In the window that pops up, pay attention to the bottom corner of the screen and select Screen Saver.
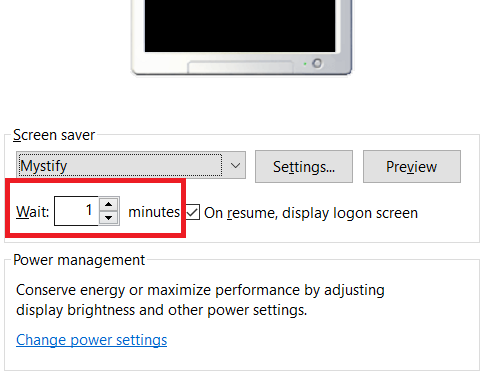
Step 3: In the Screen Saver Settings program, pay attention to the Wait item. Here you can customize the appropriate time for the standby screen feature to be turned on. Next, select On resume, display logon screen.
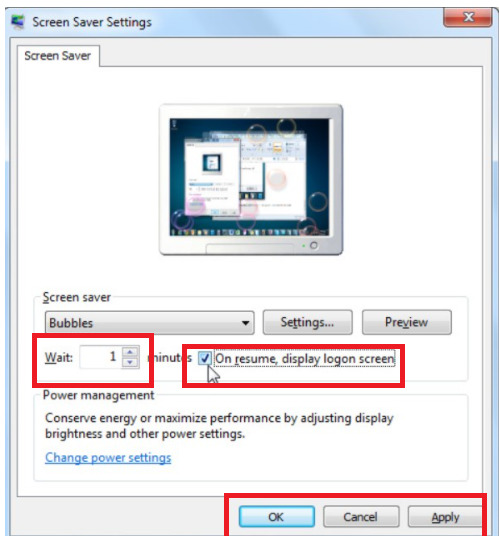
Step 4: Click Apply and OK to complete the process.
Some other articles you can refer to:
And above are our sharing on how to turn off the Windows 7 standby screen. Hope the above information is useful to you. Don’t forget to Like, Share and visit GhienCongListen regularly to get new knowledge every day.
Source: How to turn off the Windows 7 standby screen in a few easy steps
– TechtipsnReview

