You are using the Windows 10 operating system and have just learned about the standby screen feature, so you do not know how to set the time for it to appear faster or slower. It’s okay, hereafter GhienCongListen will show you how Windows 10 screen timeout setting. Let’s start.

Advertisement
Instructions on how to set screen timeout in Windows 10
Perhaps Windows users, especially Windows 7, are very familiar with the setting of the standby screen. But when switching to Windows 10, it seems that this rarely happens. Perhaps the demand for the installation of the idle screen is not as much as it used to be. However, the number of users interested in this is still a lot, so let’s find out.
Windows 10 screen timeout setting from Settings
The first is to set the Windows 10 screen timeout time from the Settings. To do this, follow the steps below;
Advertisement
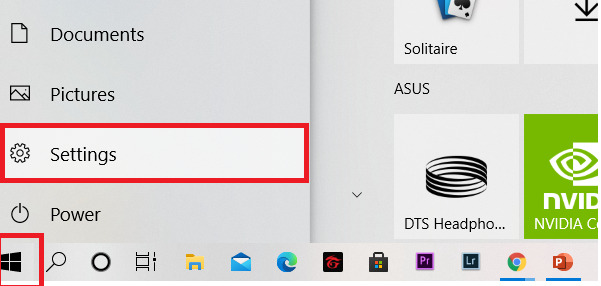
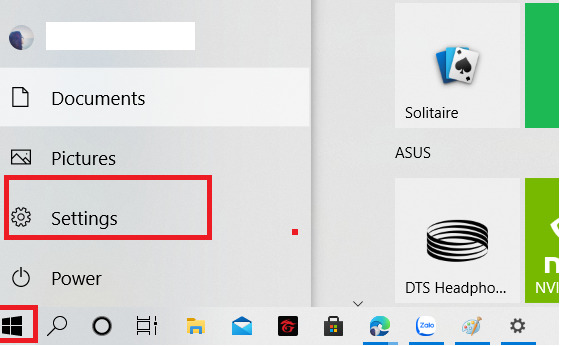
Step 1: Select the Start icon and then select Settings.
Advertisement
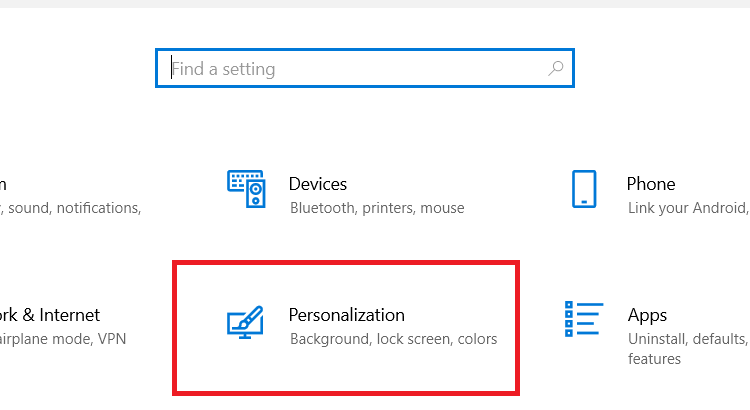
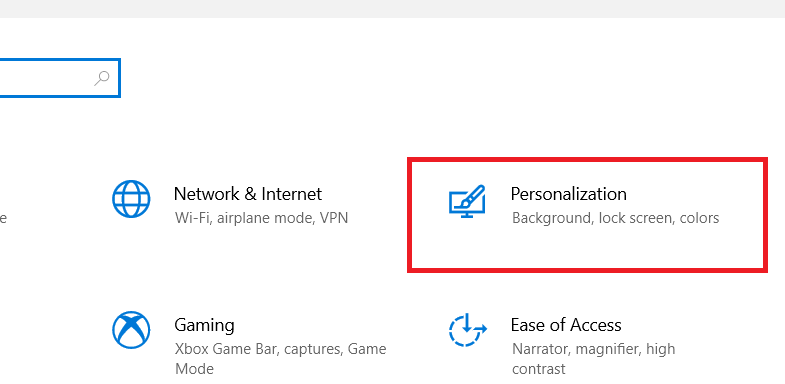
Step 2: In the Settings menu, select Personalization.
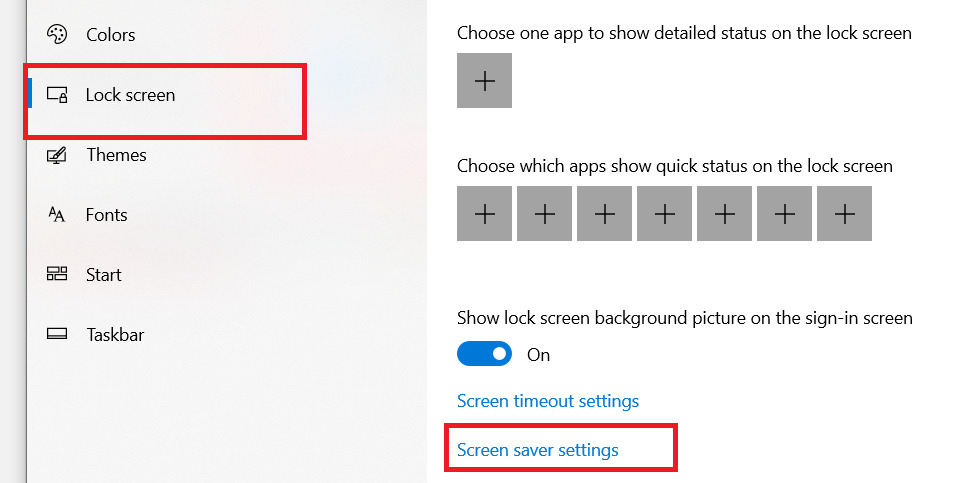
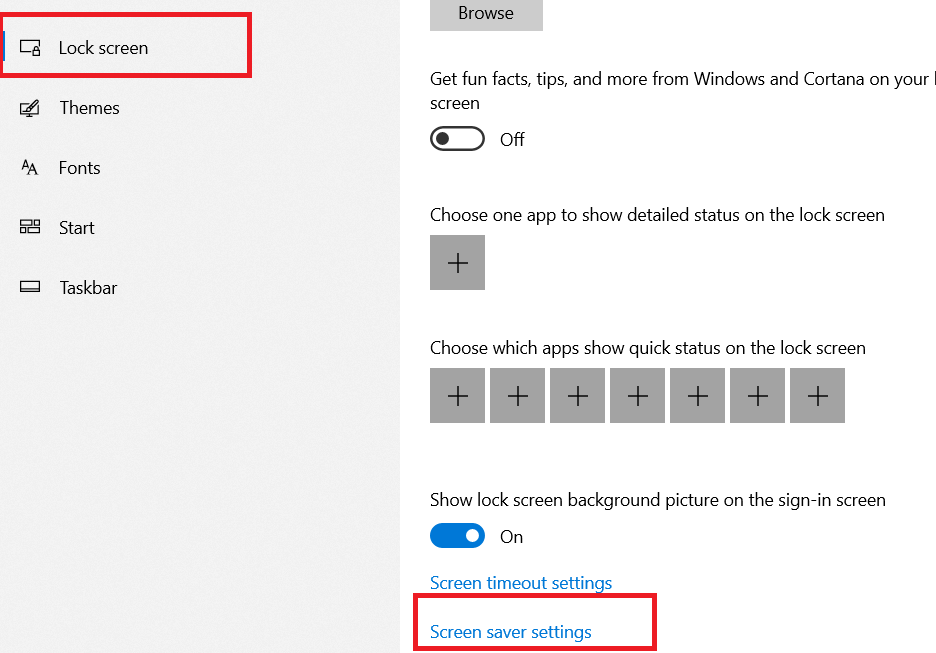
Step 3: Next in the Personalization section, select the Lock Screen item. Scroll down and select Screen saver settings.
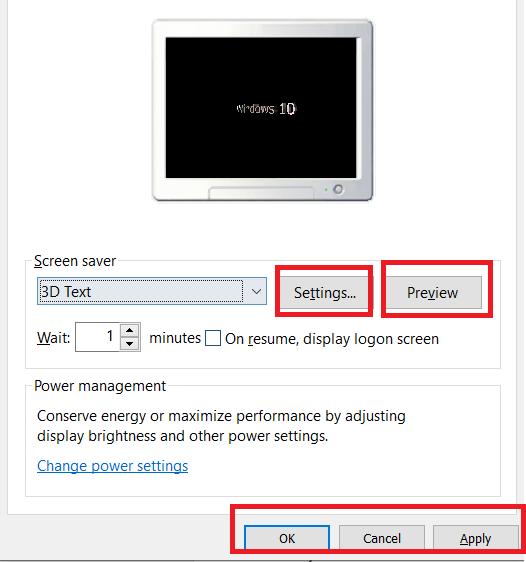
Step 4: In the Screen Saver Settings dialog box, find the On resume, display logon screen section. You choose as shown in the picture.
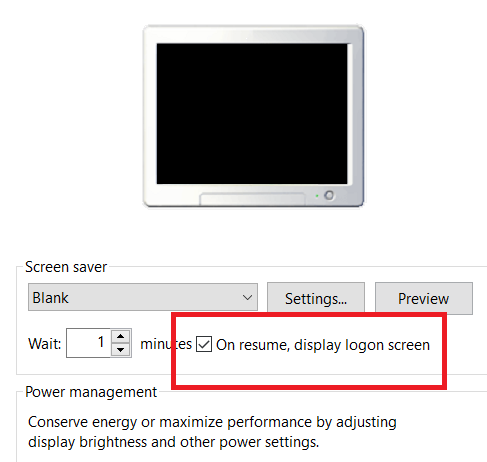
Then choose the time you want in the upper left. Note that the time is in minutes.
Step 5: Click Apply and OK to finish the installation process.
Windows 10 screen timeout setting from home screen
Or you can also do another faster way that is how to set the Windows 10 screen timeout from the main screen. The steps are as follows:
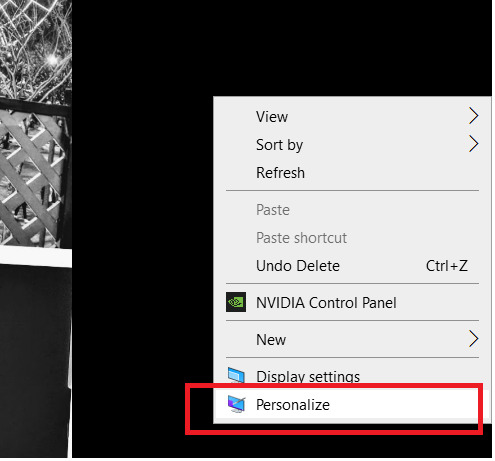
Step 1: At the main screen, right-click and select Personalize.
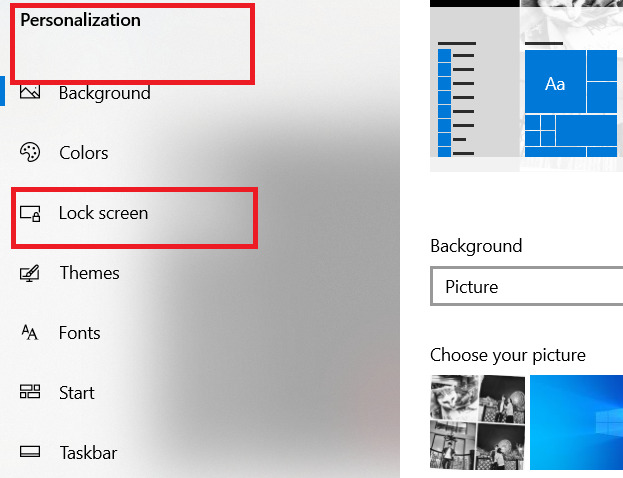
Step 2: In the Personalization section, select the Lock screen item.
Step 3: Next, scroll down to the Lock screen section and select Screen saver settings.

Step 4: In the Screen Saver Settings dialog box, find the On resume, display logon screen section. You choose as shown in the picture. Then click Apply and OK and you’re done.

You can customize how fast or slow the standby screen is in the Wait section.
Instructions to change the Windows 10 standby screen
Immediately after installing the standby screen, you can go to the Screen saver tab to customize the screen saver you want. The customizations are as follows:
- 3D Text: Consists of a line of text that is continuously run on the screen in different trajectories.
- Blank: Black Screen
- Bubble: Bubbles
- Mystify: mystical wave images
- Photos: Photos of yourself. You can install them in Settings
- Ribbons: ribbons
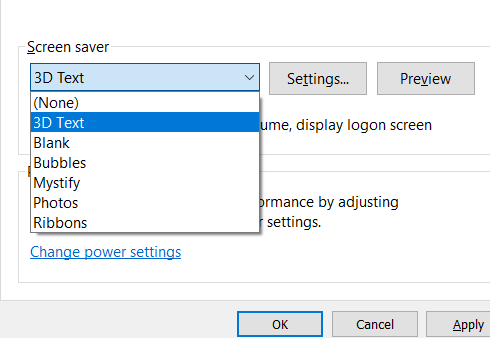
You can make adjustments and experience them to your liking by clicking the Preview button. After selecting, click on Settings to further customize the standby screen such as time, font style, motion style, etc.
After the installation is complete, click Apply and OK to save your customizations.
Turn off the Windows 10 standby screen
Next is how you can turn off the Windows 10 standby screen when you have become too bored with it or for some other purpose you want to turn it off, you can refer to our below method. me:
Step 1: You also go back to the standby screen installer as instructed above. Go to Start, select Settings.
Step 2: In Settings select Personalization.
Step 3: In the Lock screen section, select Screen saver setting .
Step 4: In the Screen saver section, select None. Immediately the idle screen effects will no longer be.
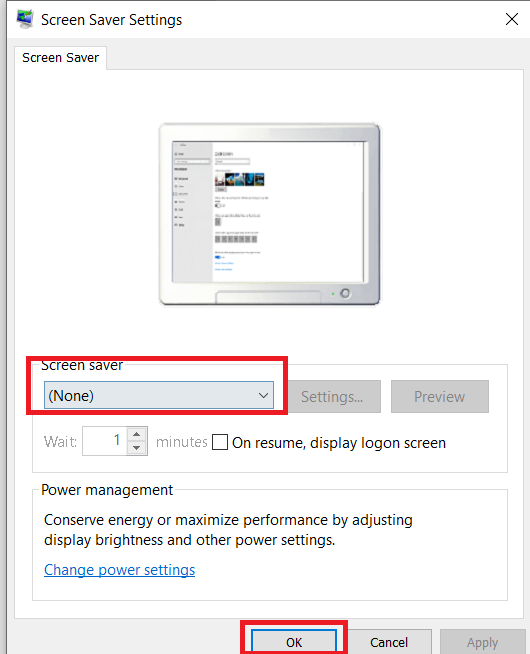
In addition, you can also turn off the Windows 10 standby screen by many different ways. Press the Windows key and type the keyword screen saver and then select Change screen saver in the search results.
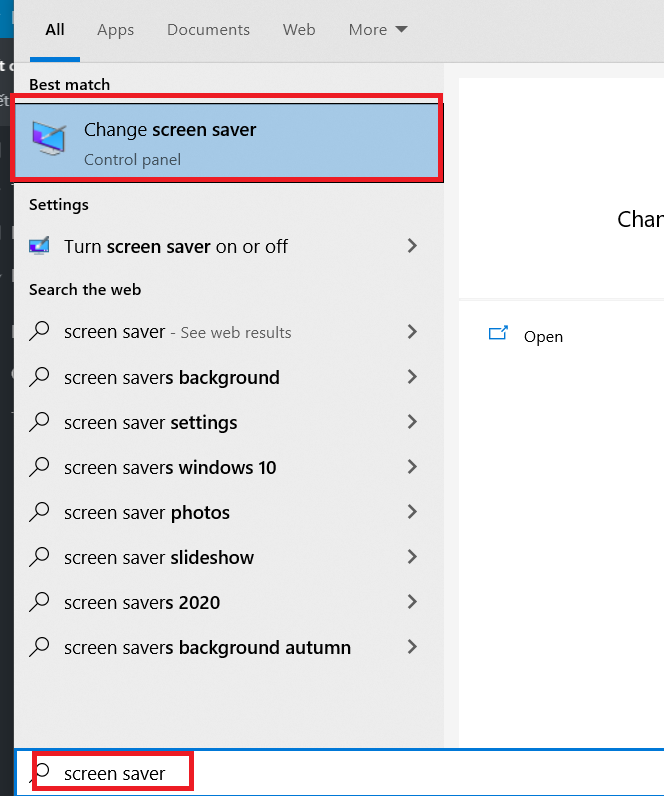
Next, follow the instructions above when in the Screen saver.
Some other articles related to Win 10 you can refer to:
And above are our sharing on how to set screen timeout in Windows 10. Hope the above information is useful for you. Don’t forget to Like, Share and visit GhienCongListen regularly to get new knowledge every day.
Source: Instructions on how to set screen timeout in Windows 10
– TechtipsnReview


