
Remote Desktop is a tool available on Windows operating system, it allows you to control one or more remote computers easily without having to use third-party remote control software. 3.
If you’re learning about servers, or web programming, you’re probably no stranger to this Remote Desktop, because you use it all the time
Normally, we can easily enable Remote Desktop through Windows Settings, but let’s assume that Windows Settings for some reason cannot be used, meanwhile, you really need to open Remote Desktop. How to use up to use?
So in this article, in addition to how to activate Remote Desktop normally, I will also share with you how to activate Remote Desktop using the command line in CMD or Windows Powershell.
I. Instructions to activate Remote Desktop on Windows
First, I will show you how to turn on Remote Desktop for your computer in the usual way for those of you who don’t know yet.
Perform:
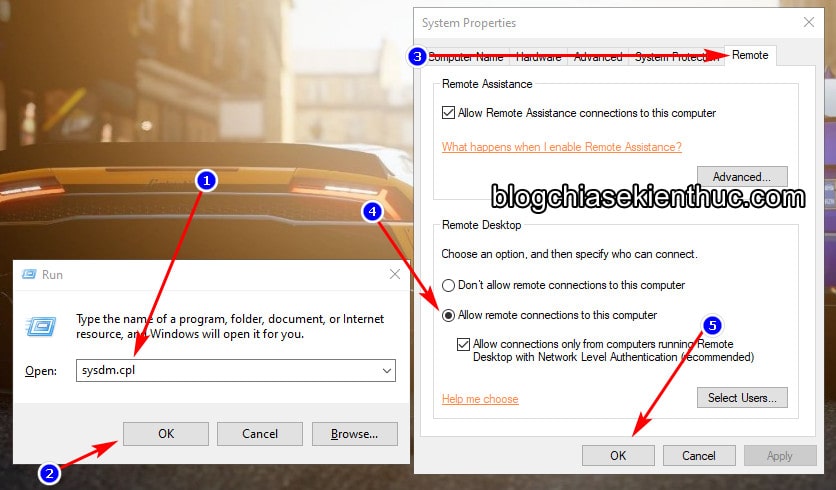
Method 1: You open the RUN dialog box (Windows + R) => and enter sysdm.cpl => then press ENTER.
In the window System Properties, you switch to tab Remote => and in the Remote Desktop Please tick the line Allow remote connections to this computer => then press OK you have turned it on Remote Desktop on Windows already.
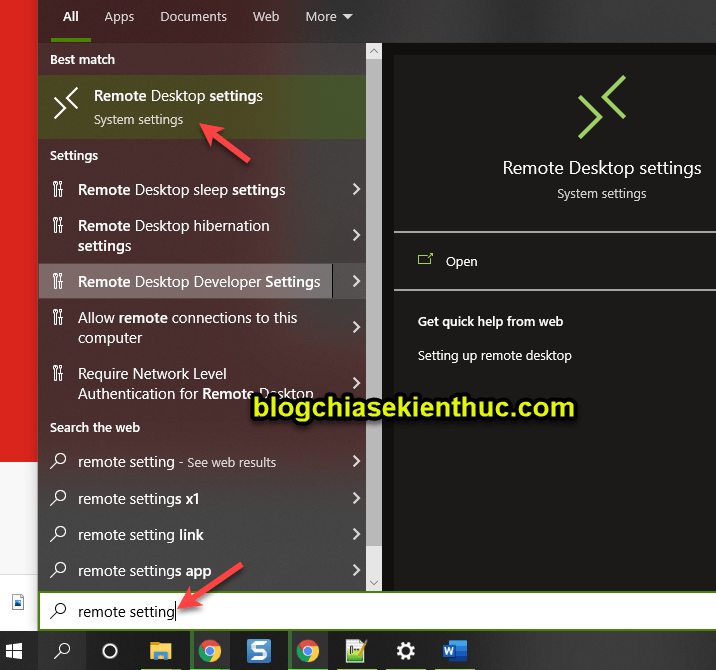
Method 2: You press the key combination Windows + S to open Windows Settings out => then search with keyword remote settings => and choose Remote Desktop Settings
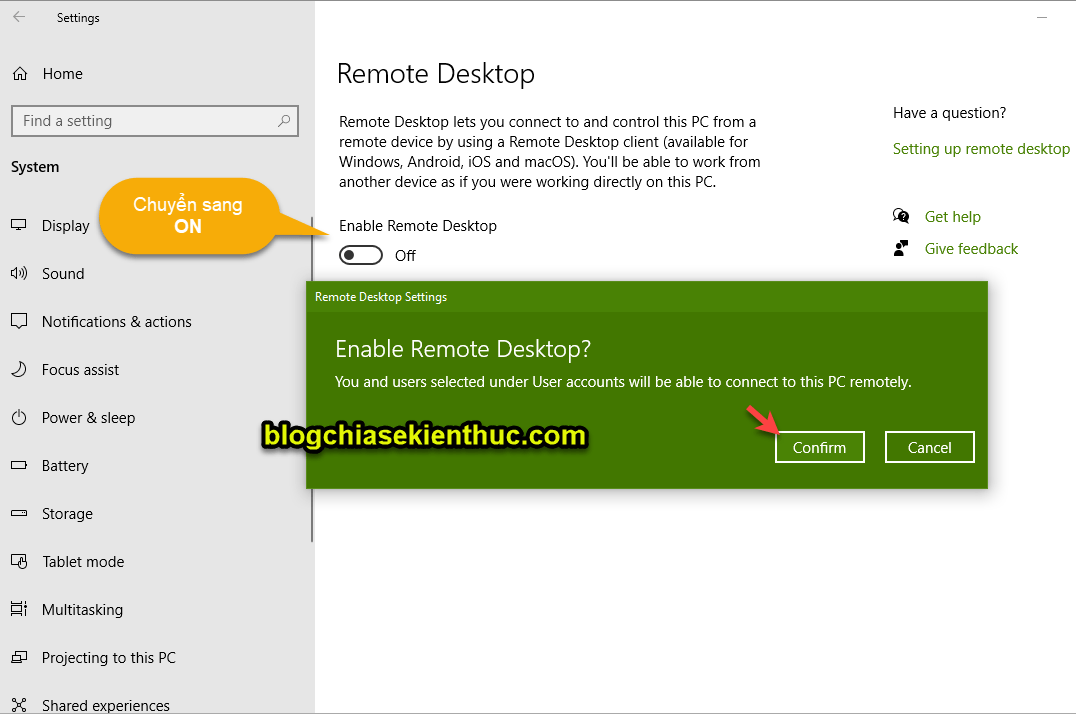
You will now be taken to the Remote Desktop => you flip the switch to the right to switch to the state ON => then press Confirm To confirm.
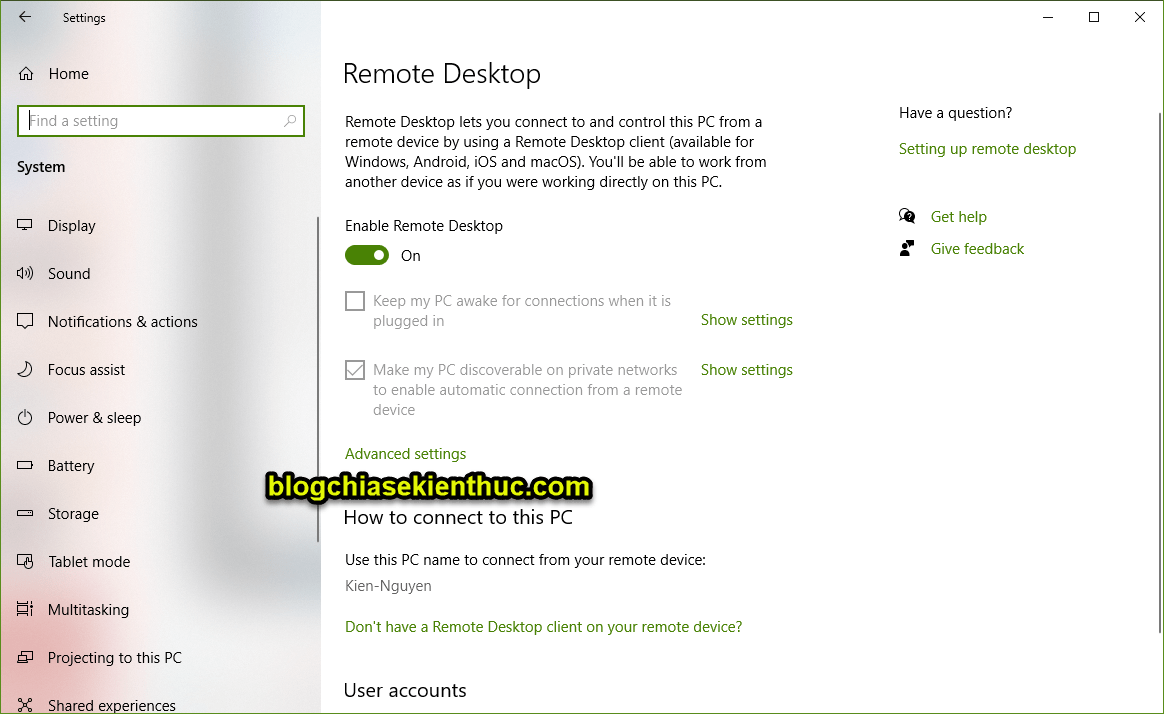
Okay, so we have successfully enabled Remote Desktop.
NOTE: To turn off Remote Desktop in the usual way is too simple, you do the same steps above and then switch back to OFF done.
II. Enable Remote Desktop on Windows 10 with Command Prompt, PowerShell
#first. Using commands in CMD
Command Prompt, also known as CMD, is a tool that is too familiar to us, right?
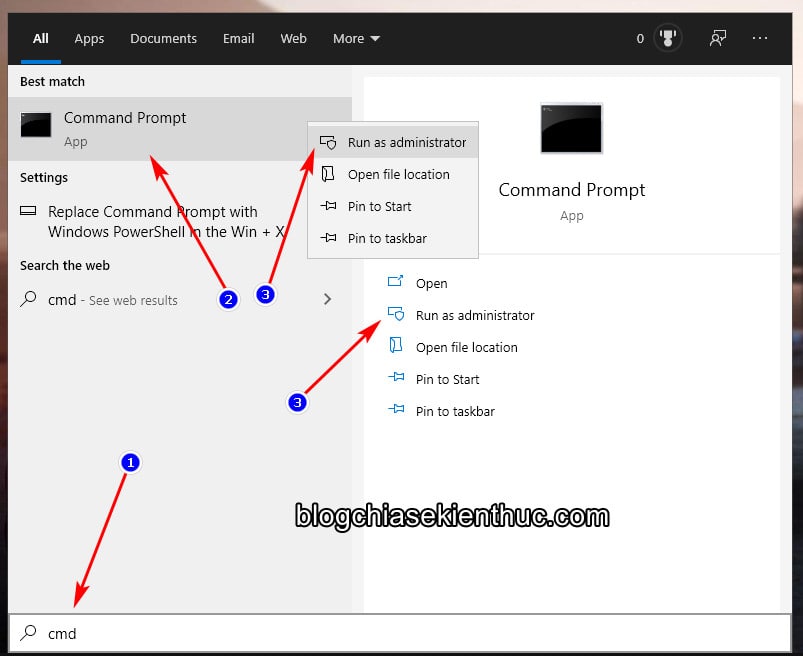
Are you searching for keywords? cmd in Windows Search => then right click and select Run as Administrator to run CMD with Admin rights!
Or if you have turned off Replace Command Prompt with Windows Powershell in the menu when I right-click the start button or press key Windows + key X then you can press Windows + X you will see the part right away Command Prompt (Admin) in PowerMenu, this way is much faster!
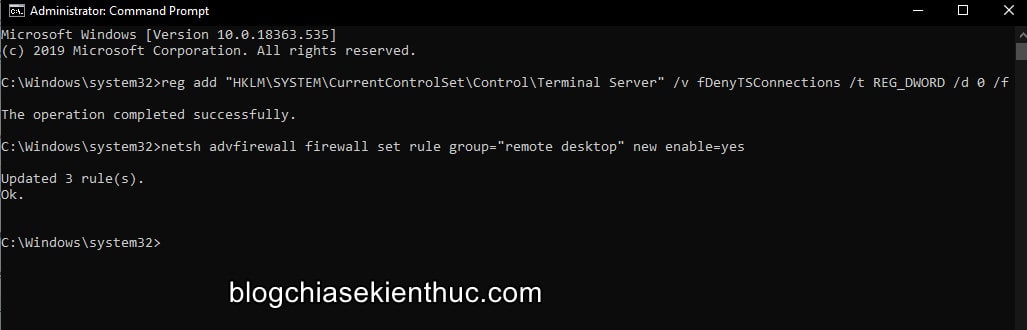
Please copy the exact command below => then paste it in the window CMD => and press ENTER to run it!
Default value of fDenyTSConnection to be 1, ie it will block (Deny) Remote connection to your computer, now we will change it to 0 when running the above command.
reg add “HKLMSYSTEMCurrentControlSetControlTerminal Server” /v fDenyTSConnections /t REG_DWORD /d 0 /f
Continue, you continue to run the command below, this command will help unlock the Firewall so that you can use Remote Desktop normally.
netsh advfirewall firewall set rule group=”remote desktop” new enable=yes
Okay ! After running, I see the line Operation completed successfully and Updated 3 rule(s). Ok If it is displayed on the screen, it means it was successful. You can close Command Prompt already.
#2. Using Commands in Windows PowerShell
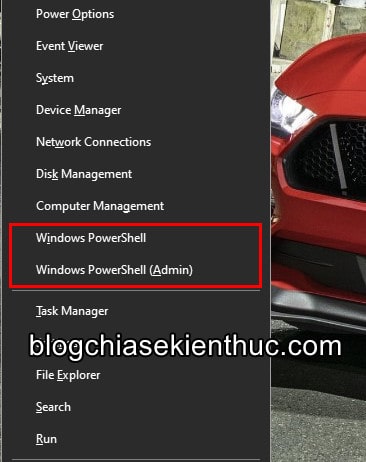
How to open Windows PowerShell with Administrator rights is similar to Command Prompt, by default, you just need to right-click on the . button Start or press Windows + X You will immediately see Powershell (Admin) in the Menu that has just appeared.
If I remember correctly, on the blog there was a tutorial on How to add Control Panel to Windows + X menu on Windows 10, you can apply this way to add Command Prompt and Windows Powershell at the same time to Windows + X menu!
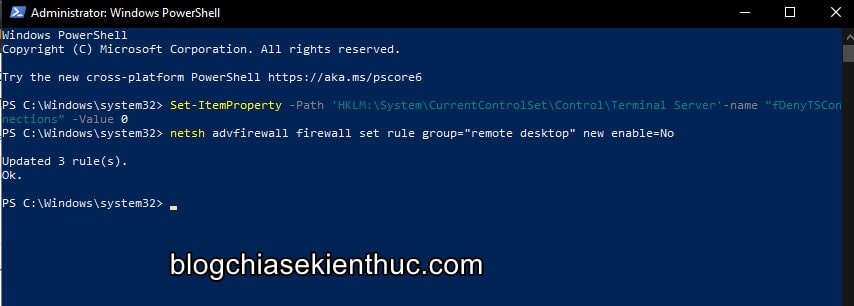
You also run the 2 command lines below, the function is similar, but the command is edited a bit, because the command structure of Windows PowerShell and Command Prompt is different, so I won’t explain it again.
The result after running the command as shown in the image below is successful.
Set-ItemProperty -Path ‘HKLM:SystemCurrentControlSetControlTerminal Server’-name “fDenyTSConnections” -Value 0
netsh advfirewall firewall set rule group=”remote desktop” new enable=No
III. How to turn off Remote Desktop using a command in CMD, PowerShell
To turn it off is also simple, please reopen Command Prompt or Windows PowerShell with Admin rights as instructed above => then run the command below.
For Command Prompt, you can use these 2 commands:
reg add “HKLMSYSTEMCurrentControlSetControlTerminal Server” /v fDenyTSConnections /t REG_DWORD /d first /f
netsh advfirewall firewall set rule group=”remote desktop” new enable=No
As for PowerShell, it is similar, enter these 2 commands in turn and then ENTER :
Set-ItemProperty -Path ‘HKLM:SystemCurrentControlSetControlTerminal Server’-name “fDenyTSConnections” -Value first
Disable-NetFirewallRule -DisplayGroup “Remote Desktop”
So that’s it then !
IV. How to use Remote Desktop to control a remote computer
For example, I want to use a computer A to access the computer B I will do the following. As in the example below, computer A is Windows 10, computer B is Windows 11.
What to prepare?
- You need to enable the Remote Desktop feature on both computers.
- Need to know the IP address of the machine
B. - Must have Username and password of the computer
B(if computer B has a password set). - Both computers must share a LAN, a WiFi transmitter or a wired network port.
Okay, now we’ll go into each step in more detail.
+ Step 1: If you do not know how to get the IP address of computer B, please see this tutorial!
+ Step 2: To know the User name of computer B, check the following:
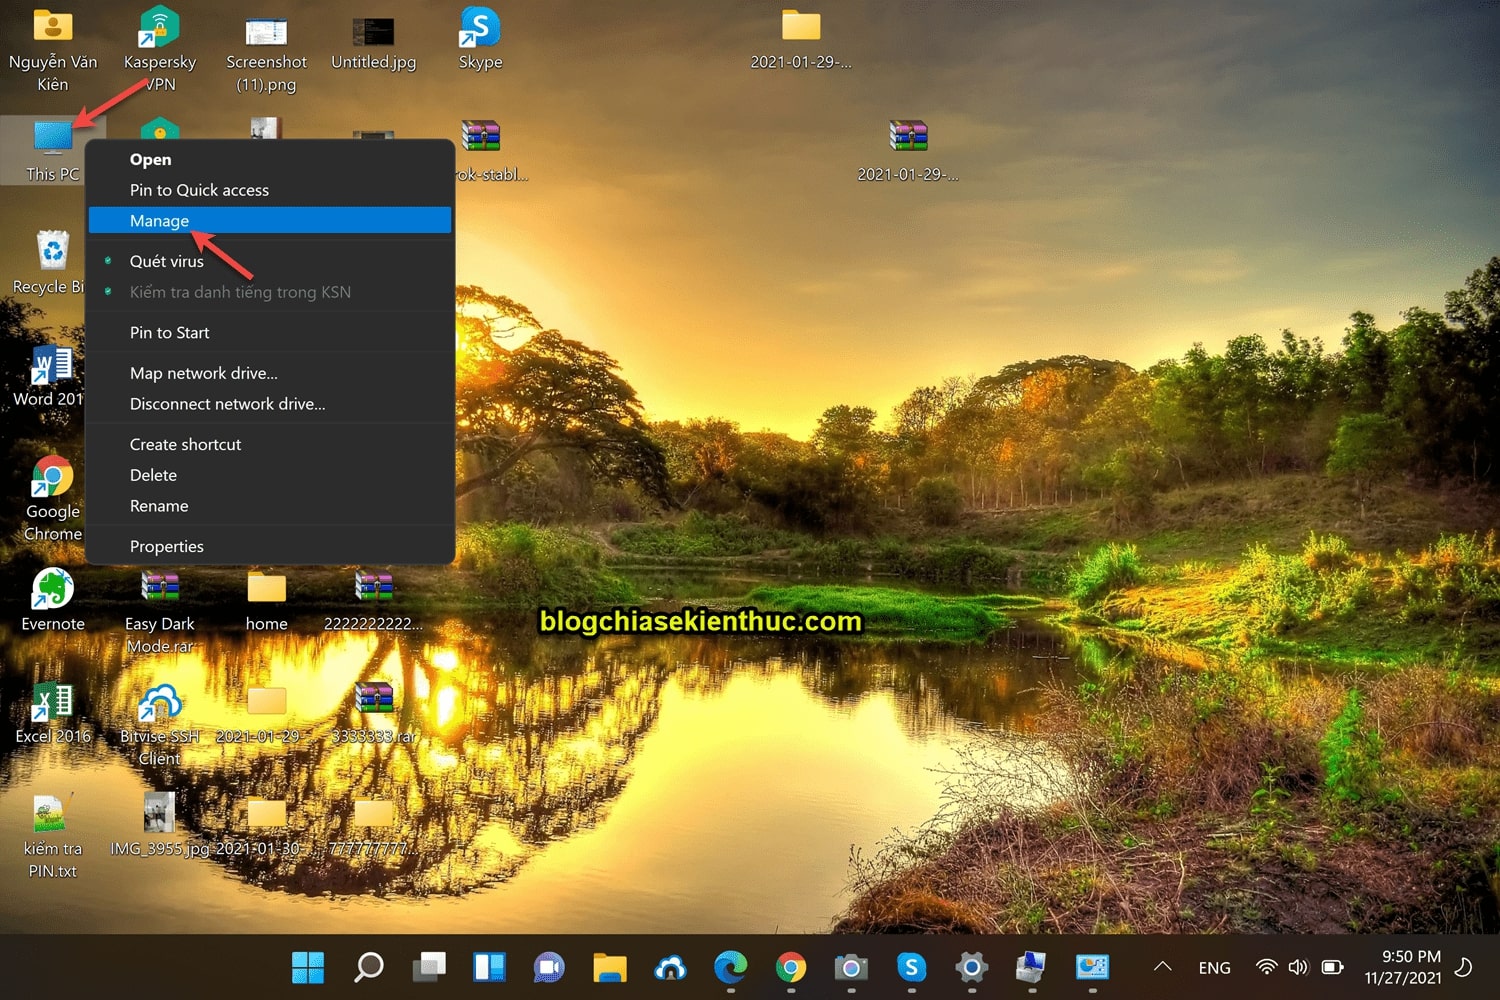
You right click on This PC => then select Manage
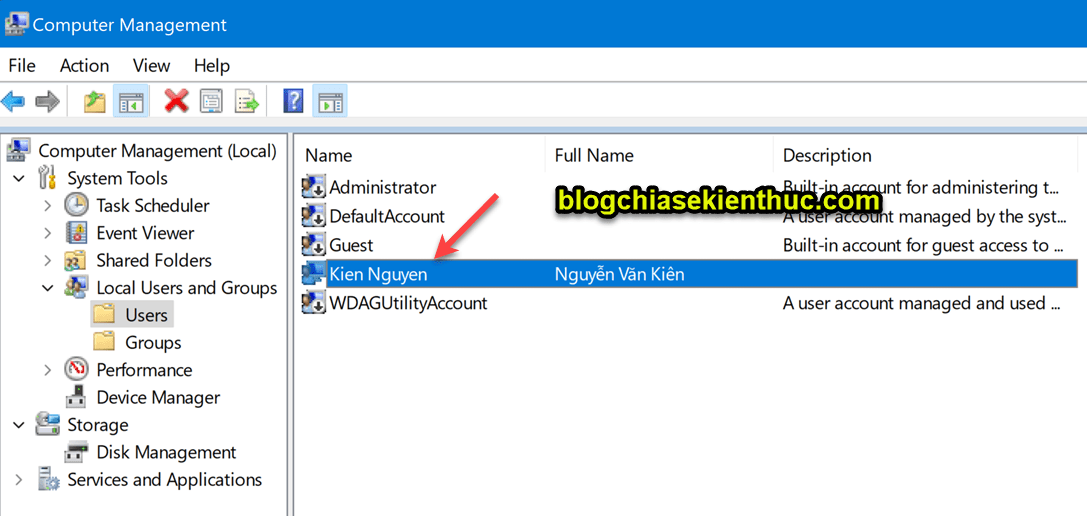
Choose Local User and Groups => choose User. Here will list all the existing Users on your computer. Note that the users with the arrow pointing down are not activated yet. Like mine here, the user I’m using is called Kien Nguyen.
+ Step 3: Okay, now we will proceed to open Remote Desktop to start using.
You press the key combination Windows + S to open Windows Search => then search with keyword remote => and open the app Remote Desktop Connection go up.

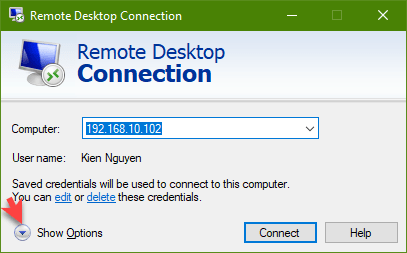
+ Step 4: Then enter địa chỉ IP của máy B that you have prepared earlier go here, then click the . button Show Options to open the settings.
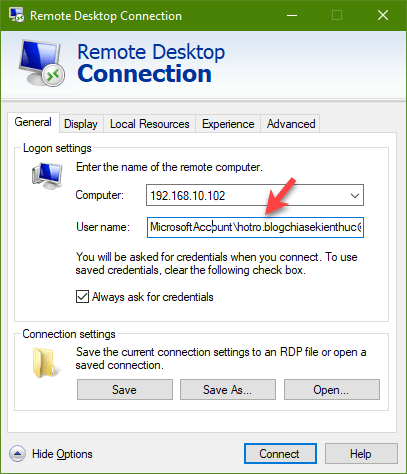
In the next step, enter your name User name that you just found in the step above.

Or If your computer is using a Microsoft Account, you can enter the following syntax:
MicrosoftAccountemail-address-register-account-microsoft
=> Then click the button Connect
+ Step 5: In this step, enter the computer password of computer B, if the computer is using a Microsoft Account, enter the password of the Microsoft account here.
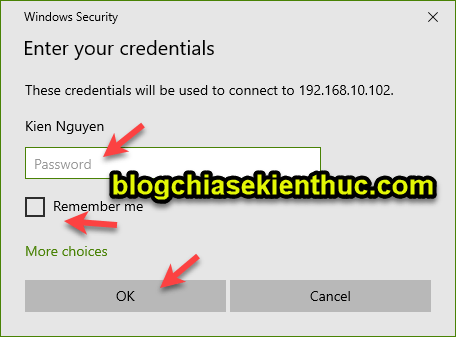
Press Yes to agree.
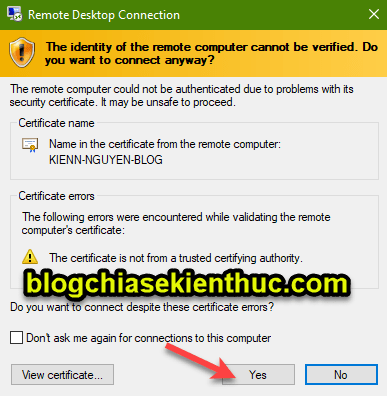
+ Step 6: As a result, you can access computer B, guys

V. Conclusion
Okay, so I have shown you how to use Remote Desktop to control your computer remotely. With this approach, you can easily control computers in the same company very easily.
The repair, as well as support everyone in the company also becomes more convenient. Hope this article will be useful to you, good luck!
Read more:
CTV: Nguyen Thanh Tung – techtipsnreview
Note: Was this article helpful to you? Don’t forget to rate the article, like and share it with your friends and family!
Source: How to use Remote Desktop to control a remote computer
– TechtipsnReview


