In addition to the security of personal account information, many people also have the need to secure data on computers or phones. Currently, there are a number of applications that support hiding and hiding certain types of data on the phone such as the xFiles application. xFiles is an application for iOS devices, whose main feature is to secure photos, videos, notes, contacts or chats from messaging applications on the device that no one else can see.
Besides, the application also possesses many other useful features such as storing data on xFiles’ servers, providing web browser access without saving web surfing history. All content or data in xFiles is secured by the application password that the user sets. The following article will guide you how to use the xFiles application on iPhone.
Instructions to secure photos on iPhone with xFiles
Step 1:
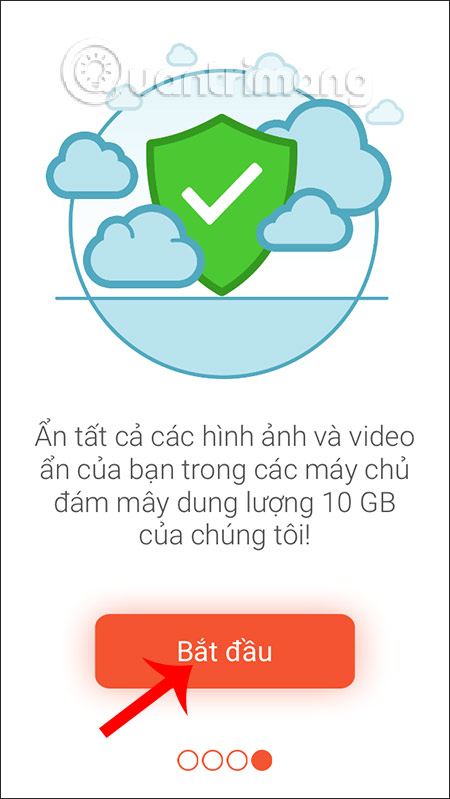
Users download the xFiles application according to the link below and then install it. At the first interface we will see the features of the application, press Skip already press Start to use the application.

Step 2:
Next to the user enter 4 digit password to lock the app. We are then asked to create an account to use the application, Click Create New Account and create via email according to the requested content.
Step 3:
Accessing the main interface of the application, users will see below the interface with 4 main management items is File, Browser, Offline, More section More features.
Step 4:
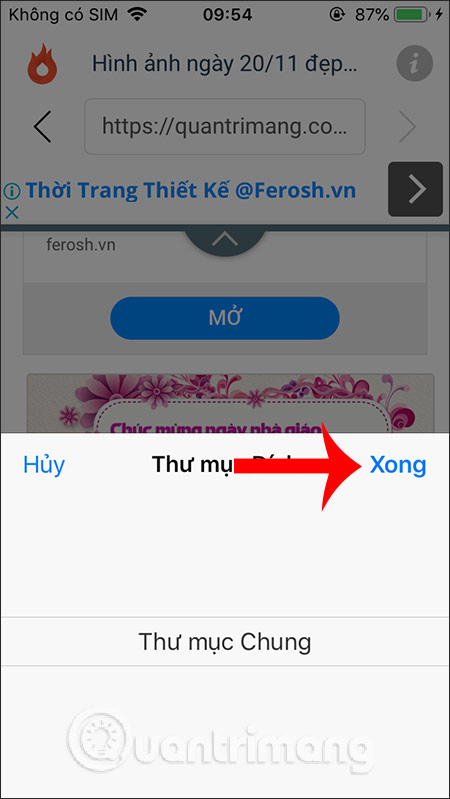
In File sectionwhen pressing Public folder we will be allowed to store images, videos on the device or images downloaded from the browser on xFiles. Press plus symbol to download the file and then select where to download the file.
Step 5:
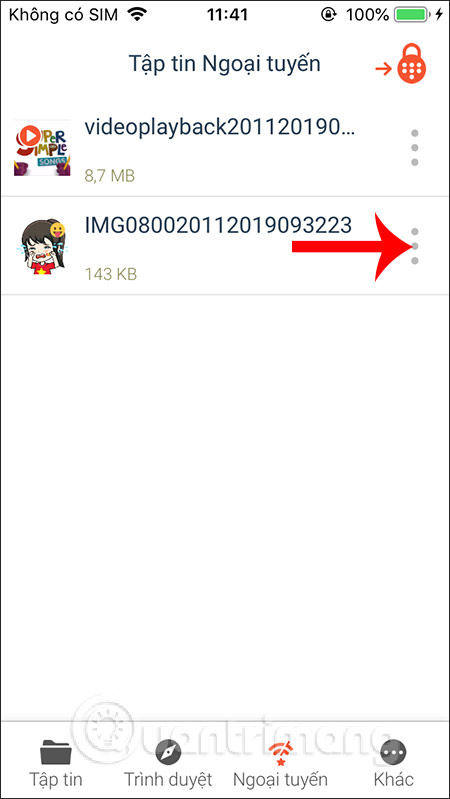
Uploaded images and videos will display as shown below. Click 3 dashes icon to change the sort.
Each image when clicked vertical 3 dots icon both display the options menu as shown below.
All data uploaded to xFiles is uploaded to the application server. And if we want to download the file to the device again turn on Use Offline mode. Now the file is moved to the Offline section.
Step 6:
Switch over Phonebookalso press the plus sign to add contacts from within the device or enter them manually. If add from available contacts then you are asked Do you want to delete the original contacts? no because it was saved to xFiles.
With self-added contacts then you need Fill in the contents requested press Create.
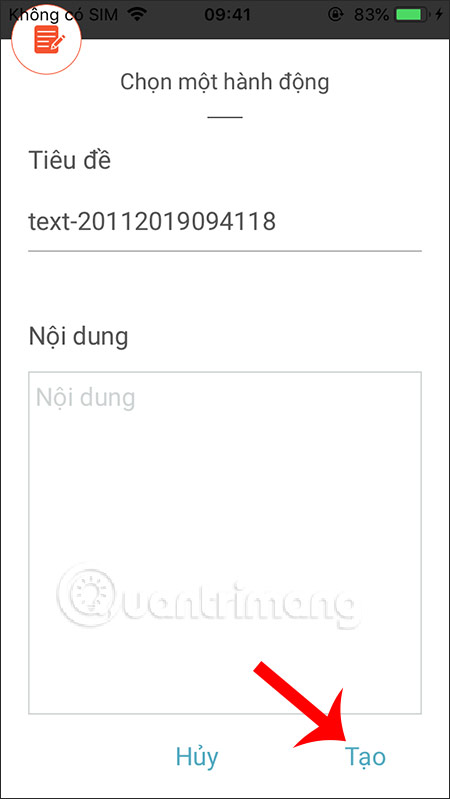
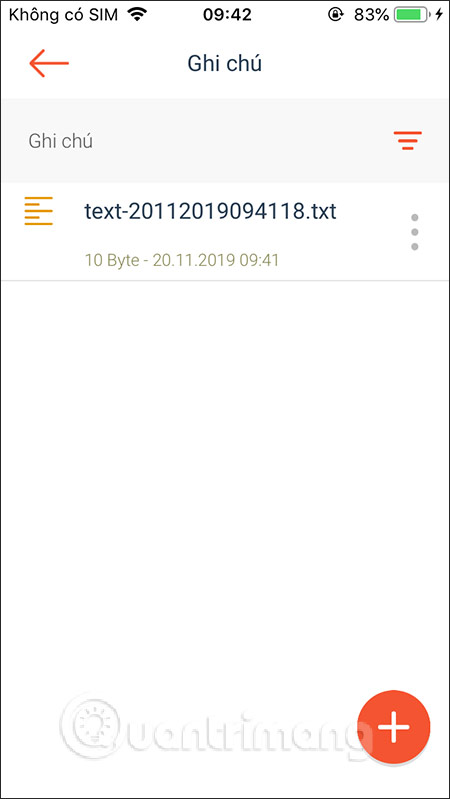
Step 7:
In the interface Add notes also press plus symbol. Display content filling interface including note name and note content. Press Create button to add.
Step 8:
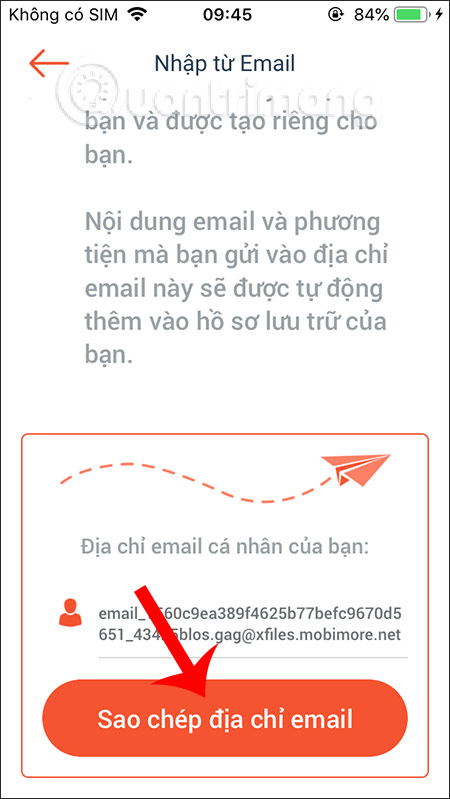
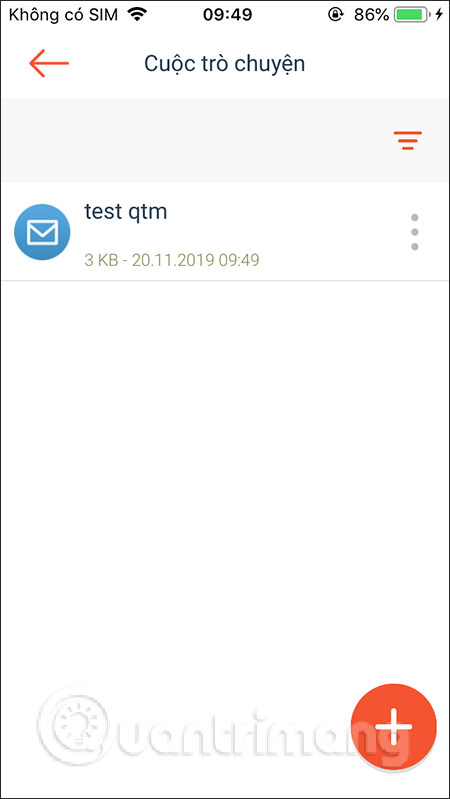
In the section Conversationpress plus symbol to add and will see a display of messaging apps to choose to save the conversation. The app supports WhatsApp, LINE, Tango and Email. Select the application you want to archive chats and follow the instructions.
Only the email part you are provide a personal email address used to receive email. All conversations sent to this email will be saved on xFiles. We can still browse mail as usual.
Step 9:
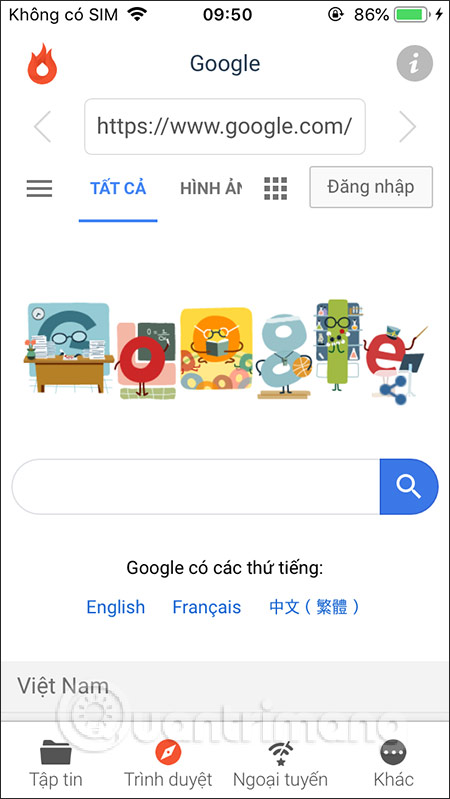
Switch to Browser feature on the app. The web browsing interface on xFiles is very simple. Surfing history is not saved. Currently, the browser does not have a search feature, so if you want to access it, you must enter from Google, or enter the exact website address.

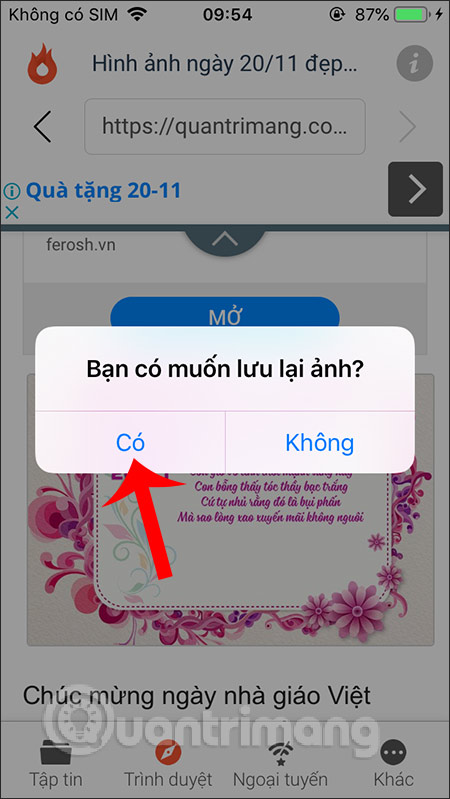
The browser only allows downloading of images, long press on photo then choose Have to save. The photo is saved to Public folder in the File section.
Step 10:
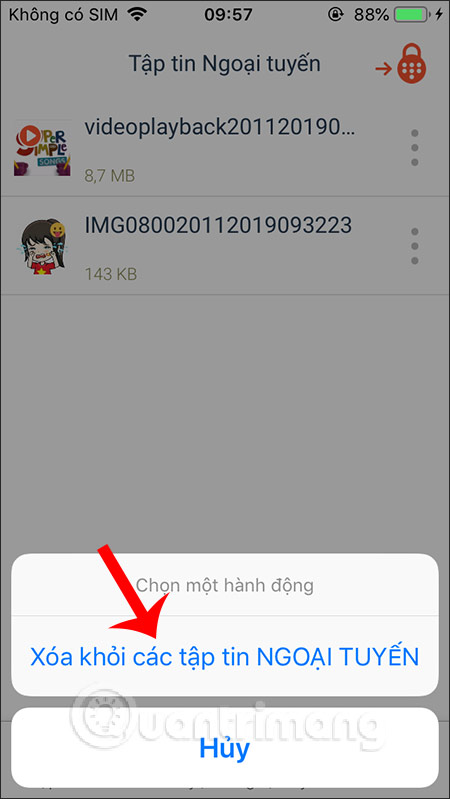
Offline Section will save the files that we have turned on offline mode to view offline, or save it to Photos on your device. If Which file do you want to delete from Offline? then press the 3 dotschoose Remove from Offline files. Note Users need to enable offline mode first for files while connected to the network to be able to use this mode.
Step 11:
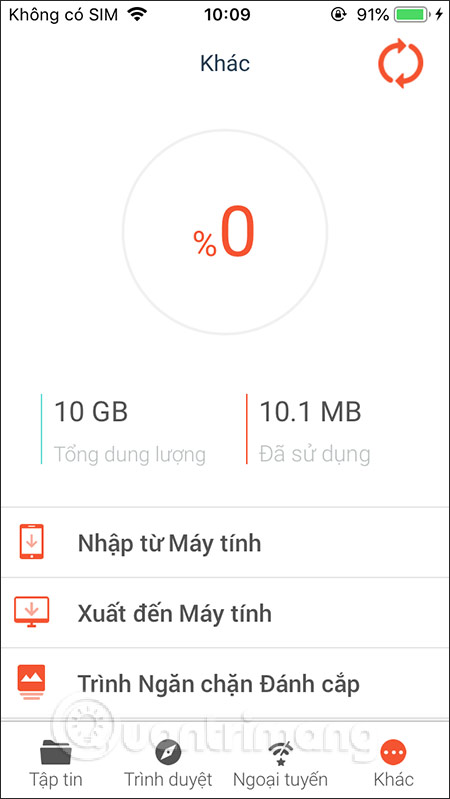
Switch to Other we’ll see the amount of cloud storage you’ve used from xFiles’ servers. The application provides 10GB of cloud storage to download files. Below are other options from the app.
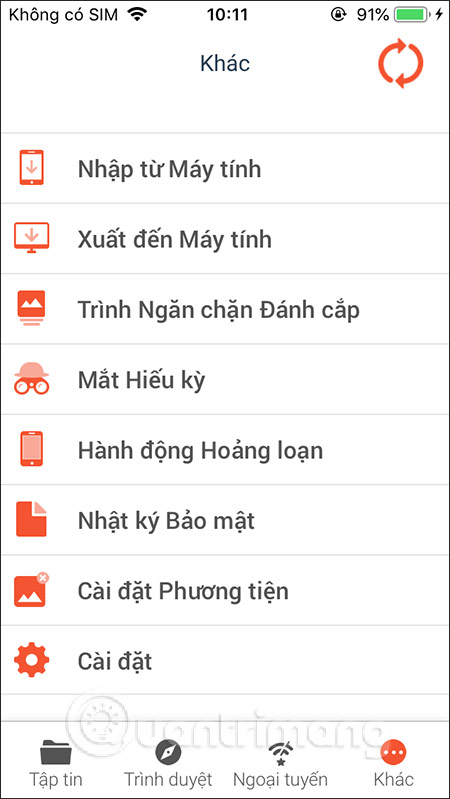
Step 12:
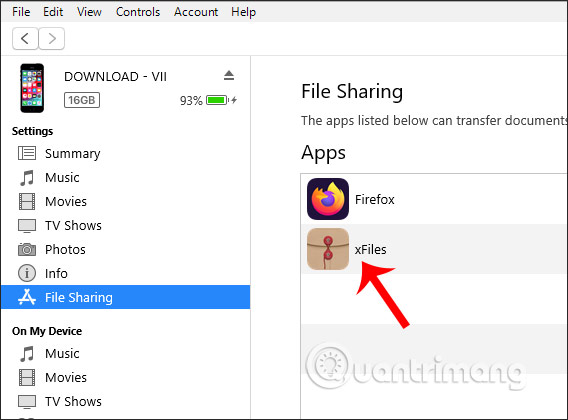
For example, you want Transfer videos and photos from computer to iPhone via xFiles, connect your iPhone to your computer and then turn on iTunes. In iTunes interface click iPhone icon. Then click on File Sharing in the left sidebar and then press select xFiles.
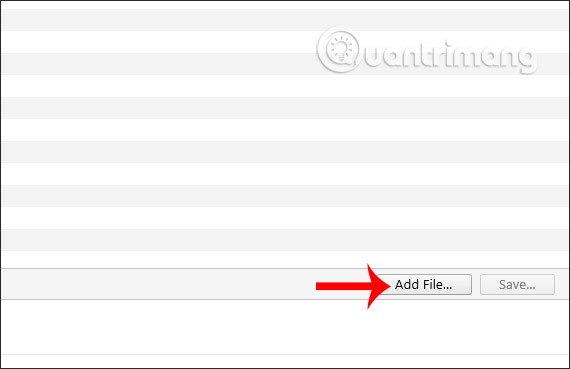
Press Add Files to select files from your computer and then upload them to iTunes and upload to the app.
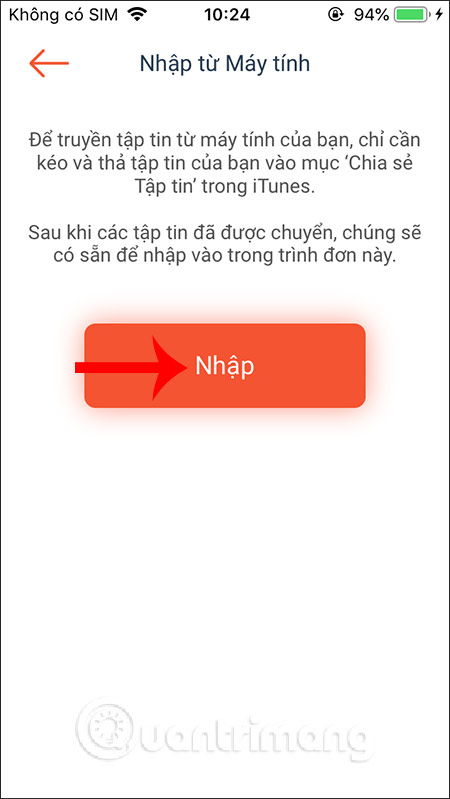
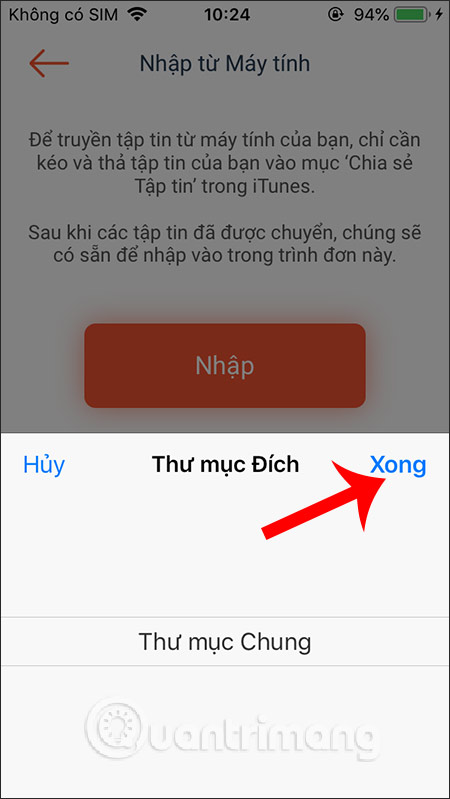
Come back xFiles app we tap Import from computer already press Enter in the interface. Choose next in-app save folder already press Done is to be. The data is immediately loaded into the application.
Step 13:
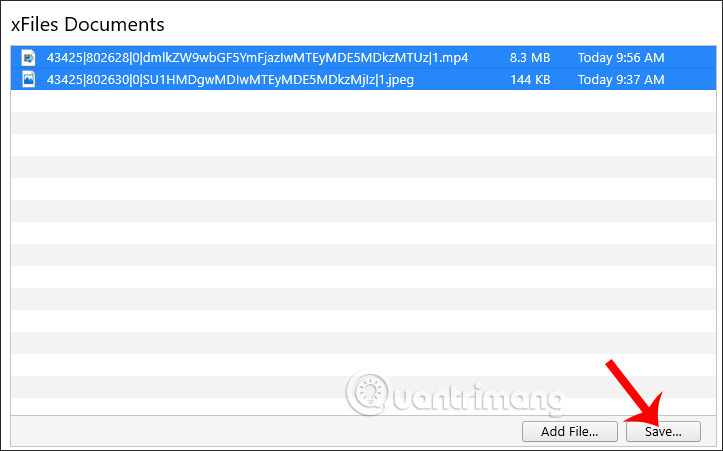
If you want transfer files from xFiles to computer well connect iTunes with computer and select File Sharing > xFiles. Now you will see files are in the Offline folder to transfer to the computer. Press select file already press Save to save to the folder choose then is okay.
Step 14:
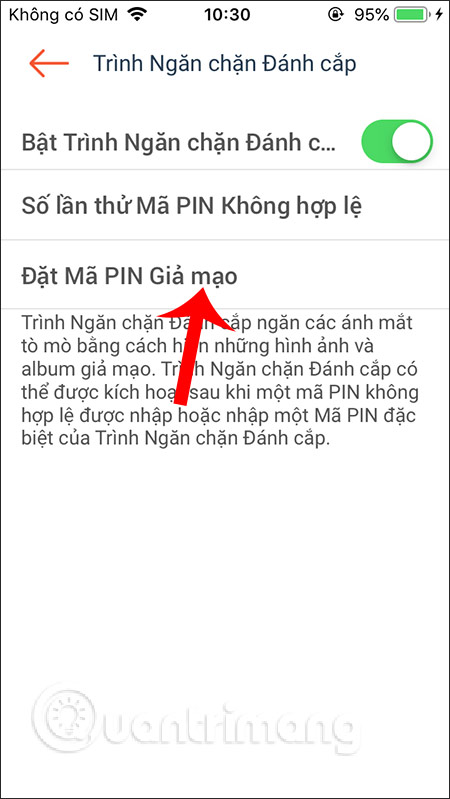
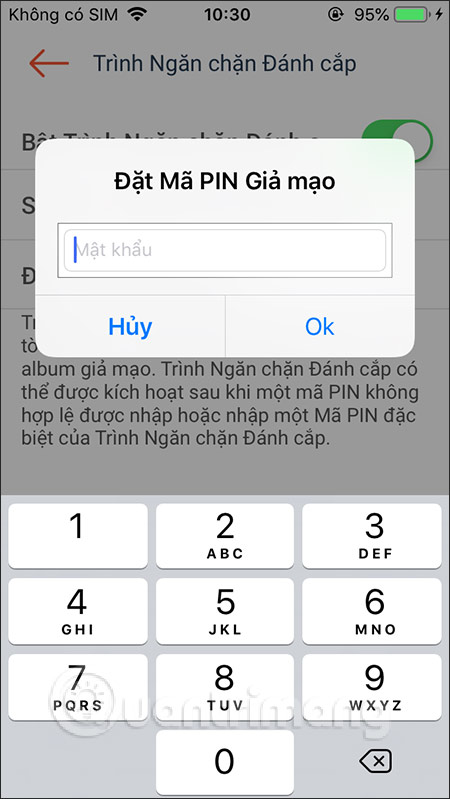
To want more app security then use the feature Theft Stopper. You are now selected create fake pin code and okay set the number of invalid pin attempts.
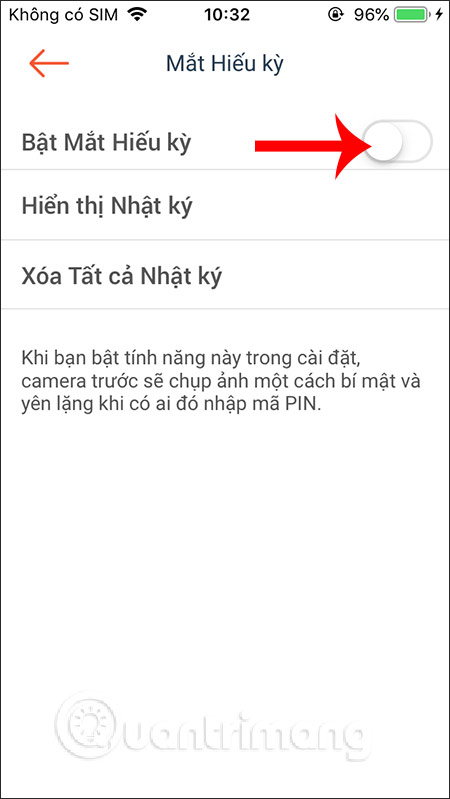
Step 15:
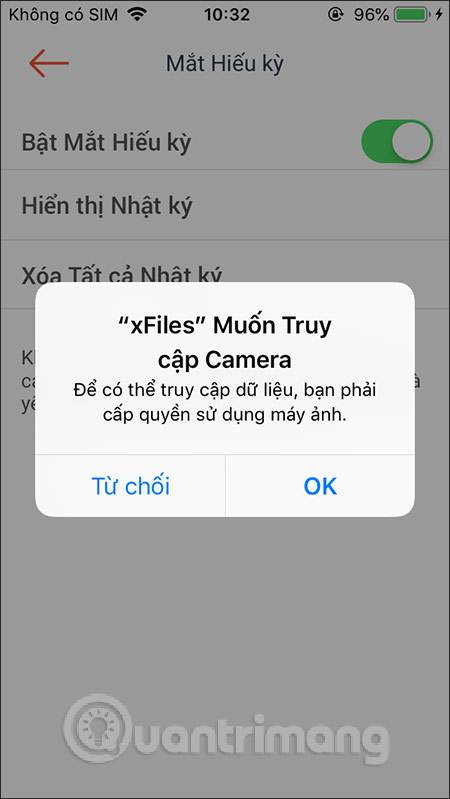
Feature Curious eyes will take a photo of anyone who intentionally enters the pin code to access the application.
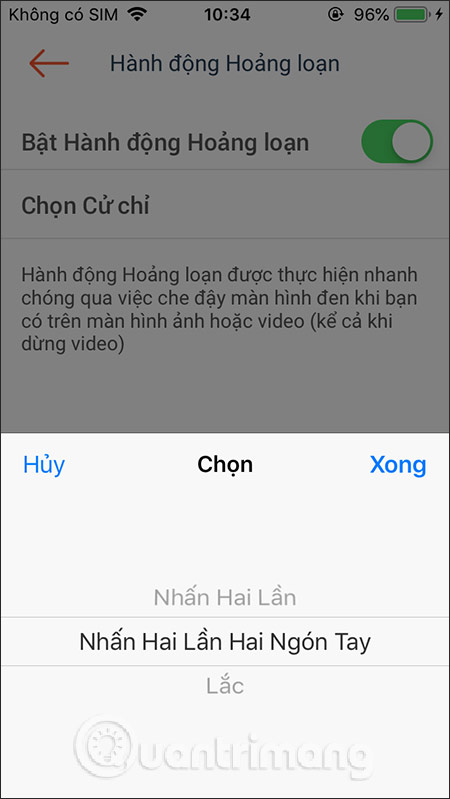
Panic action will cover the screen with gestures when you view image or video content, even when the video is paused. Enable feature then press Select Gesturesincluding double-tap, double-tap with two fingers, and shake the device.

Step 16:
Part Security Diary Will choose trash can icon to clear the activity history on the app. Media settings section Select whether or not to delete the original file after it has been copied to the application.
Finally setting change part for application. You should select Ask for password mode every times to lock the application when exiting the application. Or we should click on the padlock icon to lock the app again when not in use.
Above are the entire instructions for using the xFiles application to hide data and some other features. All content is hidden and hidden inside the application through a password set by you.
Wishing you success!
Source link: How to use xFiles to hide photos and contacts on iPhone
– https://techtipsnreview.com/