
NOTE: Welcome to the Knowledge Sharing Blog! If you encounter any errors during use, such as error in download link, slow loading blog, or unable to access a certain page on the blog … please notify me. via Contact page. Thanks!
It is undeniable that Windows 10 in particular and Windows operating systems in general is one of the most popular computer operating systems today, especially for gamers.
Normally, when we want to create a USB Boot to install Windows 10 on another computer, we will often create it on the familiar Windows operating system.
And of course, articles that you often read on the Internet are also often guided on the Windows environment.
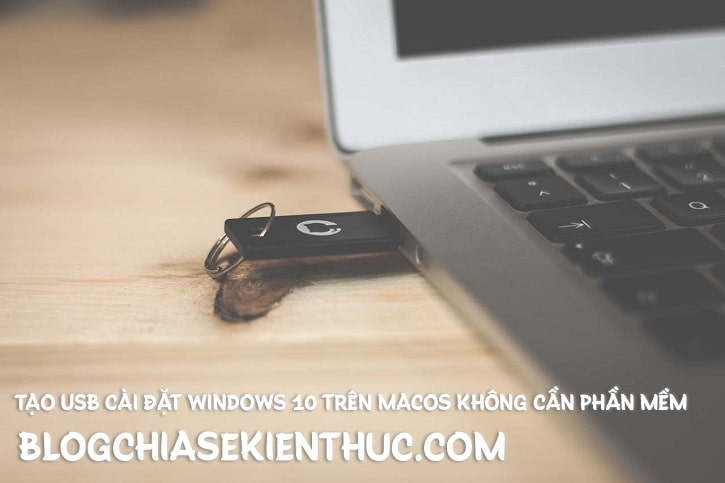
But, if you are a Mac user, but you want to create a USB containing the Windows 10 installer to install for your newly purchased Laptop / PC, what should I do? Didn’t have to go to a temporary shop or borrow a Windows computer to do it!
Or do you have to take the case to public for some people who install Win to work, and then lose a few hundred thousand more?
Read more:
Don’t worry (!) Because in this article, I will guide you How to create Windows 10 installation USB right on macOS without any 3rd party software!
#first. Let’s talk a bit …
As you all know, by default, Apple’s macOS operating system does not support the hard drive format commonly used on Windows is NTFS (New Technology File System), so you will not be able to read or write NTFS partitions on macOS.
This is understandable when Microsoft and Apple are competitors, in contrast, the hard drive format APFS (Apple File System) and HFS (Hierarchical File System) is also not supported by Windows 10.
Also for this reason, you cannot format your USB in NTFS format on macOS to create Windows 10 USB.
In addition, on macOS, there are not many applications that support creating USB Boot like on Windows 10, but if there is, it is also very difficult to use, so creating a bootable USB is quite difficult.
That is why I encourage you to use the software Paragon NTFS for Mac To format the USB to NTFS format, this is a paid software, but you can try the full functionality of the software in the first 10 days.
#2. What needs to be prepared?
Before starting to follow this article, you need to prepare the following:
- A Macbook computer has pre-installed Paragon NTFS for Mac software, you can download the software here !
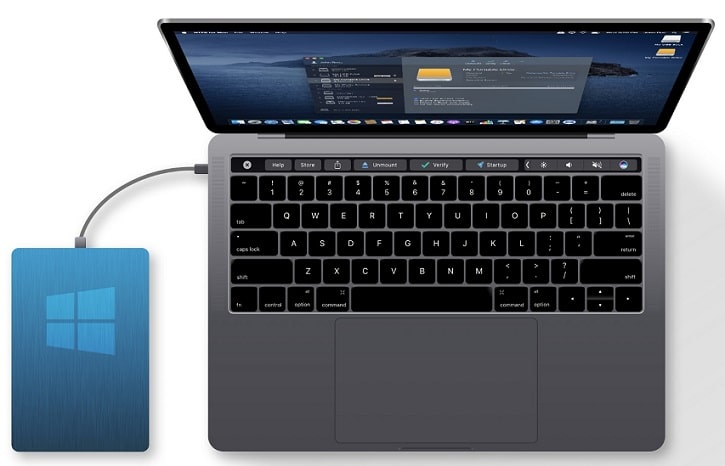
- A USB with capacity of 8GB or more ..
- An ISO file (installer) of Windows 10 64-bit version. Download here or here!
// Only support 64bit Windows version, guys!
# 3. Create Windows 10 Install USB on macOS with the support of BootCamp Assistant
+ Step 1: Just like that, now plug the USB into your Mac => then open up Paragon NTFS software to reformat the plugged USB drive.
Select the USB you just plugged in by clicking on its name in the list in the left sidebar of the application, remember to select carefully lest format the wrong drive lose all data :).
+ Step 2: Next, click on the word Erase (with an eraser icon above) => now the hard drive format setting window will appear.
- Current
Volume Filesystem, ie format the hard drive, you let it defaultMicrosoft NTFS. - And the hard drive name line (
Volume Name) you can do whatever you like => then finally clickEraseto start reformatting the USB drive to NTFS.
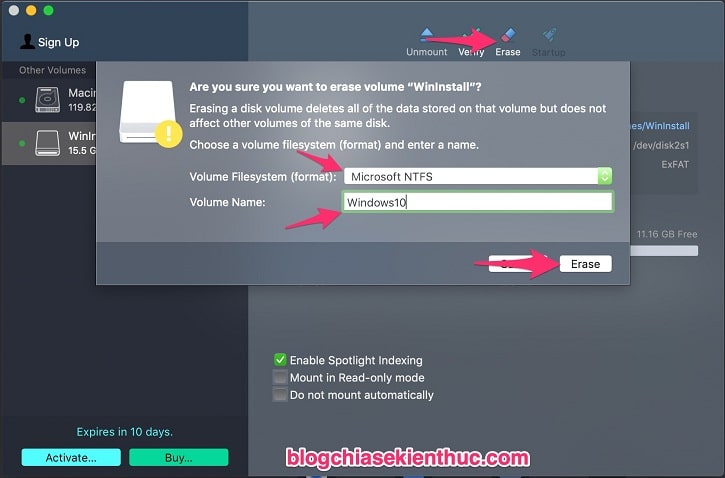
Here, I used a 16GB USB 3.0 with Windows 10 installed, so the format took place quite a long time, it took 3-4 minutes, not as fast Format as on Microsoft’s Windows.
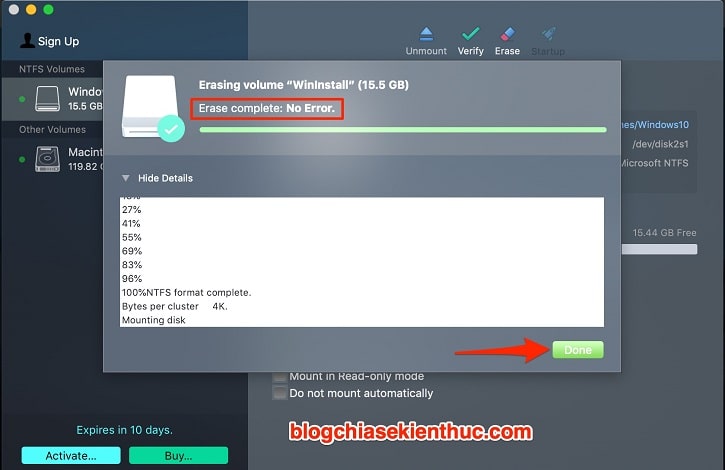
+ Step 3: After Format hard drive completed, if you see the line Erase complete: No Error then the USB format is finished, you can press now Done and turn off Paragon NTFS already.
+ Step 4: Now use the key combination Command + Space open Search Spotlight on macOS => and then enter keyword search box Boot => and open the application Boot Camp Assistant up.
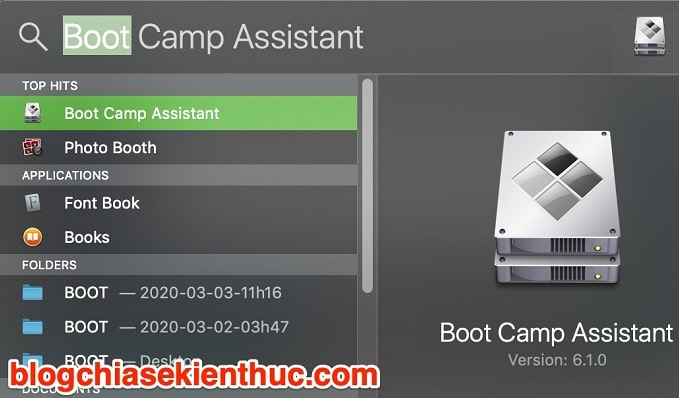
+ Step 5: Boot Camp Assistant is probably a tool that is not too unfamiliar to people using Macbook anymore.
It is a tool that helps you install Windows 10 on a Mac “easier than eating candy” and of course this software is also a powerful tool in creating Windows 10 USB installation when you do not have a Windows computer.
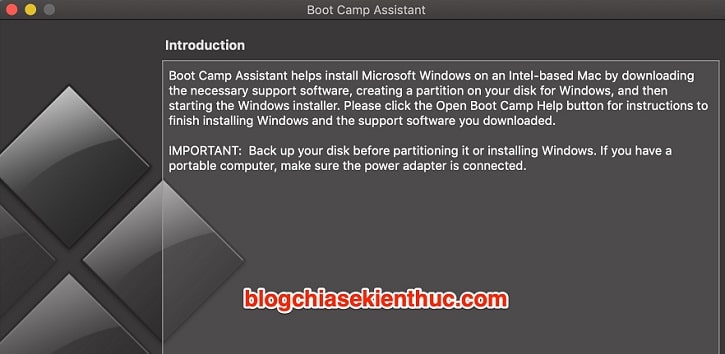
The introduction will be the first one we see after opening Boot Campt Assistant Up, you can read through these lines to know more about the function as well as notes when using Boot Camp => click Continue to continue.
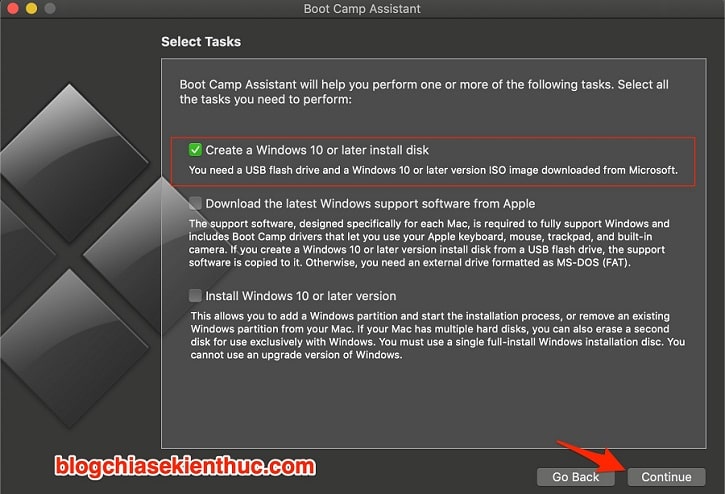
+ Step 6: At this step you need to pay attention do not press tiếp tục Always okay, the default is that all 3 lines below will be checked, but since we just need to create a Windows 10 bootable USB for a normal computer, you should leave the last 2 lines and keep the check mark in the first line as shown. home.
Note: You only tick the last 2 lines when you want to create USB BOOT to install Windows 10 on another Mac, or install Windows on the Mac you are using only, this problem, I will say more clearly in a post write another, for now it’s temporary like that!
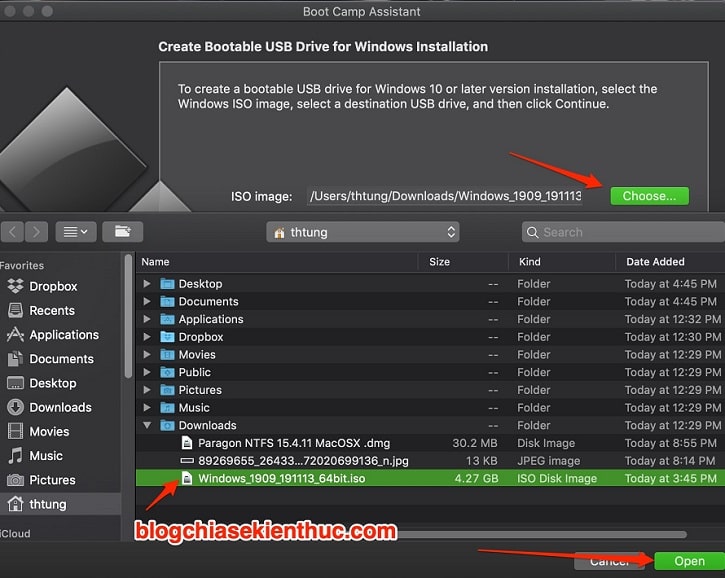
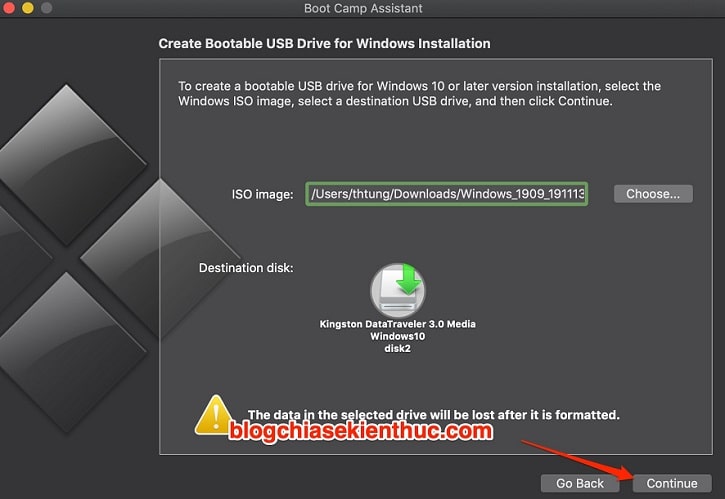
+ Step 7: Finally, select the file *.ISO (the installer) of Windows 10 that you have prepared earlier.
Note is Boot Camp only supports 64-bit Windows That’s all, so from the beginning I gave the link to download Windows 10 64bit version. But now, probably no friends have <4GB RAM to use 32-bit Windows anymore, right ?
Usually this software will automatically detect the USB as well as the .ISO file of Windows 10 that you put in the folder. Downloads as shown below.
Also if not detected or wrongly detected file *.ISO then you can reselect by clicking Choose => Navigate to the location where the file is located .ISO prepared => Press Open is done.
+ Step 7: Finally, check again that the .ISO and USB files have been selected correctly, => if OK then click the button Continue to start the process of creating Windows 10 installation USB on macOS.
Soon there will be a warning that this will delete all existing data in the selected USB => you press Continue again to ignore the message and continue.
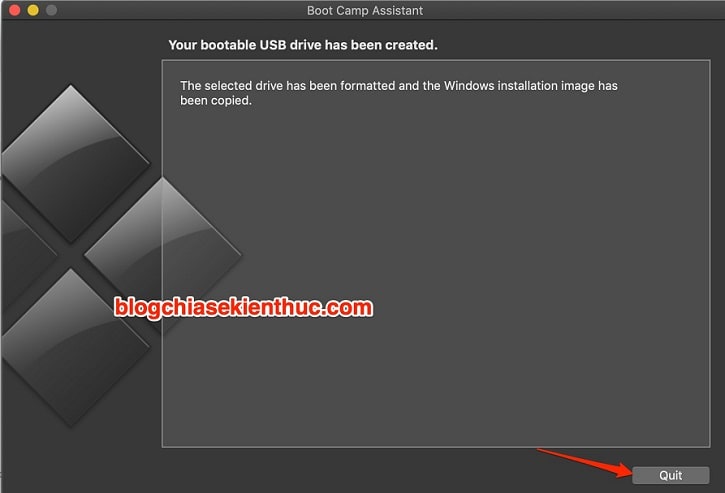
+ Step 8: And so the process of formatting the hard drive and copying Windows files has started, if nothing happens, just sit and have a cup of coffee and wait for it to finish running ?

The USB creation process is also quite fast and according to me it seems a little faster on Windows 10, guys.
The process of creating Windows 10 installation USB is complete, you will receive a message as shown below. Now you can press Quit => then Eject USB out of macOS and install Windows 10 normally!
# 4. Epilogue
So I have just finished guiding for you How to create Windows 10 installation USB on macOS extremely simple and fast.
Hopefully, after reading this article, you will no longer have to spend time going out to check out or borrowing a Windows computer to do it.
If you find it good, do not forget to share and rate this article for me. Good luck !
CTV: Nguyen Thanh Tung – techtipsnreview
Note: Was this article helpful to you? Don’t forget to rate, like and share with your friends and relatives!
Source: Instructions on how to create Windows 10 USB install on macOS
– TechtipsnReview


