
Photoshop’s Select Subject is an AI-based tool for making automatic selections. One of the most common uses of this tool is to remove people and objects from the background.
In this tutorial, Quantrimang.com will show you everything you need to know about Photoshop’s Select Subject tool, as well as how to use it for simple and complex background removal.
What is Select Subject?
Select Subject in Photoshop is an AI-based tool commonly used to select objects or people. Once the object has been selected, a background removal mask is created.
This allows the user to then place objects on completely different backgrounds or save selections for later use, such as layering them as masks in Photoshop.
When to use Select Subject?
There are several area selection tools in Photoshop besides Select Subject, each suitable for specific selections. The best time to use Select Subject is when there is a clear person or object in the composition that you want to isolate.
Photoshop will make the selection in seconds, making it easy to make further edits.
Select Subject workflow for simple background
Portraits with a simple background are perfect candidates to use the Select Subject tool. In many cases, you will get a perfect choice. If it’s not perfect, then a few slider or brush adjustments will fix the problem.
Let’s see an easy selection with just a few small adjustments. If you want to follow along, you can download this example image from Pexels:
https://www.pexels.com/photo/woman-in-white-turtleneck-shirt-and-black-leather-jacket-4750165/1. With the image loaded into Photoshop, duplicate the layer Background by pressing Ctrl + J. You can deselect this layer at any time, but it’s best to have a copy to create additional layers using the original pixels.
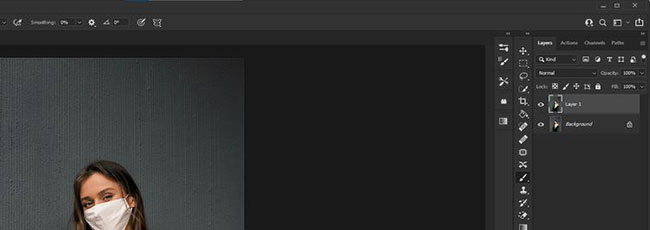
2. There are several ways to access the Select Subject tool. If you are already working with one of the selection tools, like Object Selection or Quick Selection, then Select Subject will appear on the top menu bar by default. Otherwise, with Layer 1 active, go to Select > Subject.
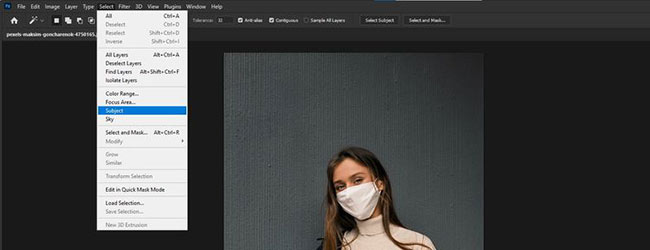
3. The object in the image will be selected. Click the mask icon in the bottom right menu bar.
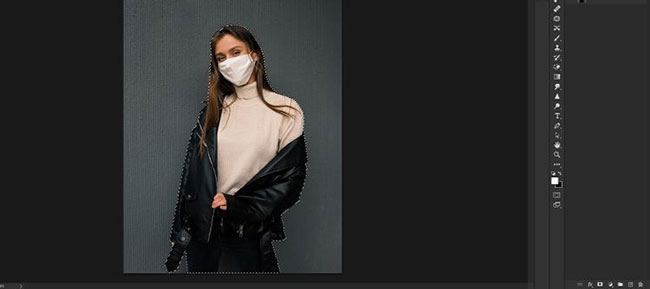
4. A mask will be created for the subject in Layer 1. If disable layer Background, you will see a selection containing the image of a woman.
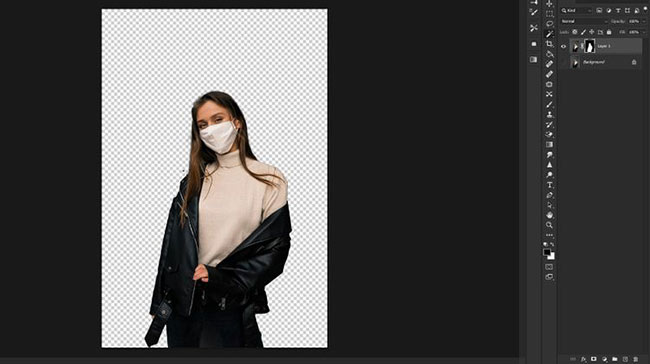
Photoshop has done a very good job of removing the woman from the background. But always double-check your images for areas that need more attention. In this image, there is a prominent black patch next to the woman’s shoulder that can be easily corrected with the Brush tool.
How Select Subject works for complex selections
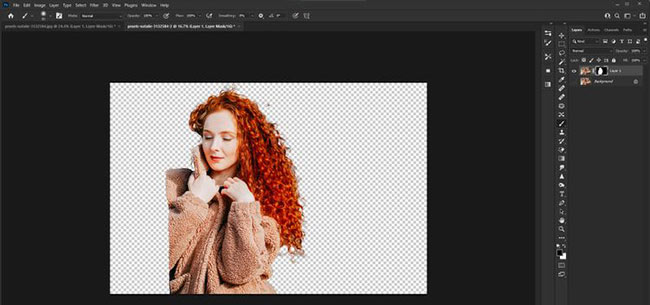
For most Photoshop users, fur and especially hair are difficult to deal with. In this example, the article will use a different technique for audience selection.
First, make a selection like we did before. Duplicate that layer and make some slider adjustments. Then using a layer mask you can erase any unwanted pixels.
If you want to follow along, you can download this example image from Pexels.
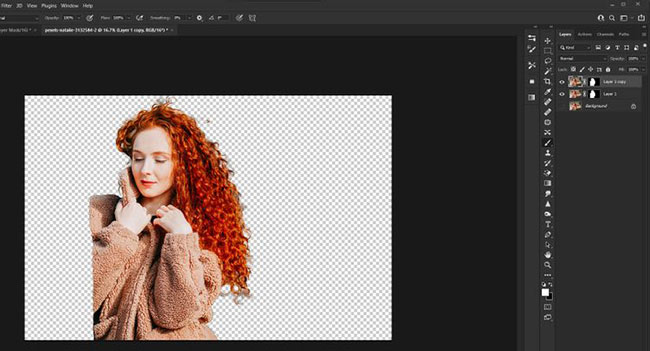
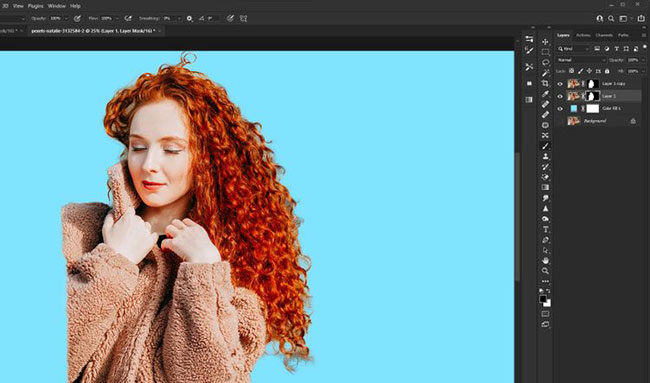
https://www.pexels.com/photo/long-curly-red-haired-woman-wearing-brown-fleece-coat-3132584/1. Repeat steps 1 through 4 in the above section. Make sure you deselect the layer Background as shown below.
2. With Layer 1 active, press Ctrl + J to duplicate the layer.
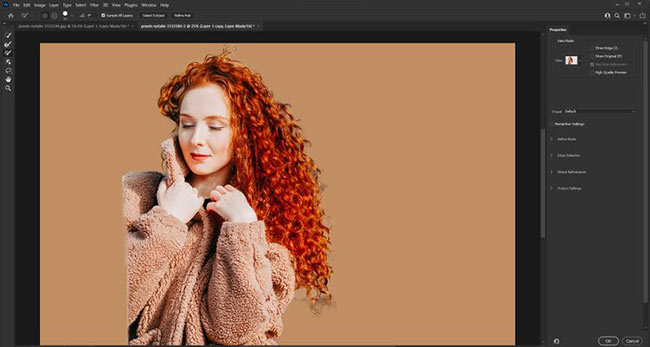
3. Double click on the mask Layer 1 to open the control panel Properties.
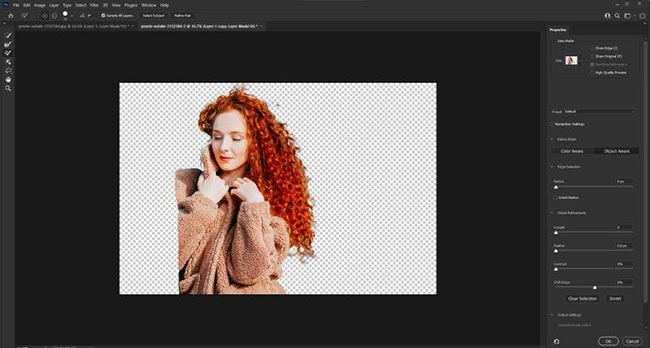
4. In the menu View Mode, select view On Layers. Then check the box Real-Time Refinement.
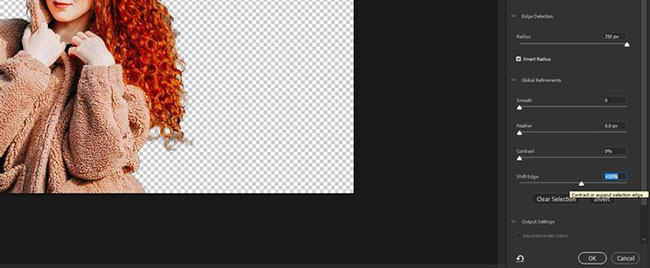
5. In Edge Detection, move the slider Radius to the extent 250. Check box Smart Radius.
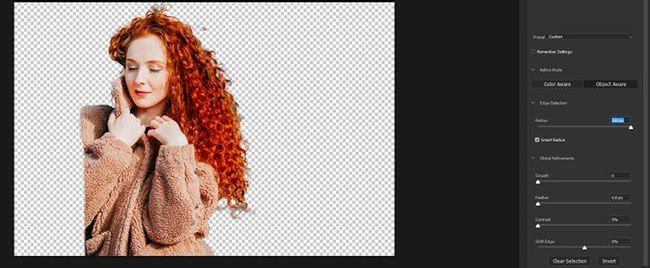
6. Change the slider Shift Edge Fort 15. Then click OK to accept the changes.
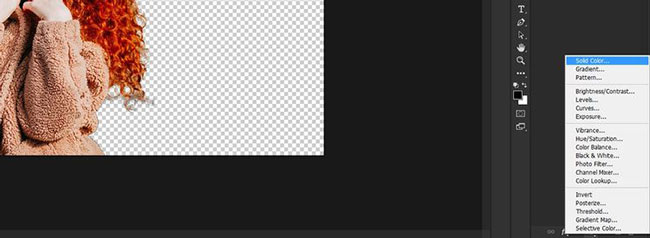
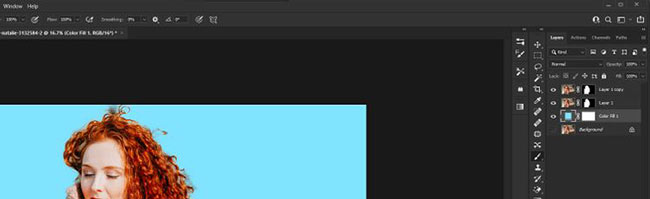
7. Create an adjustment layer Solid Color through the menu at the bottom right.
8. In the menu Color Picker, select any light color and press OK.
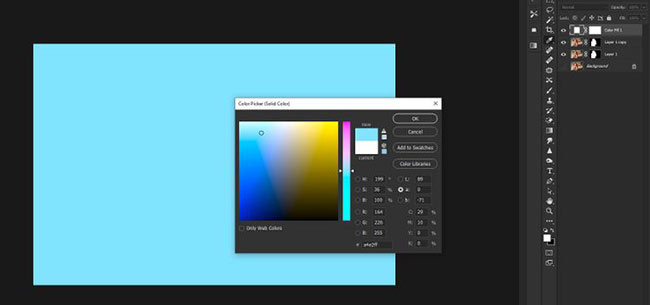
9. Select layer Color Fill 1 and drag it down right below Layer 1 Copy in the layer stack as shown below.
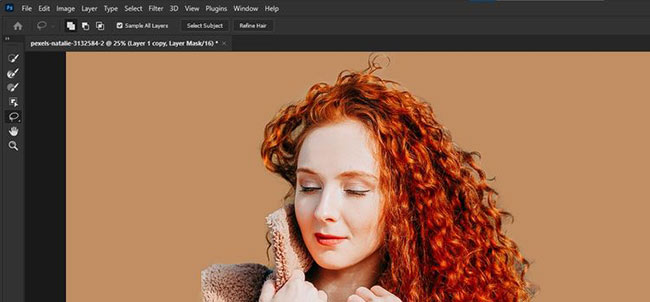
10. Using tools Brush (Press REMOVE), remove unwanted pixels in Layer 1 and Layer 1 Copy. You can undo any mistake by pressing Ctrl + Z.
There is no set of rules for choosing and covering hair; Each image will require different slider methods and combinations. The article will briefly discuss these other useful tools below.
Additional Features of Select Subject
Whenever you choose the option Select and Mask, or just double-click any layer mask, you’ll be taken to a menu screen with three different toolbars.
On the left are the various selection tools. At the top you have Select Subject and Refine Hair. And on the right is the properties menu from which a variety of adjustments can be made targeted to a specific audience and generally applied.
Selection tools
On the left panel you will find the following: Tools Quick Selection, Refine Edge Brush, Brush, Object Selection, Hand and Zoom. All of these can assist in the selection process if needed.
At top, Select Subject and Refine Hair can also be used to make new selections.
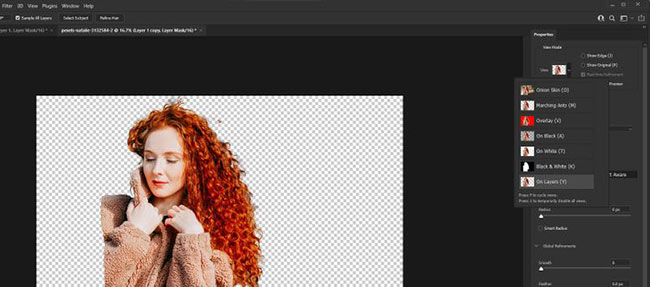
View Mode
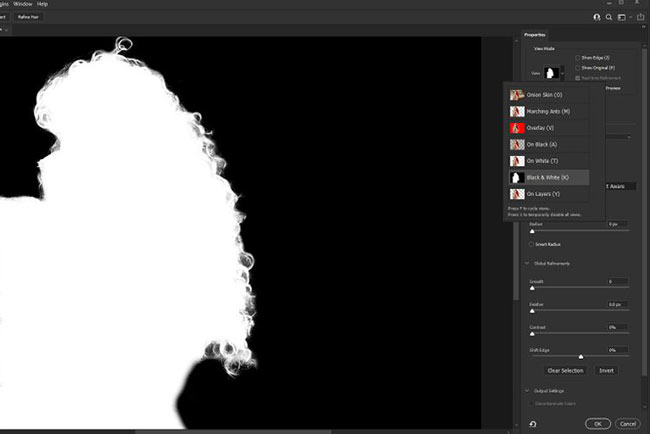
The article used a view in View Mode, but there are several other options that can be useful in different situations. View mode Black and White extremely useful if you have a light background or a complex background and just need a simple mask view to work with without distractions.
Refine Mode
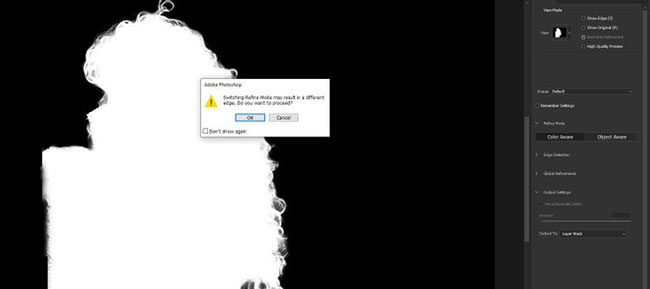
In the submenu Refine Mode, there are two modes you can use to help make additional selections, which are Color Aware and Object Aware. When either mode is selected, you will be notified via a pop-up warning. Both of these options can be useful for complex selections.
Edge Detection
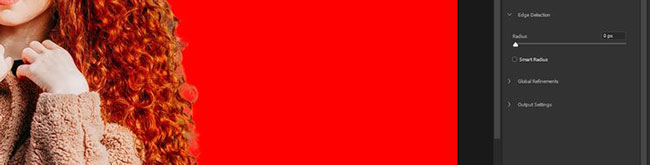
Menu Edge Detection includes two features; scroll bar Radius and box Smart Radius, can be turned on and off for different results. Scroll bar Radius very useful for complex selections like hair and fur.
Global Refinements
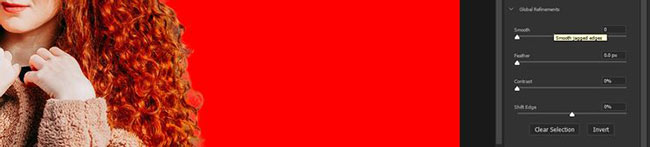
Sliders Global Refinements is a set of different options to help shape the overall selection in relation to the object. These sliders include Smooth, Feather, Contrast and Shift Edge. There are two more boxes below the slider for further adjustment, which are Clear Selection and Invert.
There are no established guidelines for using these tools in any sequence. Usually, you will have to experiment and find which slider works best for your images.
Output Settings
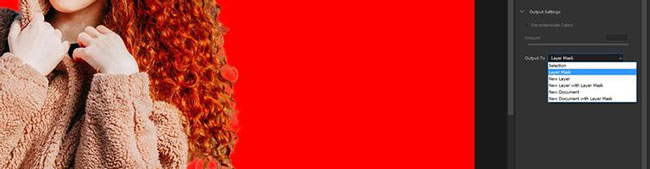
Shouldn’t be missed Output Settings (output settings). This is a very important menu that determines how your selection will be applied to the layer when you have finished selecting the object.
There is also a box Decotaminate Colors. And in the drop-down menu Output To, you can choose the best option for your selection.
Source link: Learn about the Select Subject tool in Photoshop
– https://techtipsnreview.com/


