
NOTE: Welcome to the Knowledge Sharing Blog! If you encounter any errors during use, such as error in download link, slow loading blog, or unable to access a certain page on the blog … please notify me. via Contact page. Thanks!
Yes ! What Ram is, I have a very specific and clear sharing article, if you do not know, you can look back on my blog to read it again.
And in this article I will guide you the 2 easiest and most effective ways to check if the RAM on your computer is faulty or not?
This problem has had a lot of friends thanks to me to write the tutorial but until today I can write a complete article for you.
Actually, there are instructions on the Internet, but many of you just like to write the idea. Well, write…. ?
Read more:
Why should you check RAM? and do you have to do this? The answer is not needed if your computer is operating normally.
However, if you like, you can still self-check and periodically check your RAM ? in some cases, you must test ram if the computer frequently encounters errors such as blue screen, computer. can’t boot up, image is broken or maybe the computer reboots automatically…. so that you can also provide timely solutions.
Okey, on the main issue in today’s article, I will guide you in detail how to check RAM errors without using software and another way that is to use the Memtest86 software.
I. Use Windows Memory Diagnostic to check RAM errors
This method applies in case your computer is still working, which means you can still access the Desktop to operate.
Implementation: Open the Windows Memory Diagnostic tool
There are many ways to open the Windows Memory Diagnostic tool on Windows, but I will guide you through the most general way, applicable to all versions of Windows.
- Option 1: Open the Run dialog box (Windows + R) => enter keywords
mdsched.exeand pressEnterto perform/ - Method 2: Open
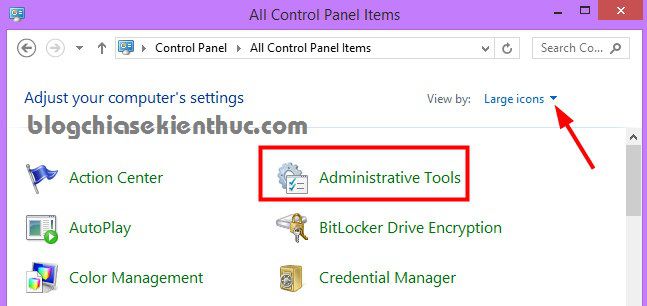
Control Panel(watch in modeLarge icons) => selectAdministrative Tools. You do as shown below.
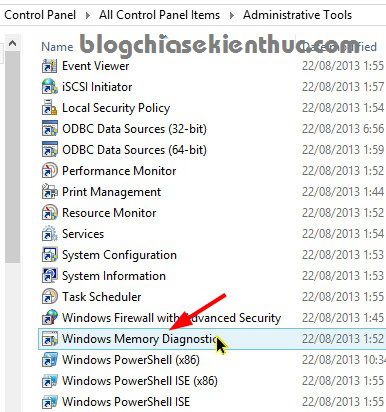
In the next window, there will be a list of useful tools in Windows, but here we are interested in the feature of checking RAM errors, so I will look for a tool called Windows Memory Diagnostic.
=> You double click to open this tool and start using.
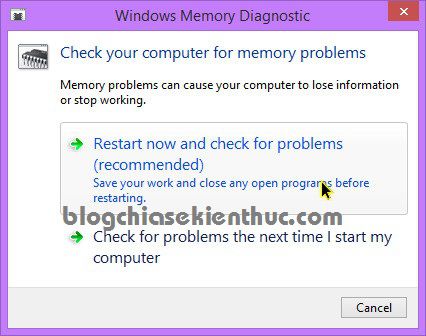
OK, the RAM test tool is activated. Now click on the option Restart now and check for problems (recommended) to start error checking.
Note: Before clicking on this option, you should turn off all running applications.
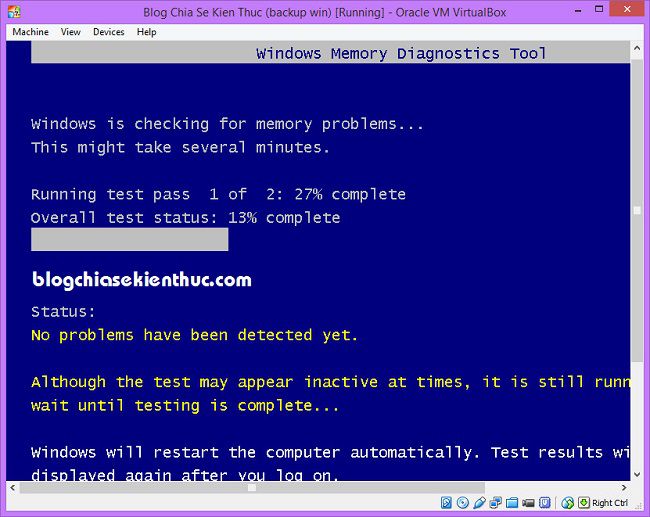
At this point your computer will reboot, the tool Windows Memory Diagnostic Tool Get enabled and start checking RAM errors on your computer. Wait a moment for the program to work.
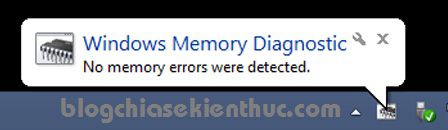
After the check is completed, the computer will reboot again and go directly to the Desktop. This will appear a notification about the current state of RAM under the Taskbar.
As you can see the message in the picture below, my RAM is completely normal and there is no problem.
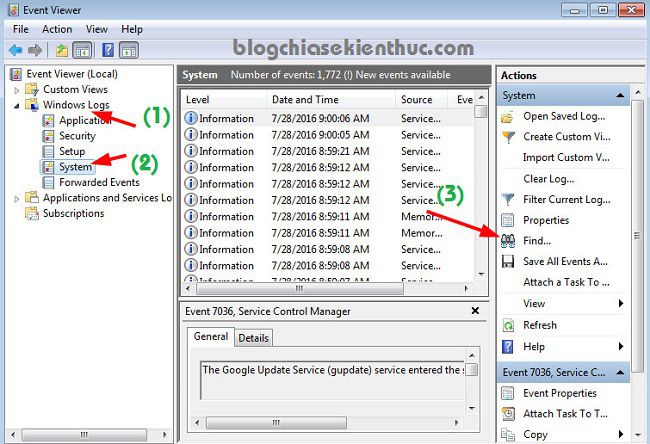
If you want a closer look at the notifications you can open it Windows Logs out to see.
Perform:
You open Event Viewer Completely similar to Windows Memory Diagnostic that I instructed above, or open the Run dialog box => enter keywords eventvwr.msc and press Enter to execute.
Click Windows Logs => select System => click Find
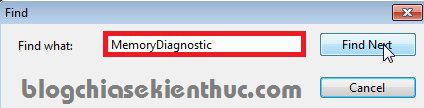
You enter the exact keywords MemoryDiagnostic into the box Find what => and click Find Next to find.
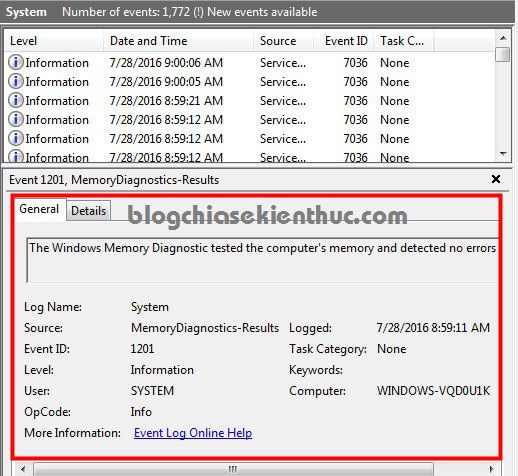
Okey! The results are available.
Tips: There are a few cases where the tool cannot be opened Windows Memory Diagnostic Tools then you can use the installation disc or the USB to install win to perform Repair again.
The way to do it is exactly the same as in this article, but instead of selecting Startup Repair, choose Windows Memory Diagnostic Tools.
II. How to use Memtest86 to test RAM
If your computer cannot access Windows, you can use memtest86 to do this. Or you simply want to test with many software and tools to get the most accurate results. Although Memtest86 is not released by Microsoft, it has been in development for a long time and is widely trusted by MS. Basically, memtest86 is somewhat accurate and gives more detailed results than Windows Memory Diagnostic tool available on Windows.
#first. Download Memtest86 latest version
Since version 5.xx onwards, memtest86 started releasing a premium version, but we only use the free version is also very OK.
#2. Steps for using Memtest86
There are two ways to use the Memtest86 software, that is, you can create a bootable usb with the ability to check the ram or create a multifunctional boot usb with Memtest86 feature.
Step 1: Create a bootable usb to test ram
Option 1: Use the tool provided by memtest86
1 / You need to prepare a USB stick, how much capacity is also => connect to the computer.
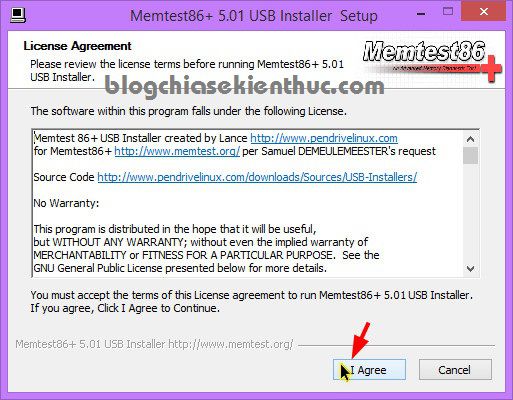
2 / Download version memtest86 V5.01 Above the other about => run the file Memtest86+ USB Installer.exe and click I Agree as shown below.
3 /: At section Select your USB Flash Drive Select the USB drive and click Create to make it bootable for the USB.
Note: You should tick
We will format....for the software to re-format the USB before burning it to your usb, the purpose of this is to avoid problems arising. But first, if there is any important data, you should copy and save it elsewhere.
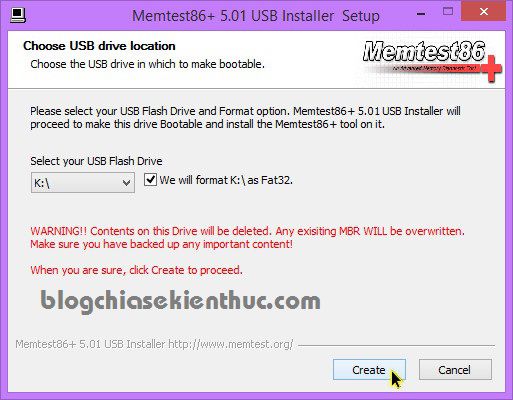
Click Create for the program to work with USB => after the program is done running, you have 1 USB is able to boot to test ram and that.
Method 2: Use a multi-purpose bootable usb
Most of the rescue usb that I introduce on my blog have built-in Memtest86 tool for you to check RAM.
And I also encourage you to create a versatile bootable usb to be more flexible in computer rescue.
In this article I will use a fully functional usb boot to guide you. If you don’t have one, you can follow that tutorial to create your own bootable usb.
Step 2: Launch memtest86
After you have got a bootable usb capable of testing usb then now we will start to test Ram, right.
1 / Please restart your computer => access MENU BOOT => boot to USB. If you do not know how to do this step, please review the article on how to access the BIOS.
2 / If you do the method 1, that is, use the tool provided by Memtest86 to make the usb boot, then right after booting into the usb you can use it immediately. If you do the method 2, create a fully functional usb boot, do the following:
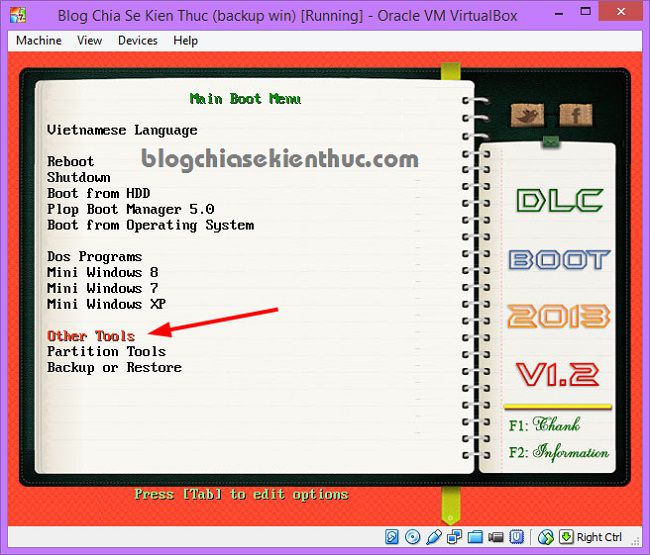
=> At Main Boot Menu you choose Other Tools
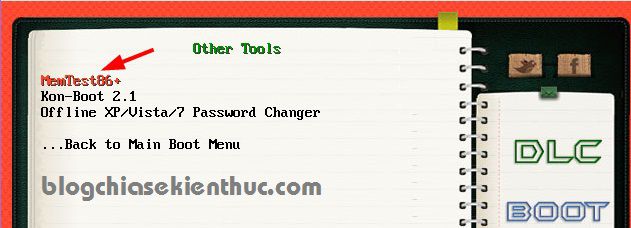
Choose MemTest86+ to open the Memtest86 software.
Step 3: Start using MemTest86
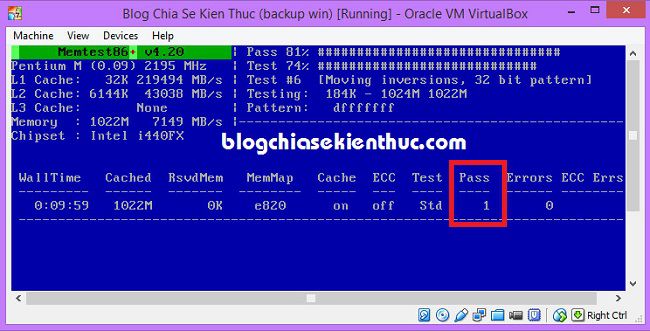
This is the main interface of the program, as soon as you open the software, it will start the error checking process immediately.
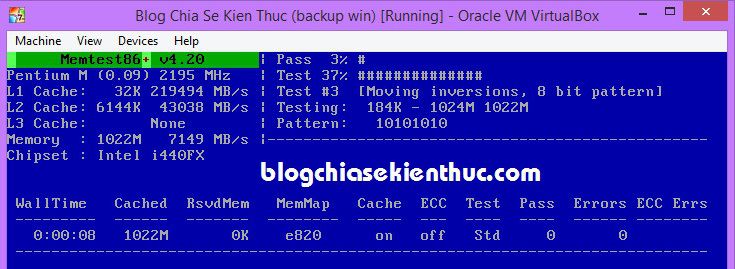
You should let it run at least to come Pass 7 okay, that will give accurate results. Errors will be provided in the section Errors Please.
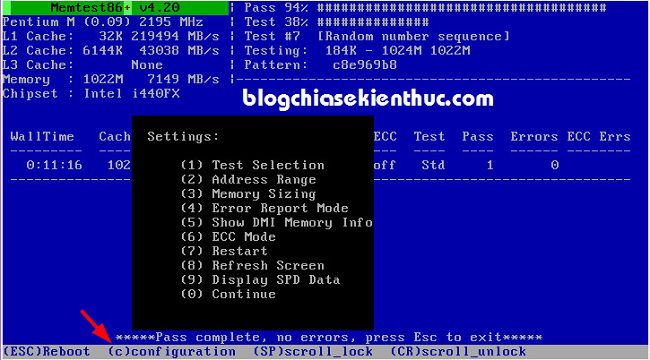
Alternatively, you can press the c key to learn more about the other features in Memtest86. Select the features you need.
Or if you do not want to use any feature in the list that appears, press Enter to continue the process of checking RAM errors.
Okey, it’s done! very simple like that.
____________________
Share a little more, if you are using any USB BOOT introduced by techtipsnreview here without Memtest86 tools, you can add them yourself as instructed below. For example, you have created a USB BOOT 1 CLICK, the way to add the MemTest86 tool will be as follows:
+ Step 1: You download this file about (Link backup) => unpacking will be a folder memtest.
+ Step 2: Copy the folder memtest that you just extracted a moment into the USB, put it in the root directory.
+ Step 3: Open your USB BOOT => Open file Menu.lst => copy this code and save it.
title Memtest86 +
find –set-root / memtest / memtest
kernel / memtest / memtest
Result:

Or if you use a tool Grub2 To create USB BOOT, for example in this article, please copy this line of code to the main.cfg file in the directory path bootgrub
menuentry “Memtest86 UEFI 32 bit” {
chainloader /memtest/memtest32.efi
}menuentry “Memtest86 UEFI 64 bit” {
chainloader /memtest/memtest64.efi
}
III. Epilogue
So I have very detailed instructions for you how to check RAM, check RAM error Very detailed computer with 2 best tools and software available today.
How about you ? What software are you using to test the RAM on your computer? Share your experience with everyone right away!
Hope this article will be useful to you, wish you success!
Kien Nguyen – techtipsnreview
Note: Was this article helpful to you? Don’t forget to rate, like and share with your friends and relatives!
Source: Share 2 ways to check RAM and check the most accurate RAM error
– TechtipsnReview


