
NOTE: Welcome to the Knowledge Sharing Blog! If you encounter any errors during use, such as error in download link, slow loading blog, or unable to access a certain page on the blog … please notify me. via Contact page. Thanks!
As you all know, Ubuntu is an open source operating system, using the Linux kernel. Ubuntu is especially good for programmers because it’s mostly done on Terminal, and Linux’s security is much better than Windows because it’s not as popular as Windows.
Therefore, many people choose to run both Ubuntu and Windows 10. The reason is because Ubuntu cannot completely replace the Windows operating system.
Normally, after we finish installing Ubuntu to Dual Boot with Windows 10, when you turn on the machine, the Ubuntu operating system will be the default operating system in Grub. After 10 seconds of countdown without any action on the keyboard, Grub will automatically run Ubuntu.
That is why in this article I will guide the set Windows 10 as the default operating system when Dual Boot with Ubuntu home.
Read more:
How to set Windows 10 as the default operating system when running Dual boot with Ubuntu
There are 2 ways to do this, you can read through it all over to choose the method that is right for you!
Method 1: Edit Boot order on Windows
+ Step 1: You load Grub2Win from Sourceforge (or Link backup). After the download is complete, extract the file => and run the file setup.exe to start the installation.
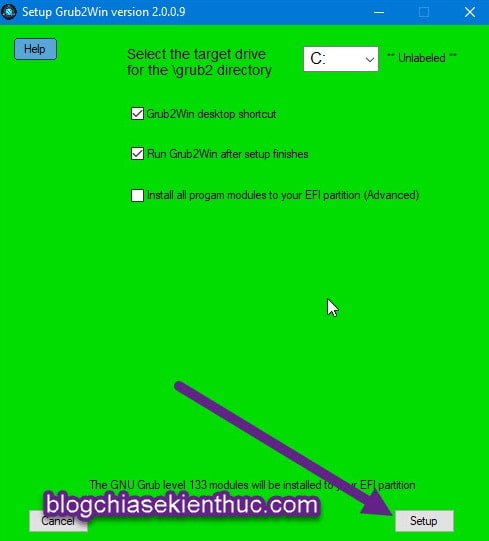
+ Step 2: Leave everything as it is, then click Setup to begin the tool installation process.
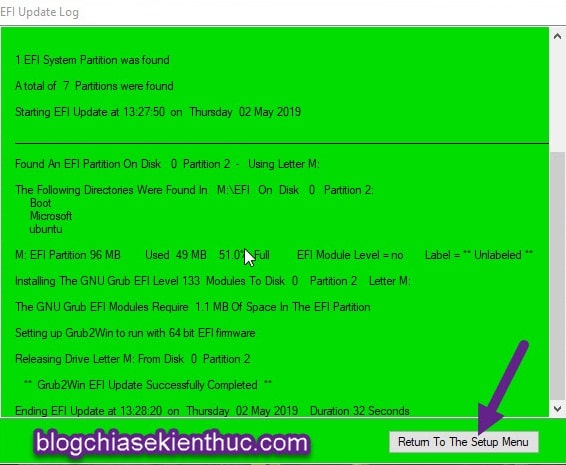
+ Step 3: Wait a while for the software to be installed. If you see the window shown below, it means that the software has been successfully installed. You click the button Return to The Setup Menu.
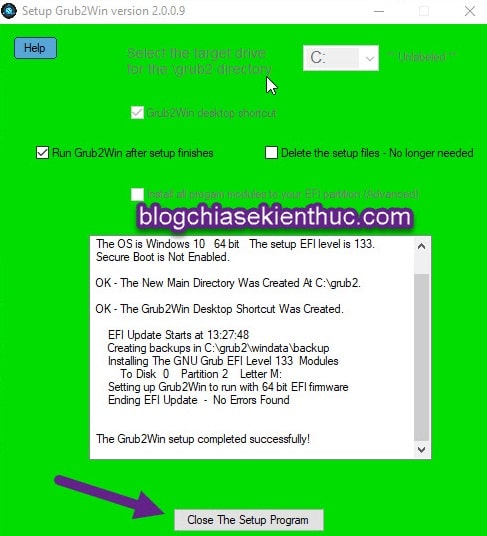
+ Step 4: Choose Close The Setup Program to close and run the software immediately.
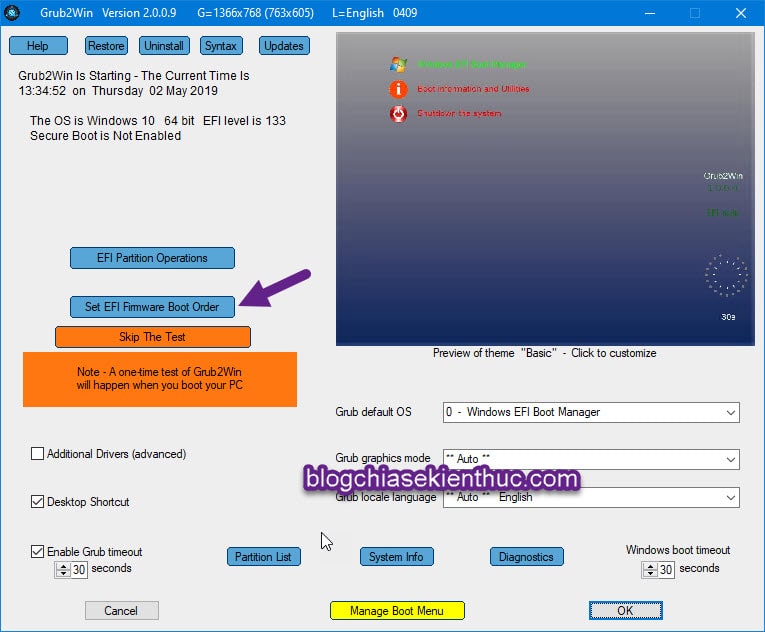
+ Step 5: At the main interface of the program just started up, select Set Firmware boot order to set the Boot priority.
+ Step 6: Click repeatedly on the up arrow button (↑) until your Windows is launched first (EFI Firmware slot 1).
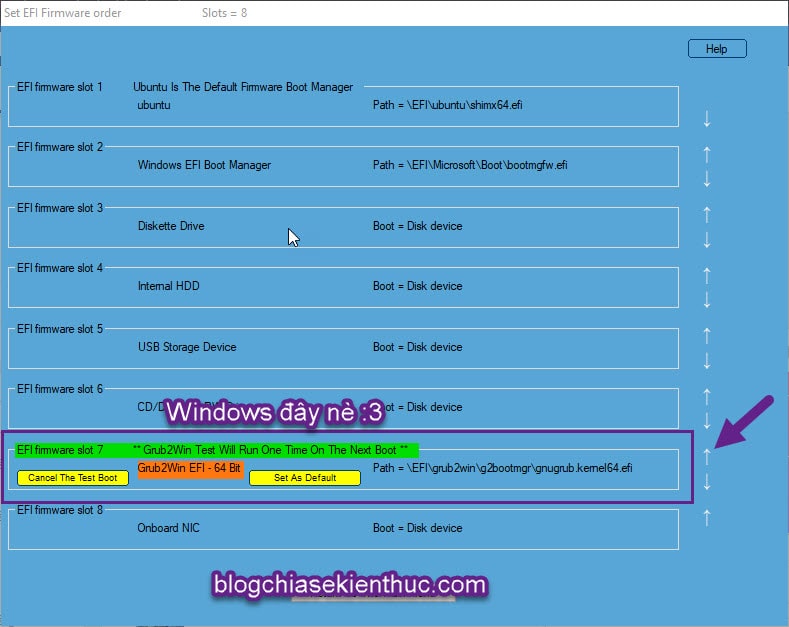
Then click Apply Update to save and apply changes.
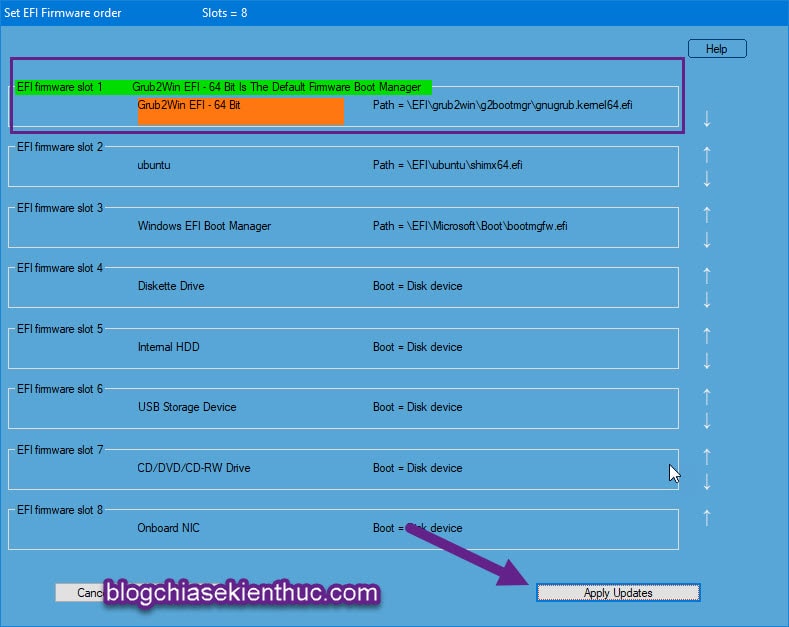
+ Step 7: Now you can reboot to test. Well, this software also has a lot of cool things for you to try. Don’t delete it yet ?
This way is also much faster and simpler than the previous one, let’s do it together!
+ Step 1: Open Terminal Up by pressing the key combination Ctrl + Alt + T. Or press the key Windows on the keyboard and then type Terminal is out.
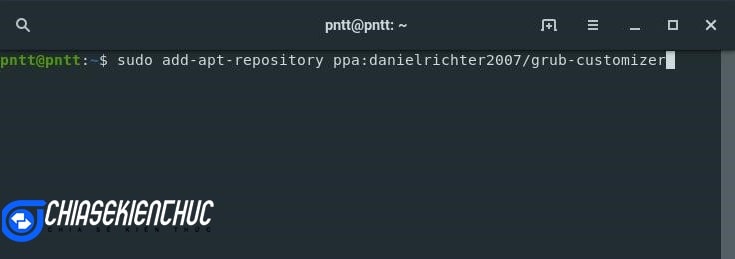
+ Step 2: Paste this command into => then Enter to add the Grub Customizer source code.
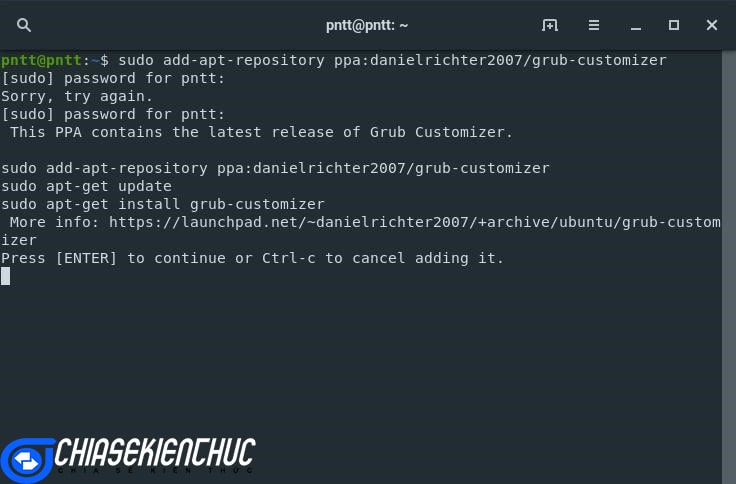
sudo add-apt-repository ppa: danielrichter2007 / grub-customizer
+ Step 3: If required Password then enter the password already Enter. Press Enter when asked as shown in the picture.
+ Step 4: Now, install the software Grub Customizer enter Ubuntu with this command:
sudo apt-get update && sudo apt-get install grub-customizer -y
=> already Enter continued.
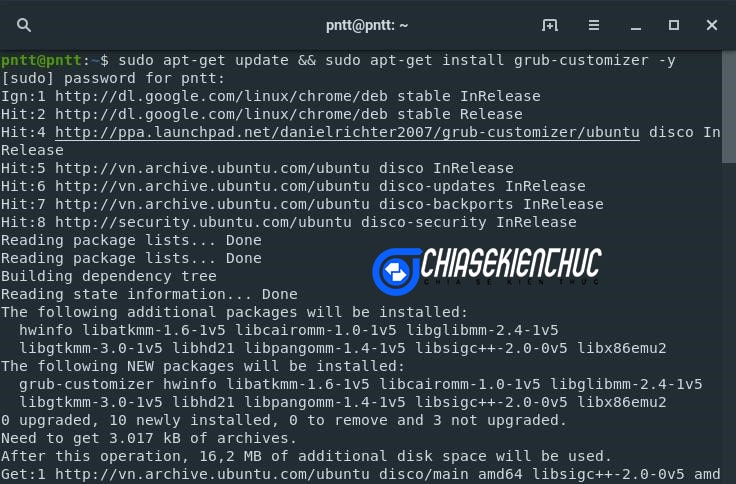
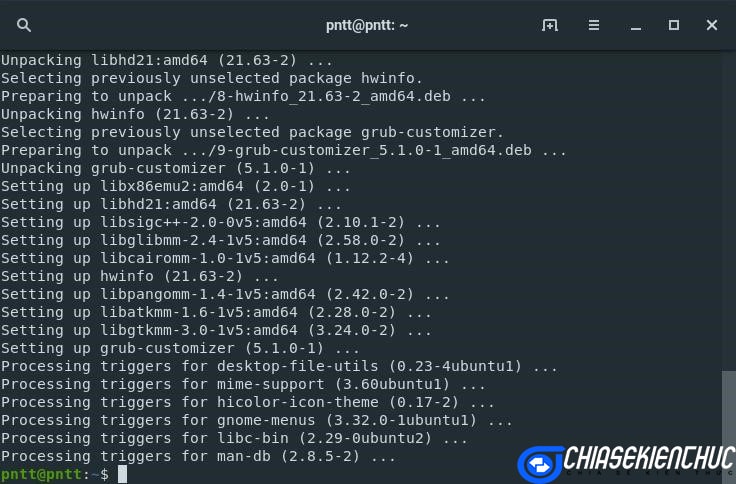
If the result after running the command looks like this and there is no such word Error then that means you have successfully installed.
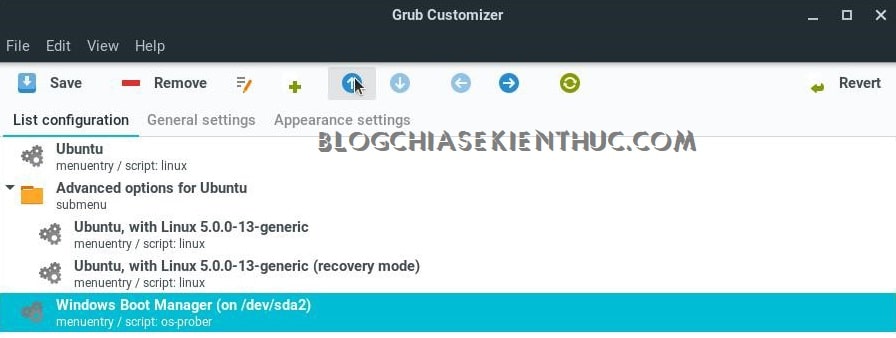
+ Step 5: Open the software by searching or clicking Show all application => and find Grub Customizer.
Enter password if asked => already Enter.
+ Step 6: Find Windows Boot Manager and use the up arrow key to bring the item before Ubuntu, set as default.
+ Step 7: After putting it on first, click Save to save your changes.
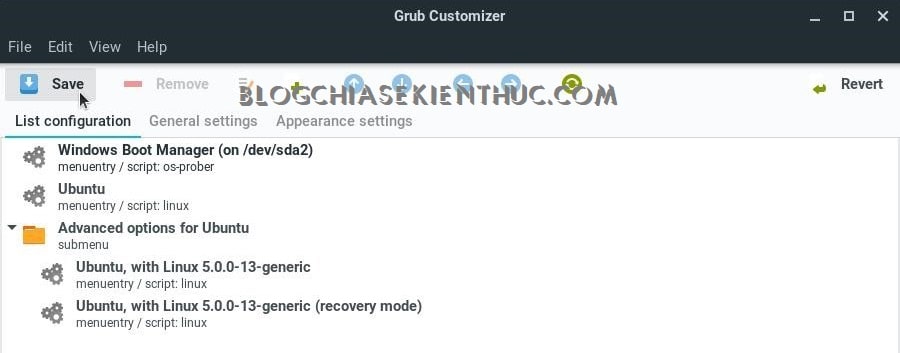
Then restart the machine to check. If you do not like to change anymore, you can press Revert to go back to the beginning.
Epilogue
OK so that’s it. These are 2 how to set Windows 10 as the default operating system when installed in parallel with Ubuntu that I know. If there is any simpler and faster method, please share it by commenting below this article.
Hope this approach will help you more convenient when working with both operating systems. Good luck !
CTV: Nguyen Thanh Tung – techtipsnreview
Note: Was this article helpful to you? Don’t forget to rate, like and share with your friends and relatives!
Source: Using Windows 10 is the default when installed alongside Ubuntu
– TechtipsnReview


