
Well, as in the article about the minimum configuration to install Windows 11, I mentioned TPM 2.0 already.
However, in that article, I only talked about TMP briefly, I did not mention too much because that would dilute the article.
So in this article, we will learn more about TPM 2.0. To see what it is and how important it is to the Windows 11 operating system.
Okay, so let’s go over the definition a bit first, shall we?
I. What is TPM 2.0?
TPM’s full name is Trusted Platform Module, and 2.0 is its version. Simply put, TPM is designed to provide hardware-based security related functionality.
TPM is a chip on a computer circuit board that is used to secure hardware and increase tamper resistance.
Malware cannot tamper with TPM’s security functions. I will have a more detailed article about this TPM chip for you later.
II. Learn more about TPM on Windows
Read more:
#first. TPM is evaluated on what criteria?
TPM is developed by TCG (a Computer Industry Corporation), standardized by ISO (International Standardization) and IEC (International Electrotechnical Commission).
#2. How does TPM work?
As in the definition at the beginning of the article, I said, TPM was born with the mission to identify the device, authenticate, encrypt and verify the integrity of the device, as well as protect the password … .
Initially, TPM was the standard used in the US Department of Defense, but later it was extended to the outside market as well.
#3. How does TPM work?
If before, when you set a password for a computer, that password will be stored on the computer’s hard drive. But when the computer is equipped with TPM feature, it is different..
At this time, the password will be encrypted right on that TPM chip, and it is also the foundation for fingerprint security and face unlock (Windows Hello) on computers…
In addition, with the hardware integrity protection feature, TPM proves to be extremely powerful in information security.
Simply put, if you remove the hard drive from the computer, then the operating system will check the integrity of the hardware => when it checks it finds the device and it will not boot anymore. , avoid theft (BitLocker Drive on Windows).
#4. How many versions does TPM have up to now?
We have 2 versions of TPM up to now:
- TPM 1.2: This version was released in 2011.
- TPM 2.0: This version was released in 2019.
To learn more about TPM, you can read more documentation provided by Microsoft here Please !
III. How to check TPM version on PC?
There are 2 ways we can quickly check the current TPM version on the computer:
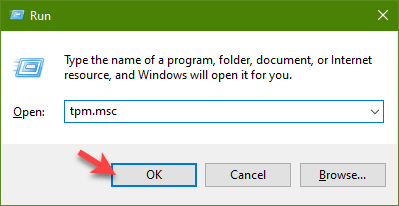
Method 1: Check TPM with the tpm command in Windows Run
You open the Run dialog box with the key combination Windows + R => then enter the command tpm.msc => and press Enter.
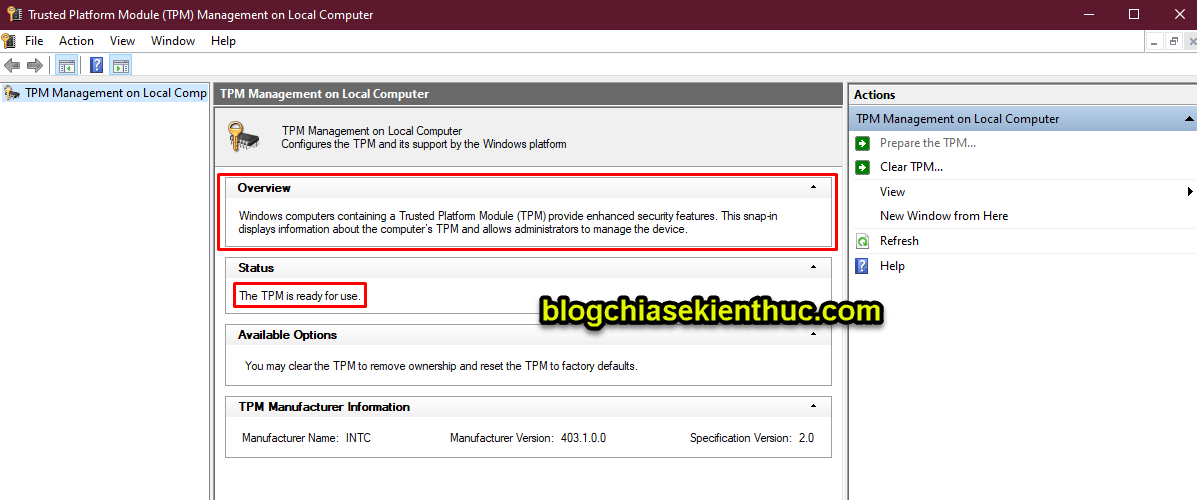
For example, the picture below is a computer that is supporting TPM 2.0. You can click on the image to enlarge it for easy viewing.
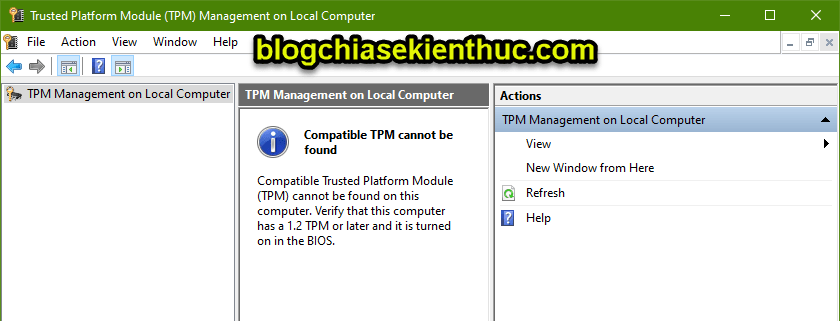
As shown below, the computer does not support TPM.
Compatible TPM cannot be found
Compatible Trusted Platform Module (TPM) cannot be found on this computer. Verify that this computer has a 1.2 TPM or latter and it turned on in the BIOS
No compatible TPM found
The Compatible Trusted Platform Module (TPM) was not found on this computer. Make sure this computer has TPM 1.2 or higher, and TPM was turned on in BIOS
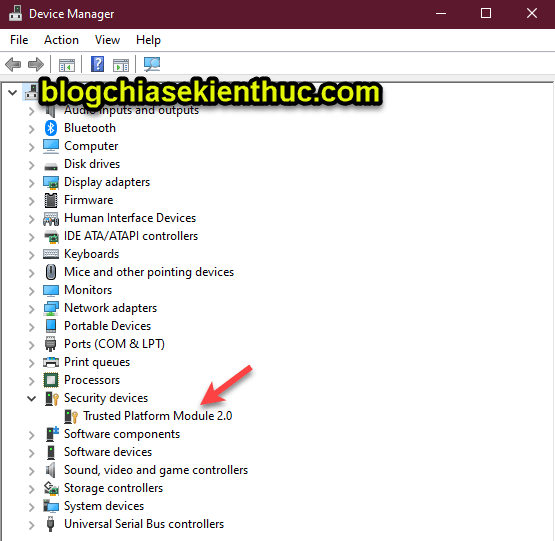
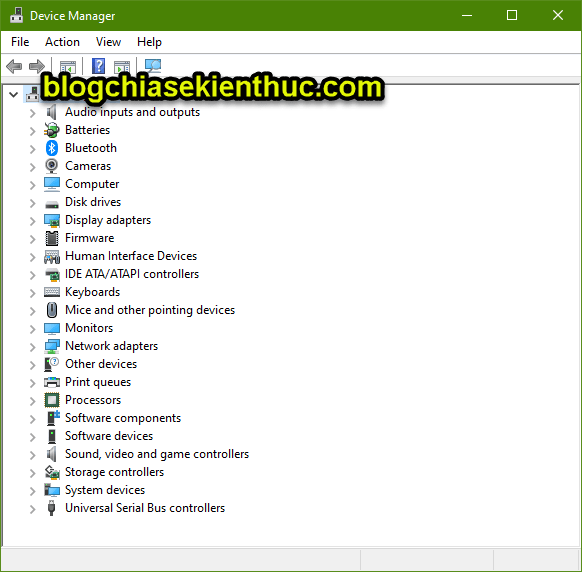
Method 2: Check TPM information on Windows through Device Manager
Alternatively, you can also check through Device Manager. It’s also very quick to do!
Perform: You open the Run dialog box (Windows + R) => then enter the command devmgmt.msc => then press Enter to perform.
Or is that you can open it manually by: Right click This PC => then select Manage => then select Device Manager.
As you can see in the picture below, the computer has TPM 2.0
If you are looking for eye strain without the line of Security devices, my condolences, your computer does not have TPM. Either you have not enabled TPM and Secure Boot in BIOS.
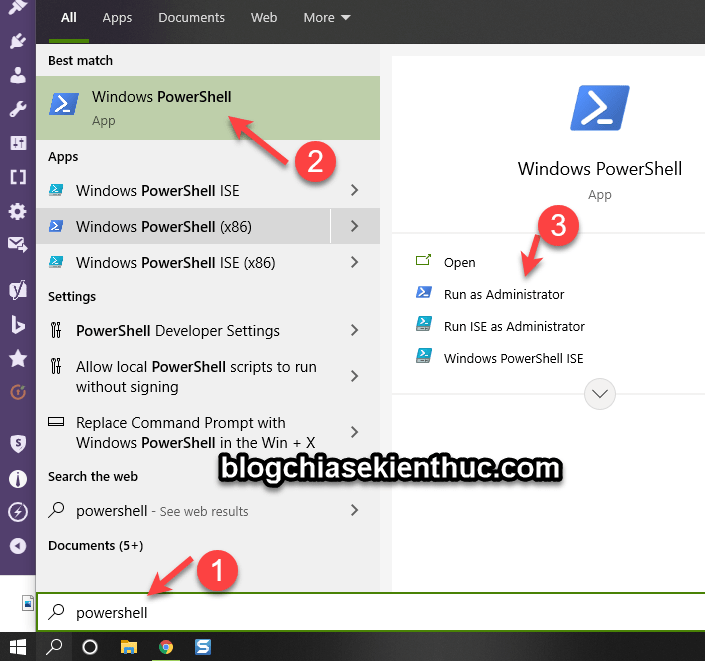
Method 3: Check TPM version by command in Windows PowerShell
First, open Windows PowerShell with Admin rights by pressing the combination Windows + S to open Windows Search.
=> Then you search with keyword powershell => and right click Windows PowerShell => choose Run as Administrator
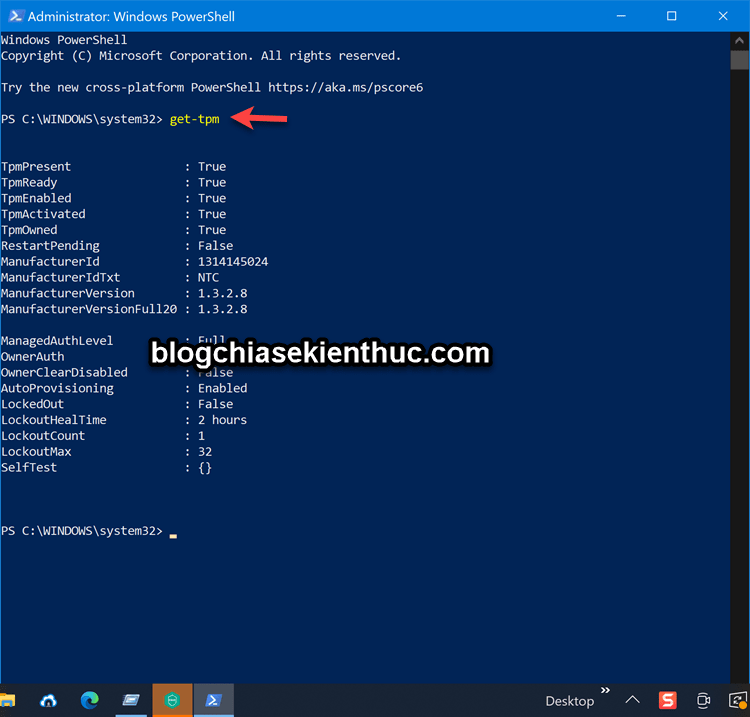
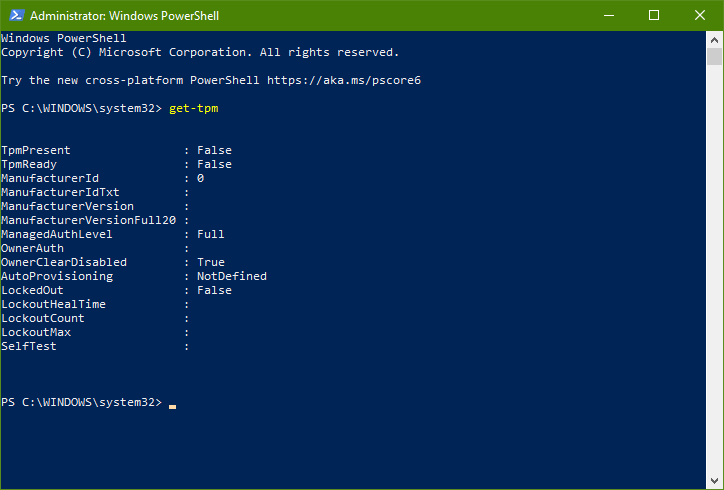
Finally, you enter the command get-tpm => and press Enter To test.
If your computer supports TPM and TPM is turned on, it will display information as shown below.
Conversely, if your computer does not support TPM, the results will be displayed as shown below:
IV. So how to enable Secure Boot and TPM in BIOS?
Yes ! In general, it’s simple, you access the BIOS => then switch Secure Boot sang Enabled is to be.
NOTE: Maybe your BIOS interface will be different, but basically go to the Secure Boot => and ON it’s okay to go up.
#first. How to enable Secure Boot details as follows:
Method 1: You find the section Secure Boot => and Enabled it is as shown below.
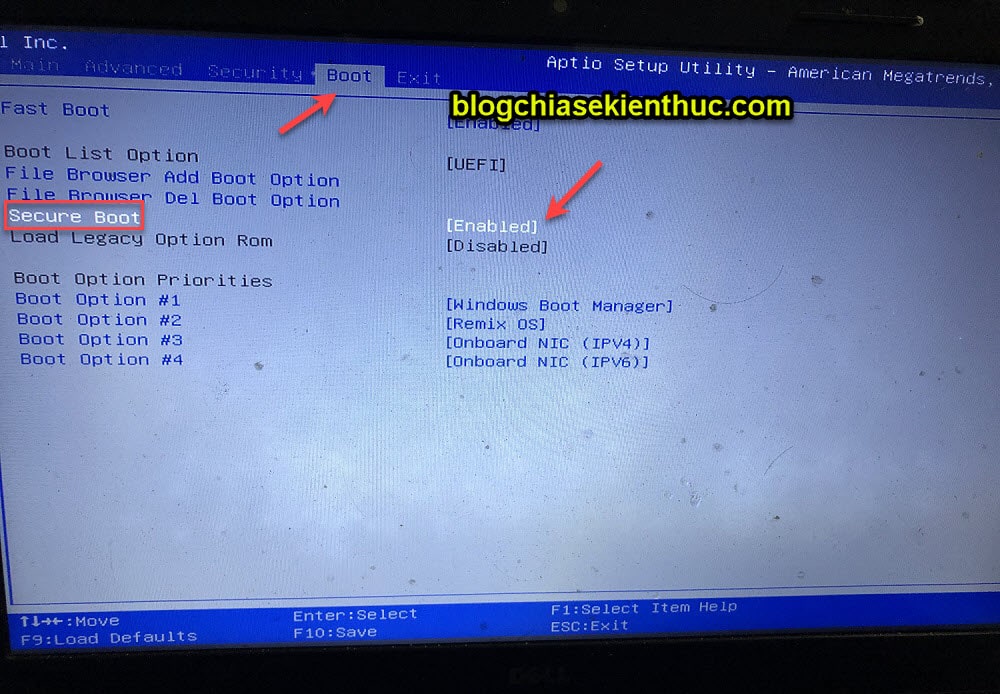
Now when you restart the machine, and try to access the BOOT MENU, the status of Secure Boot was ON so.
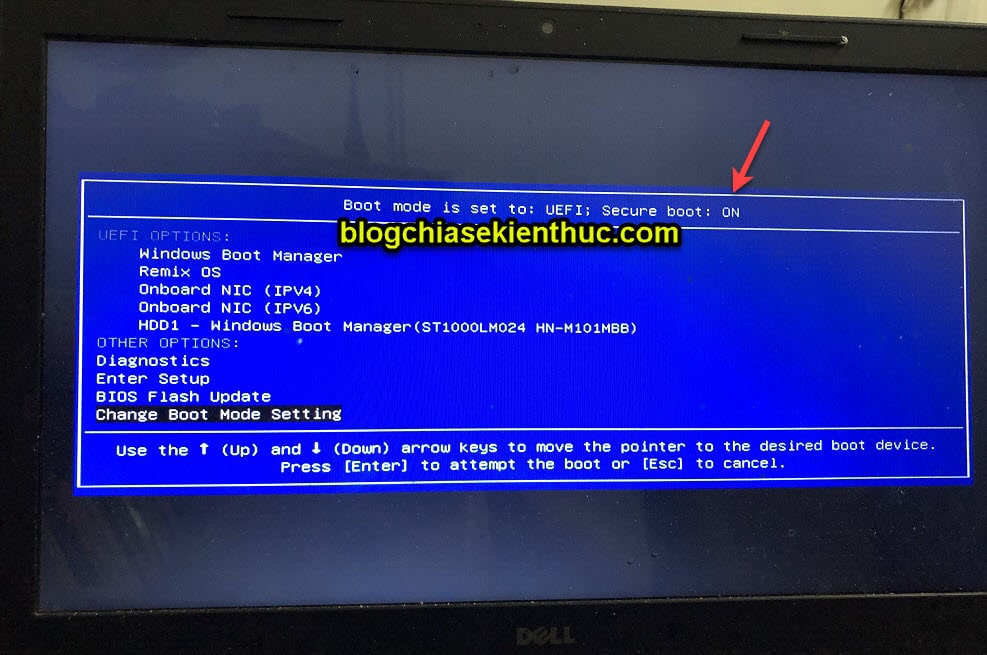
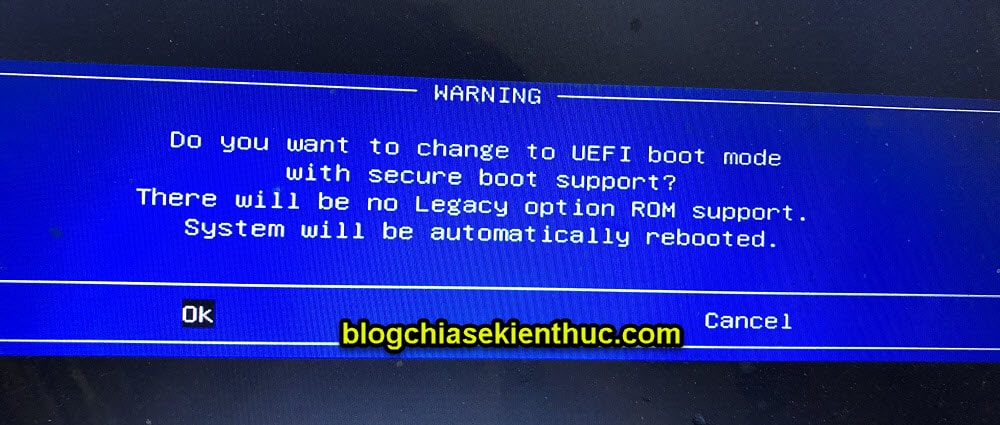
Method 2: You access the BOOT MENU always without going through the BIOS anymore. As shown below, it is OFF => now please switch to the UEFI standard BOOT option and activate Secure Boot
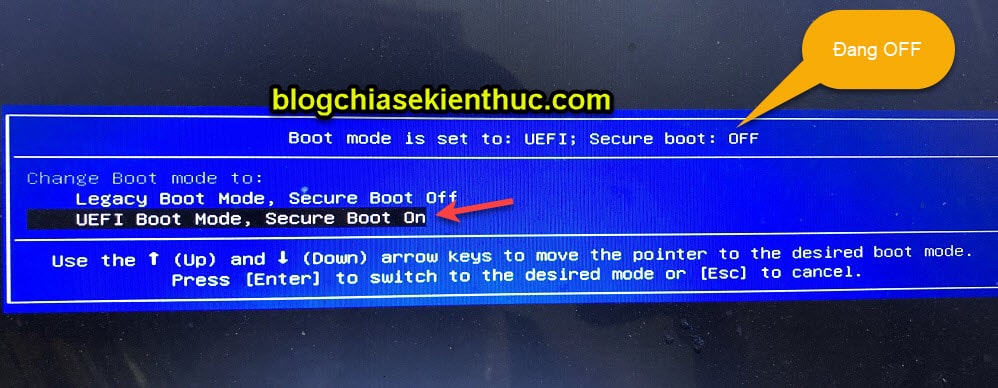
A warning dialog box appears you choose OK done.
Finally, restart and check if the computer has TPM or not!
#2. TMP Enables in BIOS
Note: I repeat again that each computer line will have a different BIOS interface, so please be flexible in this. Normally, TPM will be in the Security in the BIOS so you should search here first.
+ Step 1: You also access the BIOS => then find the section TPM Security from Menu.
+ Step 2: Next, you set up TPM Security to state ON (default is OFF).
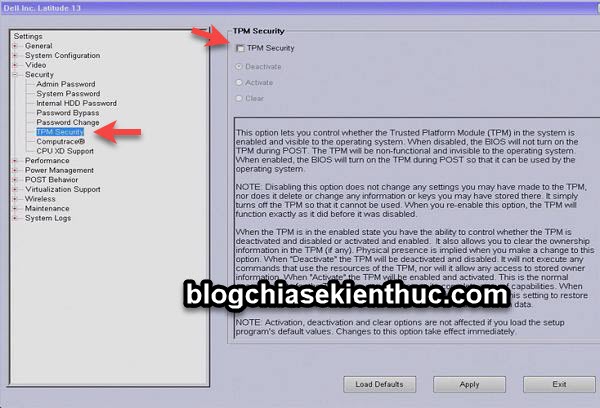
+ Step 3: Then you press the . key ESC on the keyboard to exit => and select in Save and Exit to be able to save before exiting.
+ Step 4: At this time, the computer will restart, please access the BIOS again => select Security => and choose TPM Activation. Then you change the TPM status to Activate as shown below.
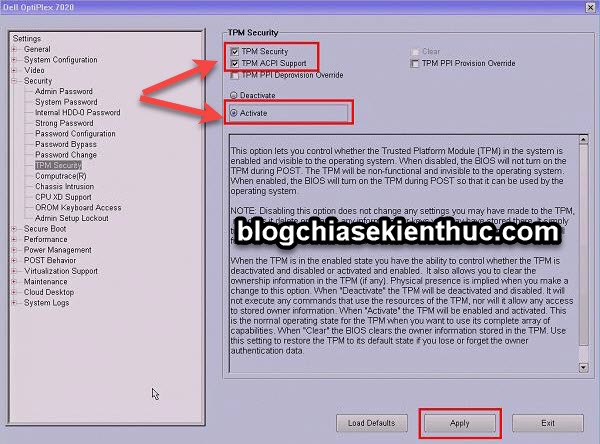
+ Step 5: Finally you press the key ESC to exit => and continue to select Save and Exit so that it can be saved before exiting to boot into Windows.
=> You will now see that TPM is enabled.
__________________________
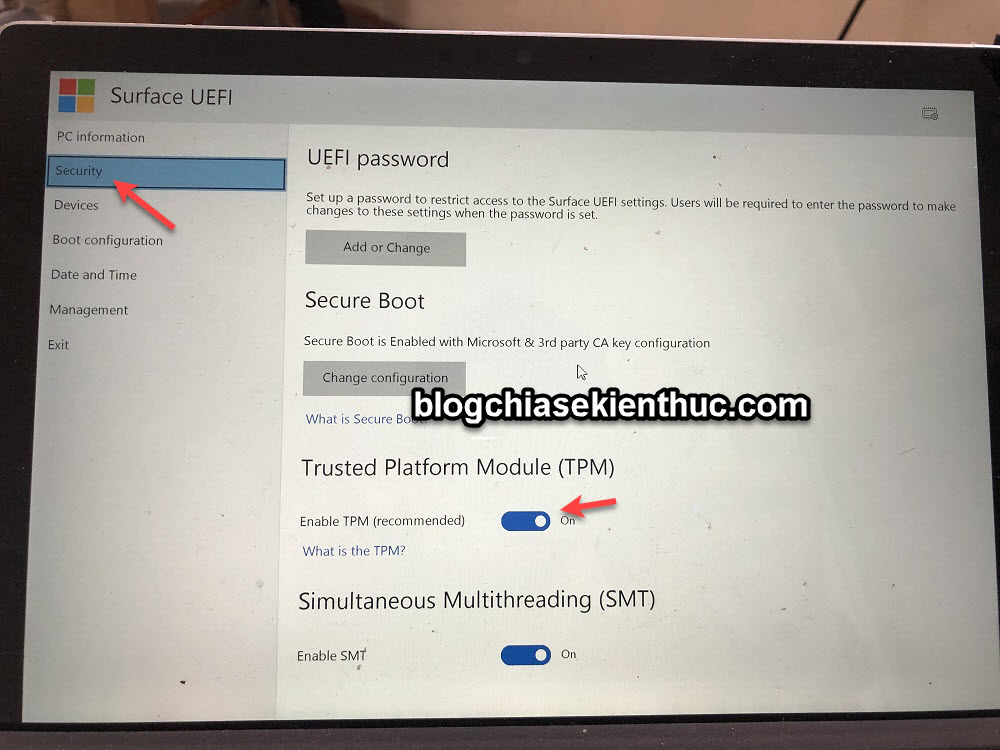
Or with my Surface Pro, the interface will look like this:
V. Conclusion
So in this article, I have shared with you quite fully about TPM-related information on Windows operating systems okay then.
I summarize that through this article, you have understood the meaning The true meaning of TPM on Windows, as well as how to check and how to enable TPM for computer already.
Hope the information in this article will be useful to you. Good luck !
Kien Nguyen – techtipsnreview
Note: Was this article helpful to you? Don’t forget to rate the article, like and share it with your friends and family!
Source: What is TPM 2.0 on Windows 11? and how to test it?
– TechtipsnReview


