
Windows Security (formerly known as Windows Defender) is a free antivirus software built into the Windows operating system.
Since Windows 10 version onwards, Windows Security has been raised by Microsoft to a new level, it is rated by experts as one of the best free antivirus tools available today.
And if you have a bit of knowledge about using a computer, this software is actually enough for you to be safe, no need to install additional specialized anti-virus software.
And in every anti-virus software, there is a function that is an exclusion list, which means that the anti-virus software will ignore this file / folder and not scan it. This is an extremely important feature of every anti-virus software…
The reason is because many tools/programs are written in AutoIT language or for some reason, anti-virus software mistakenly recognizes that file/folder as dangerous software and blocks it, or even deletes it. always.
Therefore, if you are confident with a certain file/folder, either you need to run that file for work, for game installation, for copyright activation…. then you can add it to your anti-virus software’s exclusion list.
Yes, and in this article I will show you how to add files or folders to the exclusion list in Windows Security in the simplest way.
I. How to add a File or Folder to the exclusion list in Windows Security
In this article, I will share with you how to do it manually and how to use support tools, and I will guide you on Windows 10 and Windows 11 guys!
#first. Add files/folders to the exclusion list manually
1.1. On Windows 10
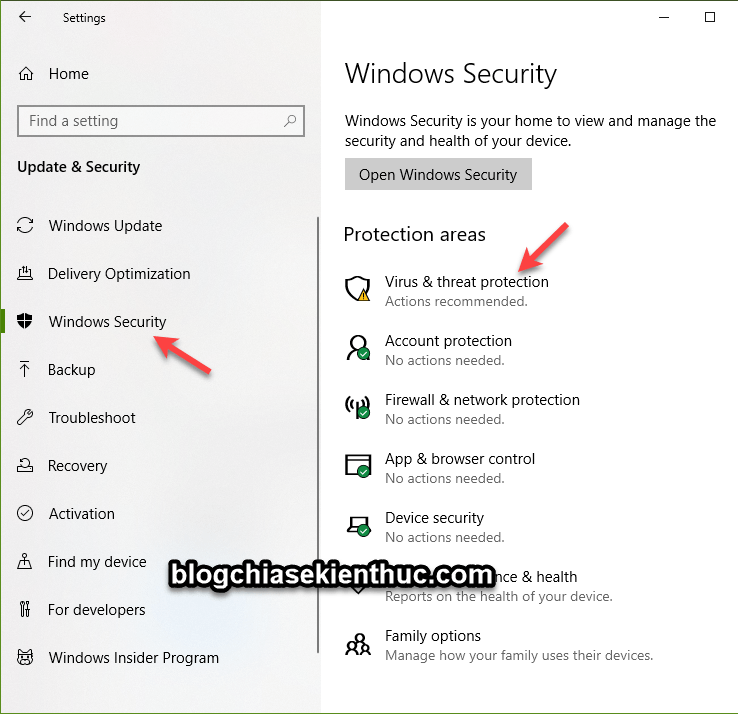
+ Step 1: You press the key combination Windows + I to open Windows Settings up => then select Update & Security => choose Windows security => and choose Virus & threat protection as shown below.
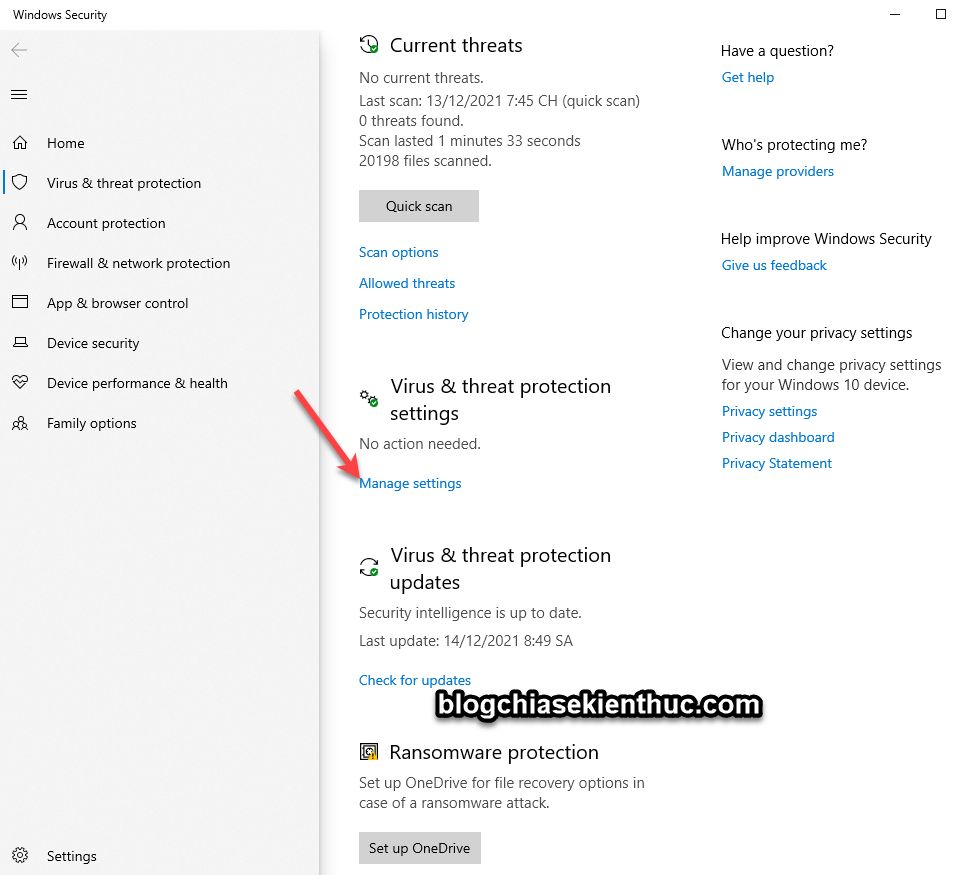
+ Step 2: Then you find the section Virus & threat protection settings => and choose Manage settings
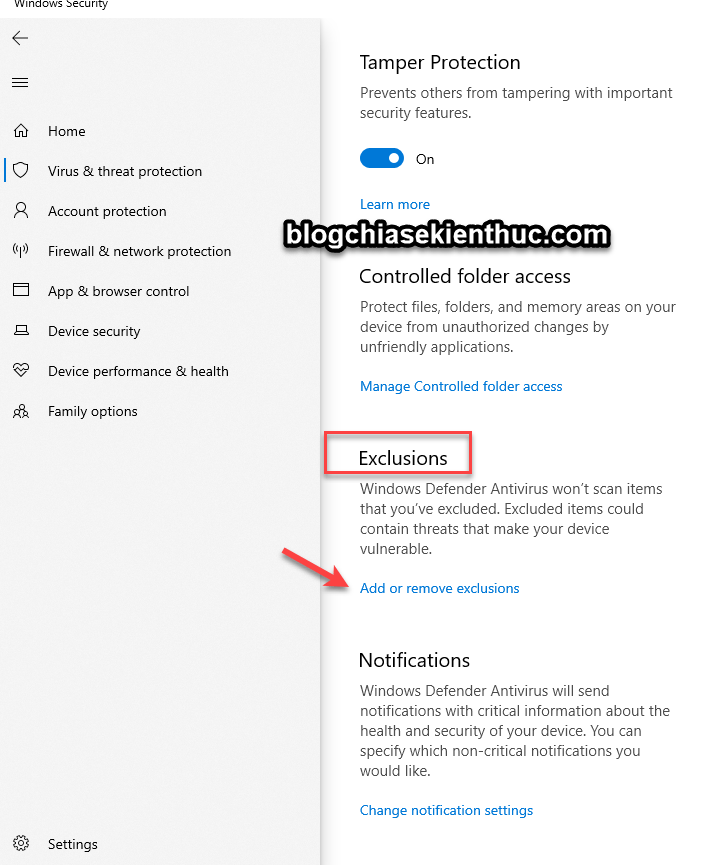
+ Step 3:Here, you find the section Exclusions => and choose Add or remove exclusions
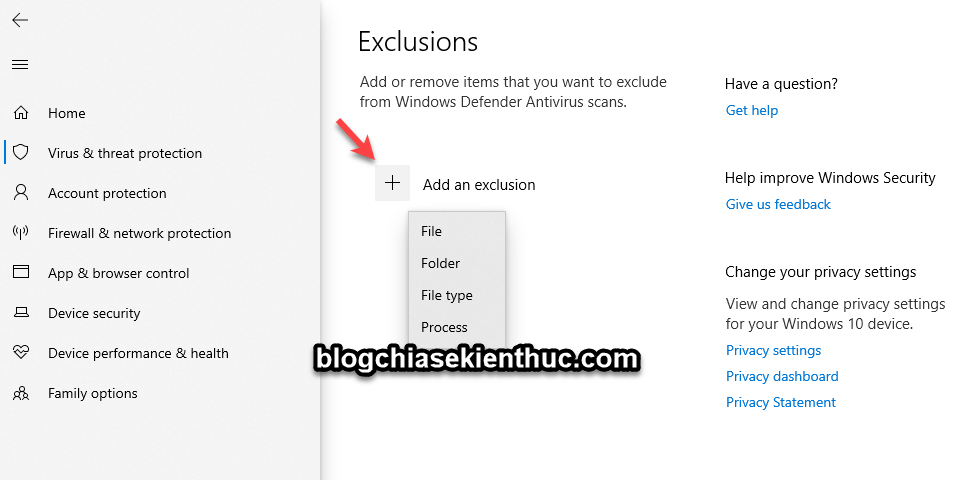
+ Step 4:Finally, you choose File, Folder…. or whatever you want to exclude.
1.2. On Windows 11
It is completely the same as on Windows 10 operating system, you click Windows + I to open Windows Setting => then enter Privacy & security => choose Windows Security
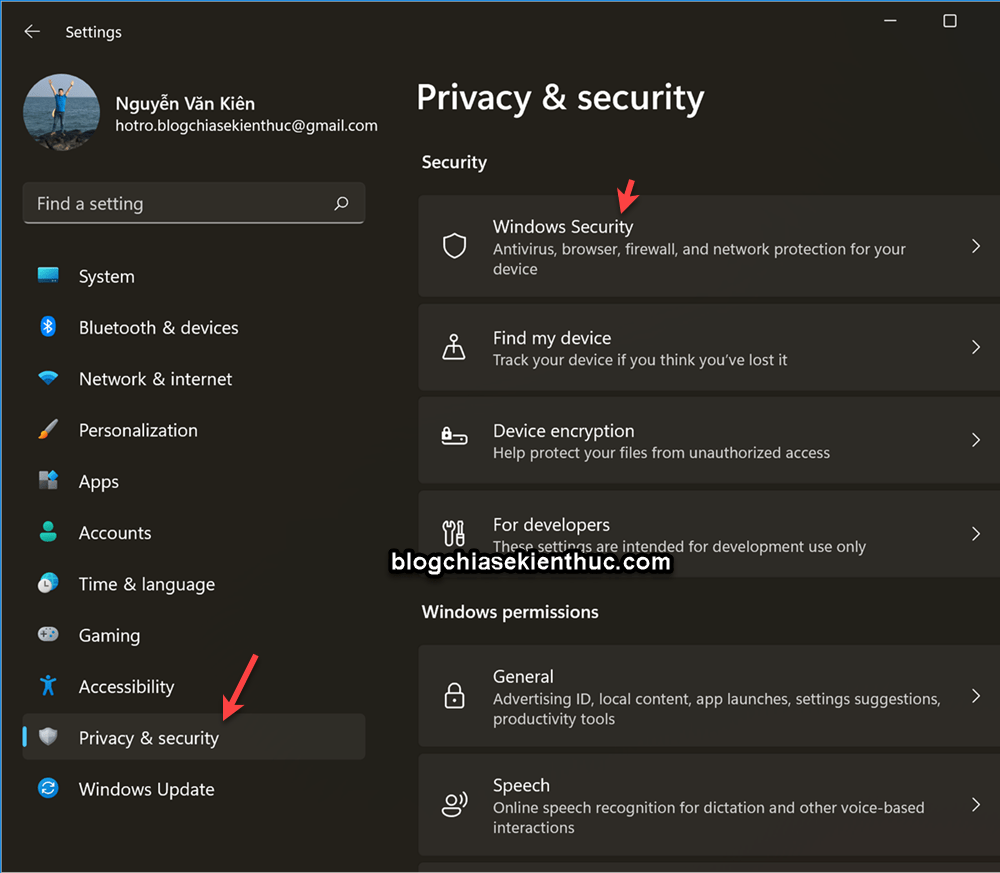
Choose next Virus & threat protection
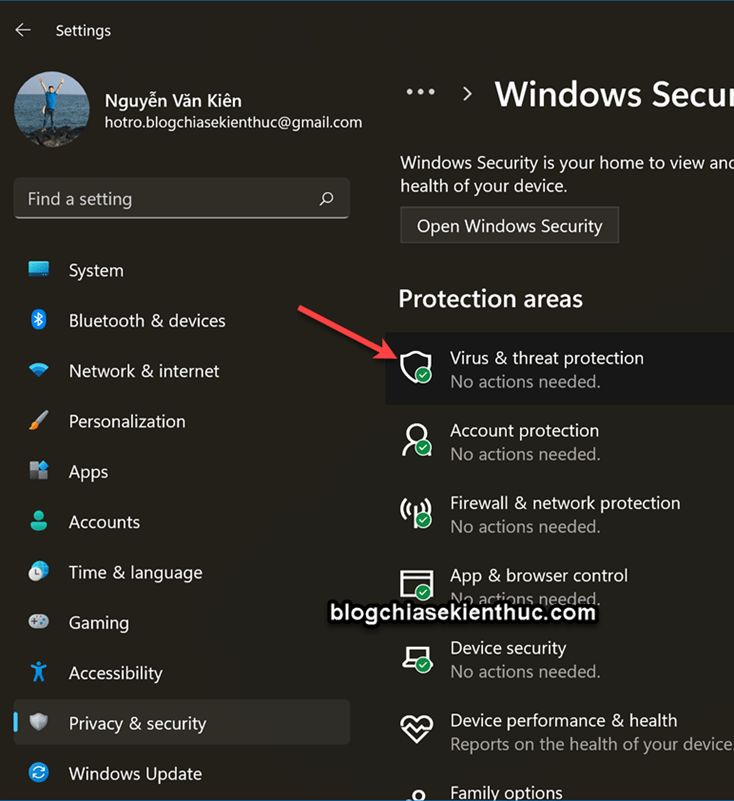
=> Then you do the same steps (from Step 2 onwards) on the Windows 10 instructions.
#2. Use the Defender Exclusion Tool to add exclusions to Windows Defender
If you often use this feature, I recommend you to use this method, because it is very fast, simple and 100% safe.
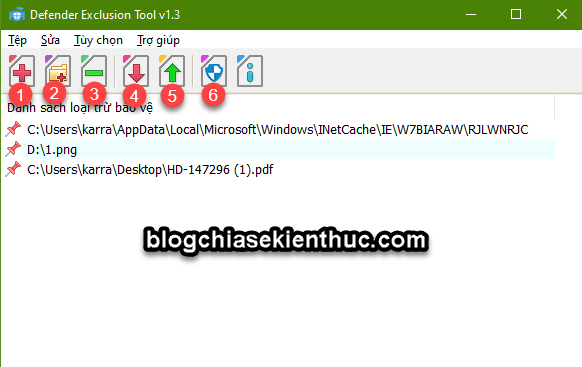
This is an extremely compact tool, no need to install when using, you just need to download and use it. Vietnamese interface is always supported for you.
+ Step 1: Download the Defender Exclusion Tool first:
+ Step 2: After downloading the file => you run the file ExcTool.exe => if you want to change to Vietnamese, you can go to Options => choose Language => and select language Vietnames done.
Now to use it is simple:
- Add Files to the exclusion list in Windows Security (Windows Defender)
- Add Folder to the exclusion list in Windows Security
- Remove exclusions
- Import list
- Export list
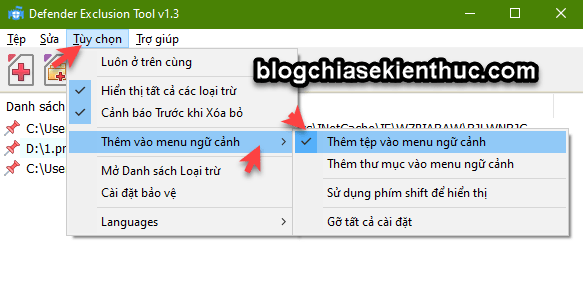
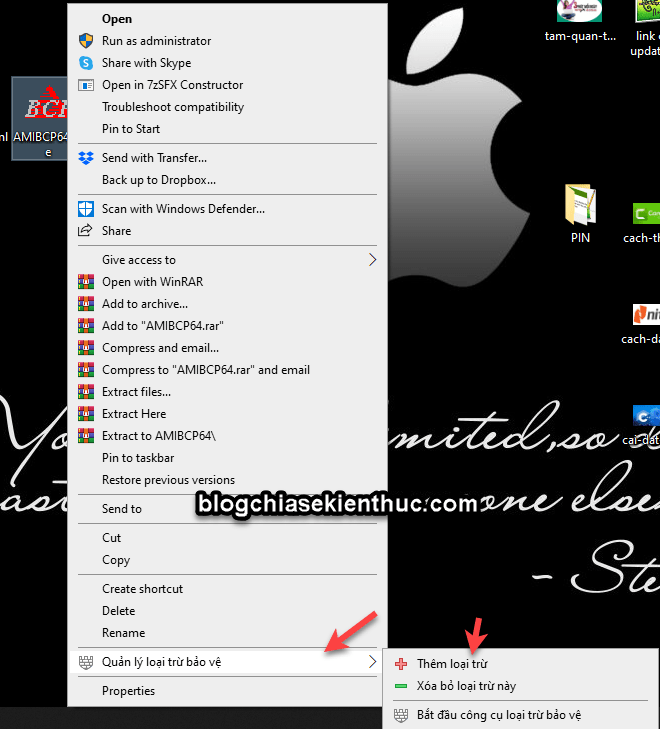
However, that’s still not that fast. But also a faster way is that you add the exclusion feature to the right-click menu.
Perform: You go to Options => then select Add to context menu => select Add File to context menu.
NOTE: You can choose to add the Add folder option to the context menu as well if you want. There are also a lot of other cool features, all in Vietnamese, so if you want to use any feature, just choose that feature 🙂
Now, to add any File or Folder to the exclusion list, you just need to right-click on that File/Folder => and select the corresponding feature ^^ Very convenient!
II. Epilogue
Okay, work add File or Folder to exclusion list in Windows Security (Windows Defender) is extremely simple, isn’t it. But this is a very important feature that you should know when using Windows operating system.
Hope this article will be useful to you, good luck!
Read more:
Kien Nguyen – techtipsnreview
Note: Was this article helpful to you? Don’t forget to rate the article, like and share it with your friends and family!
Source: Add File/Folder to the exclusion list in Windows Security
– TechtipsnReview


