
NOTE: Welcome to the Knowledge Sharing Blog! If you encounter any errors during use, such as error in download link, slow blog loading, or unable to access a certain page on the blog … please notify me. via Contact page. Thanks!
In this article I will share with you a very good tip that is Integrate the Windows installer into the Boot Menu of the computer.
In fact, this way is similar to the tutorial on integrating Win Pi or DLC Boot into the Boot Menu that I have guided you in the previous article.
I think this is a very useful trick for the rescue of your computer, so you should apply it right away.
Read more:
There are many advantages of this approach, for example:
- Rescue computer support, fix boot errors, fix Windows errors…. without having to use Windows installation disc or Windows to install USB.
- For Windows 8, Windows 8.1 and Windows 10, you can reset Win to the state it was in when you just installed it at any time.
- Support to restore (Restore) Windows 10 / 8.1 / 8 if you have created a backup point before.
- You can reinstall Windows anytime you want ?
#2. What needs to be prepared?
Yes ! Before proceeding, you should fully prepare the following tools and steps. Many of you refused to read it carefully and kept asking where did this and that come from. Really makes me very uncomfortable … that’s why you should read carefully before doing it.
- Windows installer, please download the correct Windows installer with the version of Windows that you are using. To check exactly which version of Windows you are using, open the Run dialog box (Windows + R) => then enter the command
winver=> pressEnterto see information. - Create a new partition of 4-5 GB range. You can use Partition Winzard software to divide the hard drive or see the tutorial on dividing the hard drive without losing data.
- Download the EasyBCD software: Download here or here => After downloading, install it on your computer.
# 3. Instructions for creating Dual Boot (the Windows installer is current Windows)
Note: In this article I will perform on Windows 10 operating system, if you are using other operating systems, still do the same as this tutorial.
Okey, after you have been prepared as instructed above, now we will start to perform the following steps in turn:
+ Step 1: Split hard drive without using software.
You should divide a small partition about 4 – 5 GB so that in a moment we will unzip the Windows installer here. Choose any partition that has a bit of extra space and cuts it a little.
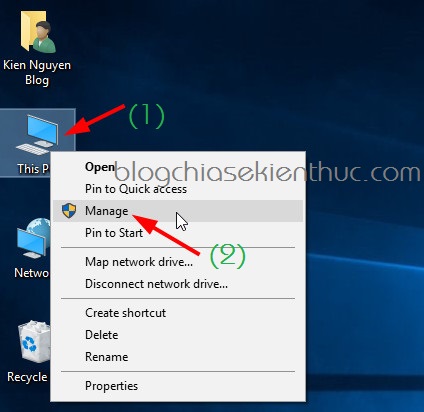
Perform: Right click This PC => select Manage as shown below.
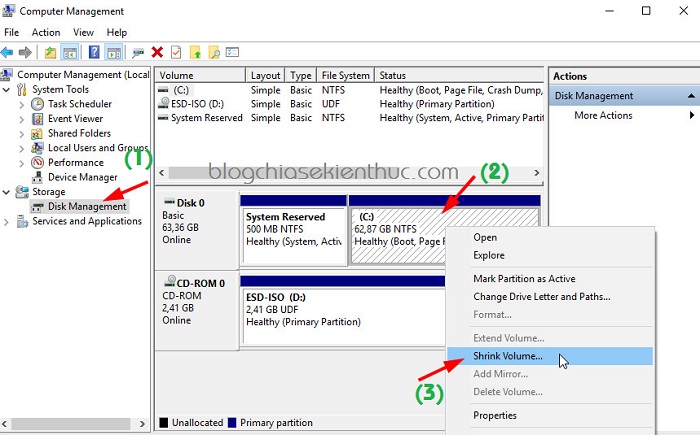
+ Step 2: Window Computer Managemet appears, please click Disk Management => right click on the partition you want to cut 4, 5 GB. For example, here I will cut the drive partition C Please.
Perform: Right-click the partition you want to split => select Shrink Volune...
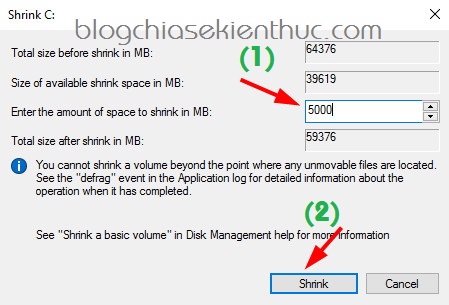
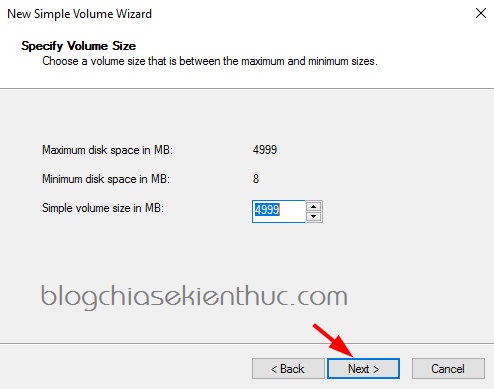
Continue to enter 5000 (5 GB) => then press Shrink
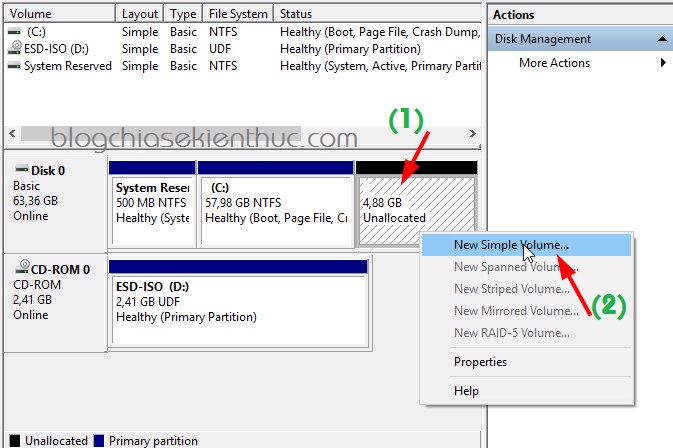
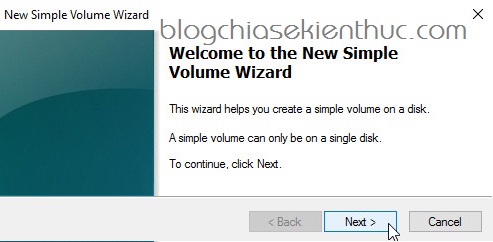
+ Step 3: At this time, the new partition has been created, but has not been formatted (Unallocated), so to use this partition, right-click it => select New Simple Volume....
Press Next to continue.
Continue to press Next to continue.
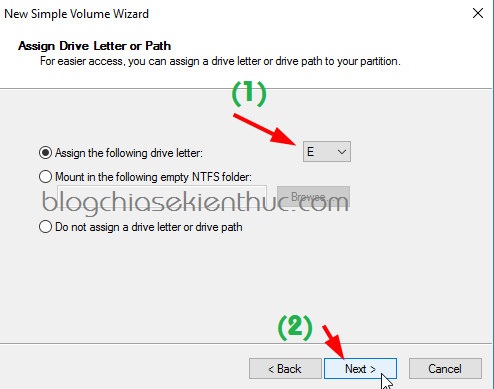
Here you can re-select the partition symbol for the hard drive, you must not select the same letter as already on the computer. Or you can just leave the default => press Next
Here you can reset it according to your needs. In cell Volume label you can name the partition you will create => press Next
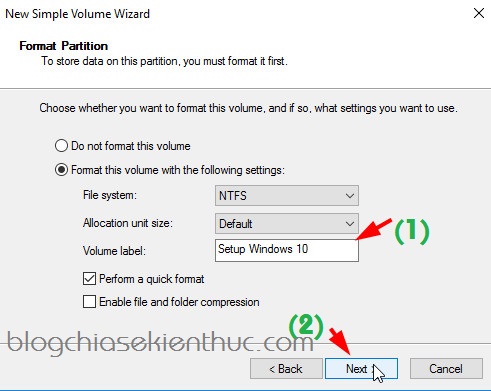
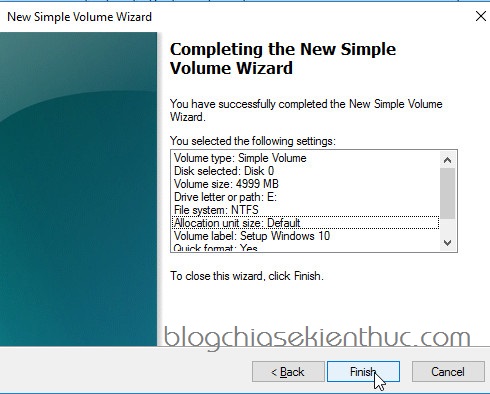
Finally you press Finish to complete the partitioning process.
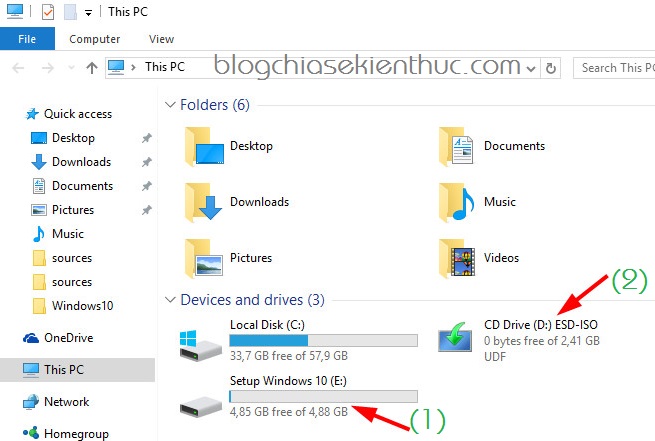
+ Step 3: Re-enter This PC to check. You will now see a new partition (E). (first) There is a capacity of ~ 5GB.
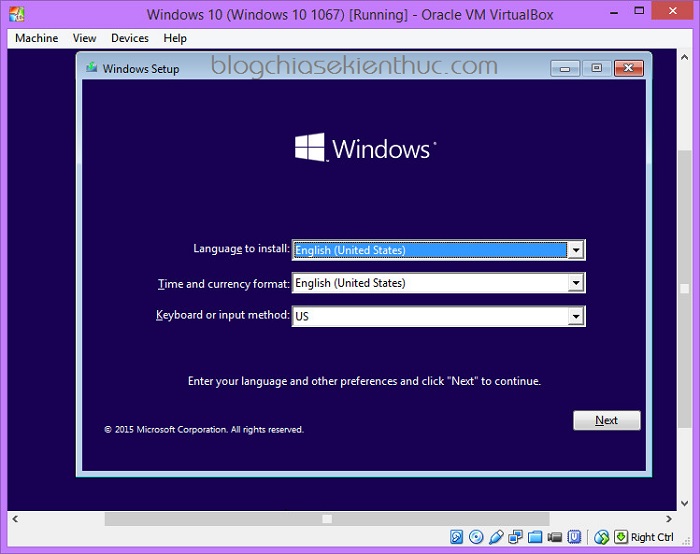
Continue you make Mount Windows installer to virtual drive. If you are using Windows 8 / 8.1 or Windows 10, you just need to right-click on that Windows installer => select Open With => select Windows Explorer Let it create the virtual drive and mount the file for you.
If you are using Windows 7 or a lower version, you can use the UltraISO software to do this.
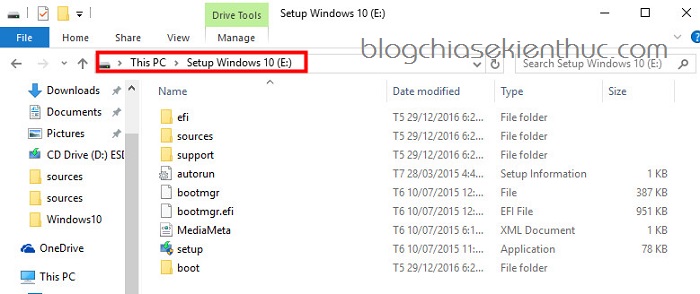
+ Step 4: Now go to the virtual drive that you just mounted the file to => copy all the files in it to the 5GB partition that you just divided in bước 1.
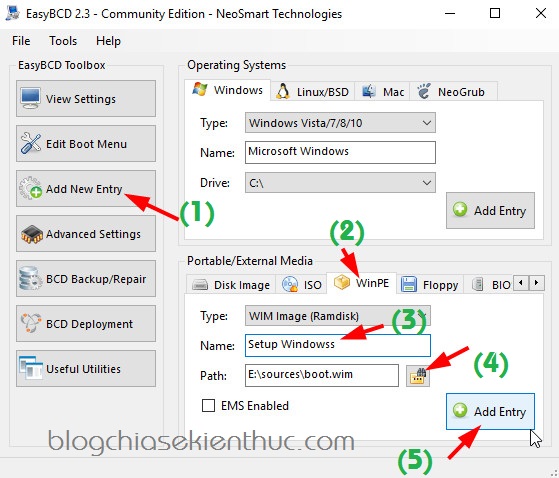
+ Step 5: Open the EasyBCD software and then do the following steps in turn:
- Click
Add New Entry. - You’ll choose
WinPE - At line
Nameyou get the title that displays the Boot Menu. - At the Path line, click the icon
...=> select to fileboot.wimin the sources directory of the 5GB partition. - Finally click
Add Entryto add to the Boot Menu.
Tips: If you want to edit anything about the boot mode, click on the option Edit Boot Menu to reset time to automatically boot into default menu, choose boot priority….
+ Step 6: Now try to restart your computer to see ? sure it was successful.
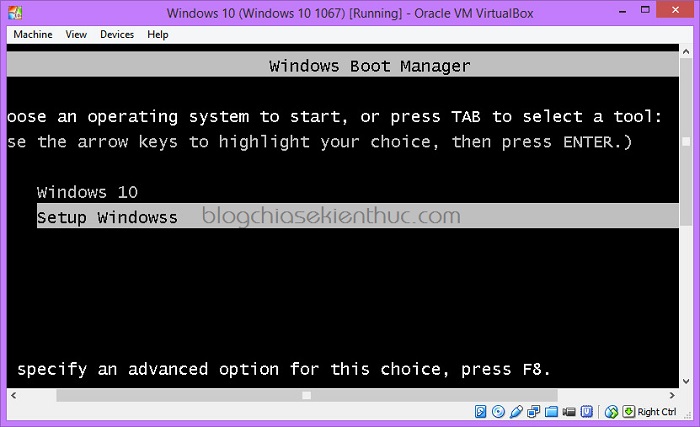
Try to access and see if it is successful ?
+ Step 7: Hide 5GB partition to limit virus intrusion and destroy installer.
This step is also quite important, I already have a very detailed article on how to hide any partition on Windows, you can refer to this article again: 3 ways to hide hard drive partition to protect “sensitive” data
Note: You should follow way 2 in that article to make it simple ?
# 4. Epilogue
So I gave you very detailed instructions on how integrate Windows installer into Boot Menu That’s it, a very simple trick, but it’s extremely helpful in many cases.
If you have any difficulty in the implementation process, please commnet below for the help of yourself and other members of the community.
Hope this article will be useful to you, wish you success!
Kien Nguyen – techtipsnreview
Note: Was this article helpful to you? Don’t forget to rate, like and share with your friends and relatives!
Source: Create Dualboot integrate Windows installer into the Boot Menu
– TechtipsnReview


