
NOTE: Welcome to the Knowledge Sharing Blog! If you encounter any errors during use, such as error in download link, slow loading blog, or unable to access a certain page on the blog … please notify me. via Contact page. Thanks!
As you all know, for Windows 10 operating system, you can easily customize almost anything. And the lock screen is an example, you can change the lock screen, use multiple lock screens, even disable the lock screen… in a very simple way.
You just need to link Windows with your Microsoft account and activate Windows Spotlight to have a lot of Full HD images, super sharp, taken directly from Bing (a Microsoft search engine), full of beautiful images and just high quality.
Or if you do not like to take these pictures then you can use the pictures you take by yourself or you collected somewhere to make the lock screen simply.
As for the Windows 7 operating system, on the other hand, we cannot change the lock screen (also known as the login screen). Because by default Microsoft doesn’t support us to do this.
If you want to change the lock screen on Windows 7, the only way to use 3rd party software or tweak the system is only. And this is also the main content that I want to share with you in this tutorial.
If you are feeling too boring with the Windows 7 login screen, this is the article for you, you can follow if you want!
Read more:
#first. Change the login screen on Windows 7 by software
+ Step 1: First you need to download the software Windows 7 Logon Background Changer Previously, you can download it here / or here !
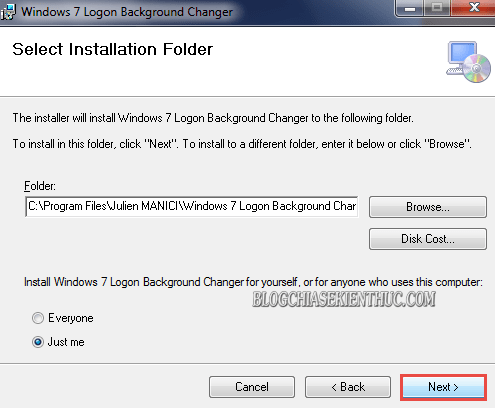
+ Step 2: Then unzip the downloaded file => and run the file *.exe. At the installation interface, you tick I Agree to agree => then click Next.

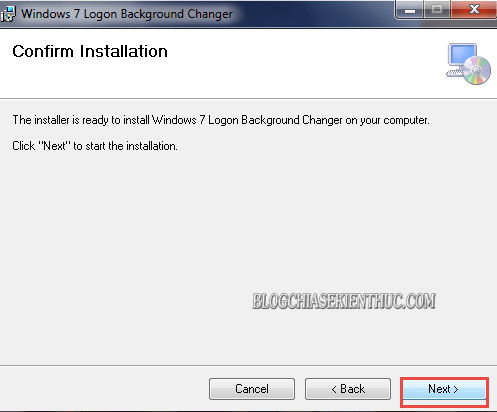
+ Step 3: Then continue to click on the button Next..
… Press Next Next to start the installation process.
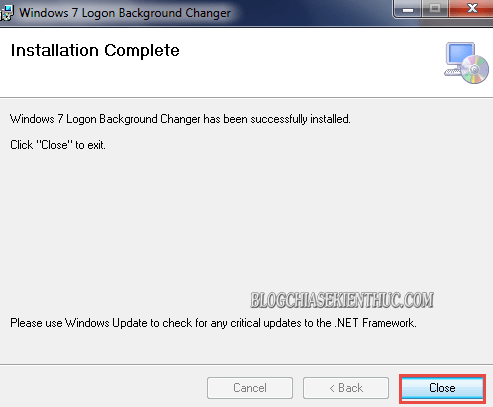
After the installation is complete, click the button Close to exit.
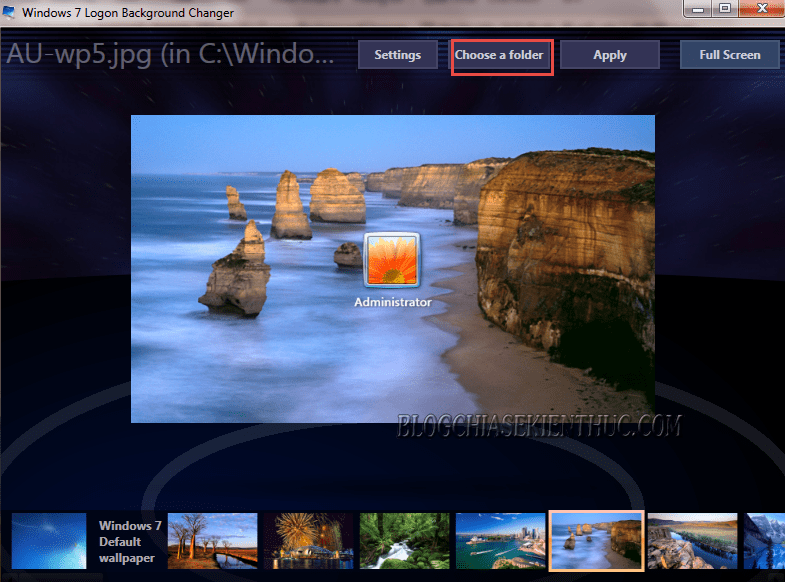
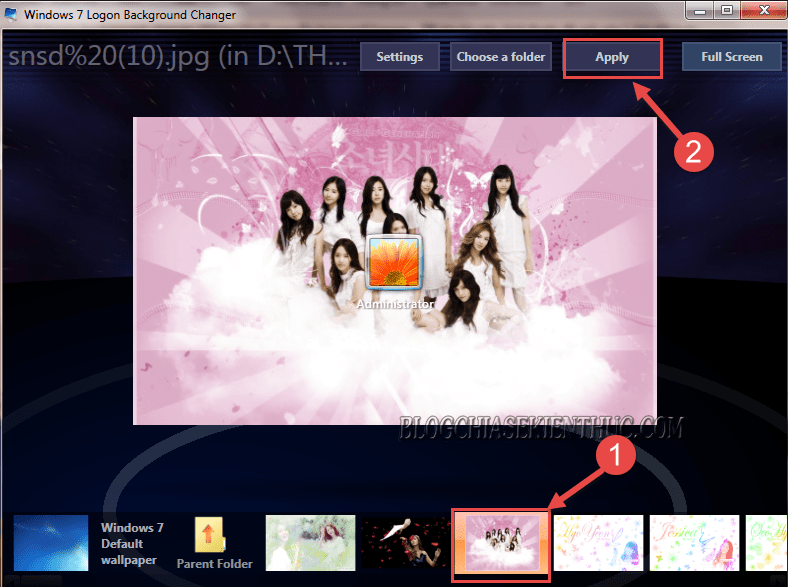
+ Step 4: At the main interface of the software, you will be provided with a number of images for the login screen to replace the default image of Windows 7.
You can choose one of the images that the software provides you with. Or If you don’t like it then you ..
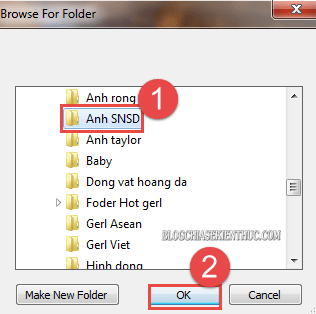
Click the button Choose a Folder.
Then navigate to the folder containing the pictures you want to use => and press OK.
Then you click to select the image file you want to use => and click Apply to apply. That’s it then!
+ Step 5: Now you can press Windows + L To check the results, if you do not see any changes, you can restart your computer to check the results for accuracy.
#2. Change the lock screen for Windows 7 (manual)
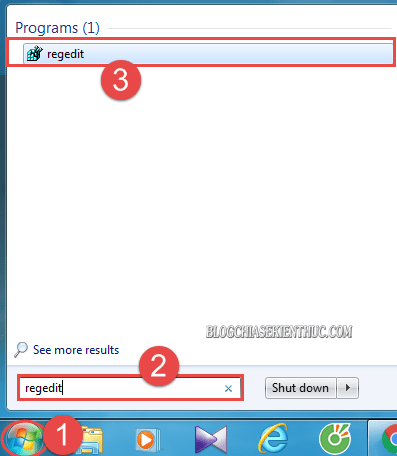
+ Step 1: First you click on Start => at the box Search programs and files => you enter the command regedit => and press Enter, or click Regedit as shown below.
In addition to opening Regedit as instructed above, there is another way to open it faster: Open the Run dialog box (Windows + R) => enter the command regedit => press Enter.
+ Step 2: Next, in the dialog box Registry Editor you login to the following path:
HKEY_LOCAL_MACHINE SOFTWARE Microsoft Windows CurrentVersion Authentication LogonUI Background
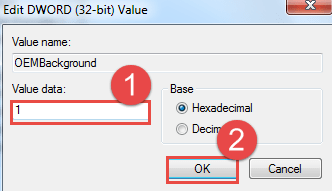
=> Then you double click on the file OEMBackground.
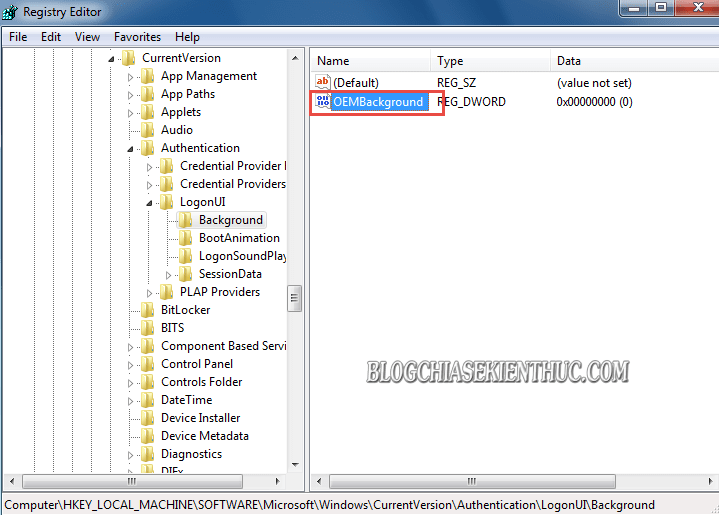
+ Step 3: Changes in value Value data equal 1 => then press OK to save and exit the Registry Editor dialog box.
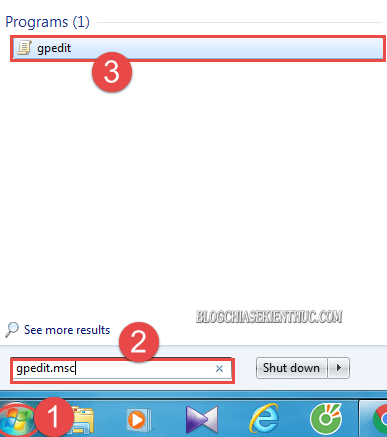
+ Step 4: You continue to click on the button Start => and click on the search box to type in keywords gpedit.msc => and click run file gpedit.
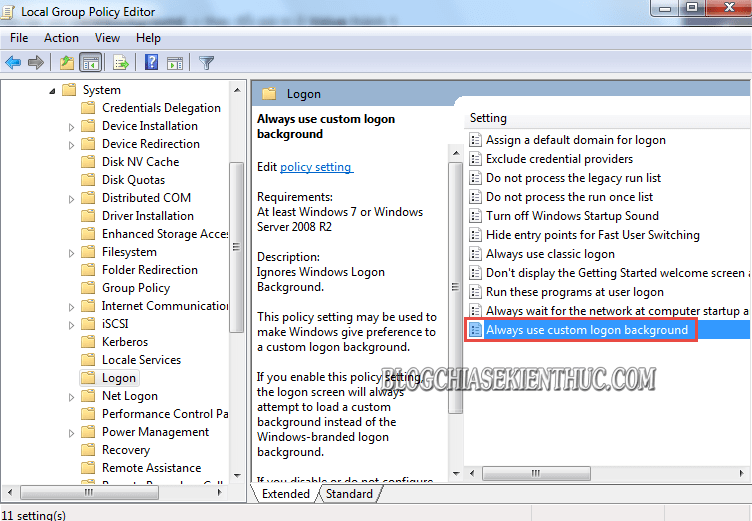
+ Step 5: Here, you follow this path:
Computer Configuration Administrative Templates System Logon
=> Then double click to open the file Always use custom login background.
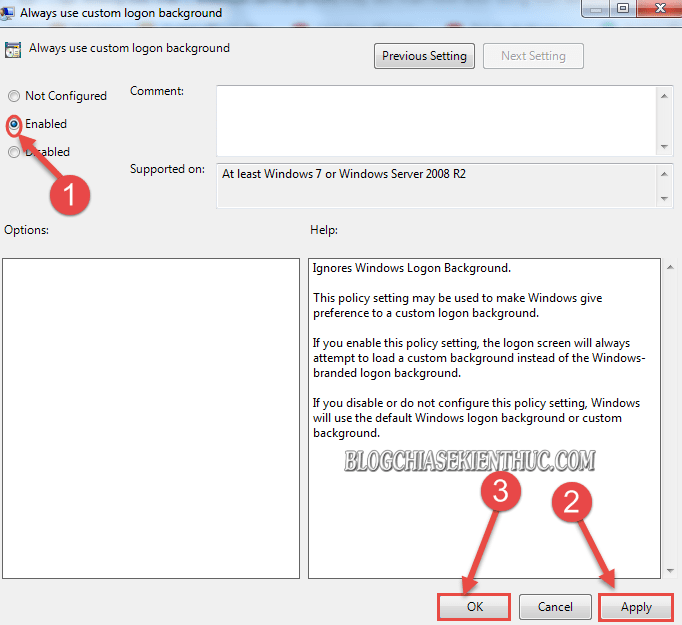
+ Step 6: Checkmark Enabled before pressing Apply => then press OK to save and exit the dialog box.
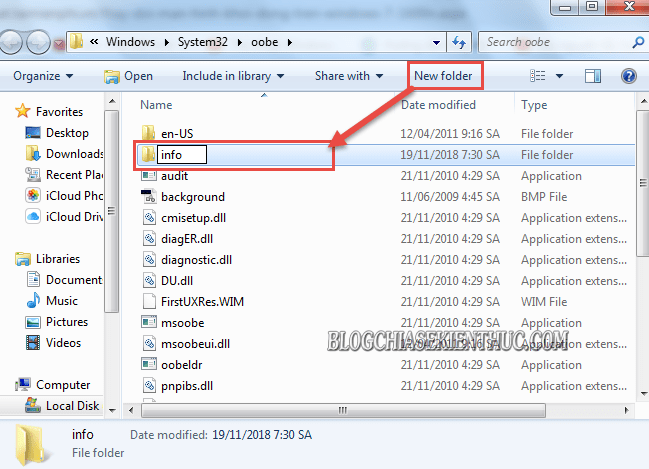
+ Step 7: Now you can access the following path:
C Windows System32 oobe
=> And click New Folder and name the file info.
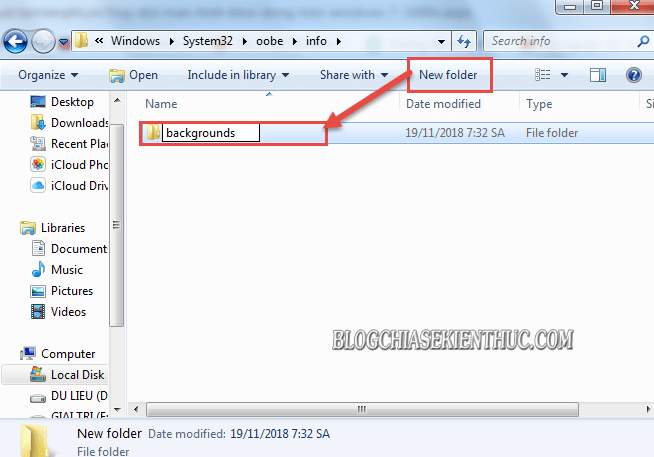
+ Step 8: Then click open folder info, and create a subdirectory named backgrounds inside the folder info there.
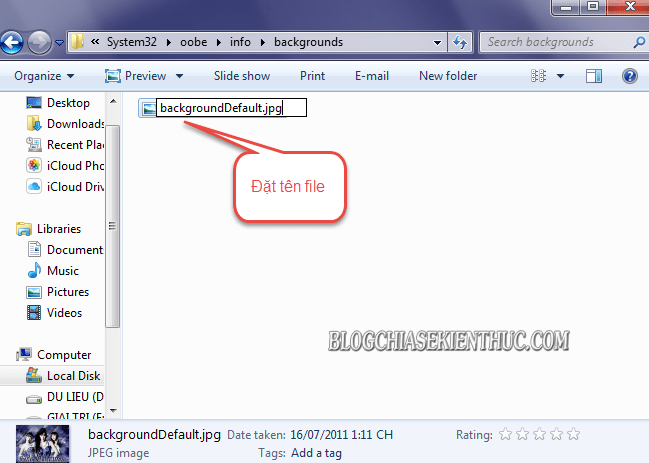
+ Step 9: Finally, copy the image you set as the login screen for Windows 7 => Then rename the image file as backgroundDefault.jpg is to be
Note: Should create 640 x 480 Pixels image file, and less than 240KB capacity for Windows to receive and load easily.
Okay that’s it. Now you press the key combination Windows + L, or Restart your computer to see the results.
Epilogue
Yes, so I just shared with you 2 simple ways to be able Login screen changes on Windows 7 Alright. Actually, you can apply this approach on other versions of Windows like Windows 8 and Windows 10, but I think these new operating systems already support by default so it’s not necessary
Okay, hope this article is useful to you. Having fun !
CTV: Luong Trung – techtipsnreview
Note: Was this article helpful to you? Don’t forget to rate, like and share with your friends and relatives!
Source: How to change the login screen on Windows 7, very unique!
– TechtipsnReview


