Need quick access to your VPN in Windows 10 with just one click? Create a VPN shortcut on your desktop with just a few simple steps. Here’s how to do it.
Prerequisites
Before you start, it’s important to understand that you can only create a VPN shortcut on your desktop using the method below if you’ve configured your VPN through Windows 10’s built-in VPN tool.
This method won’t work if you use a VPN client or a third-party app to connect to the VPN network. In that case, open your VPN app and see if there’s an option to add a shortcut on the home screen.
Create VPN shortcut on Windows 10 desktop
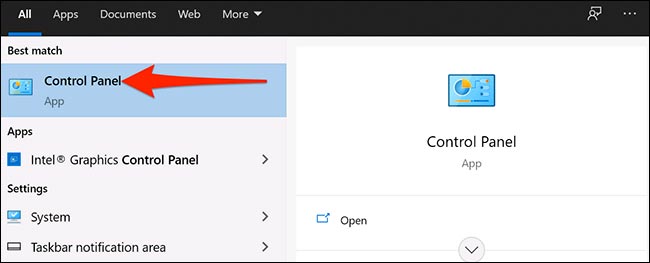
To get started, open the menu “Start” and search for keywords “Control Panel“. Click the “Control Panel” in the respective search results.
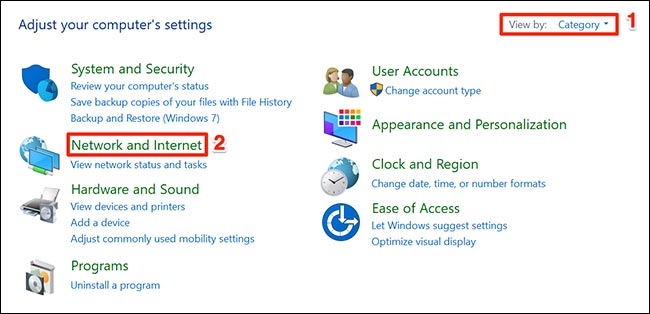
In the Control Panel window, you click the option “View by” in the top right corner of the window and click “Category“. Then select “Network and Internet“.
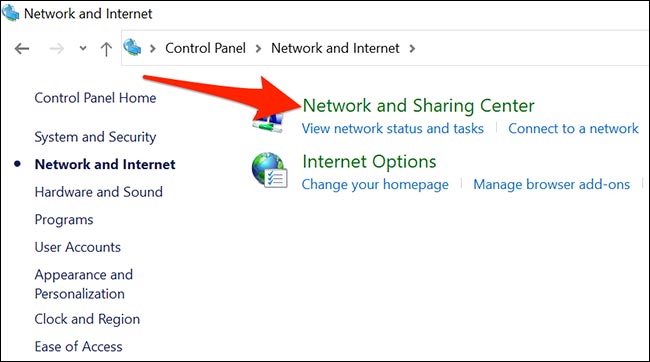
In settings “Network and Internet, you click on the item “Network and Sharing Center“.
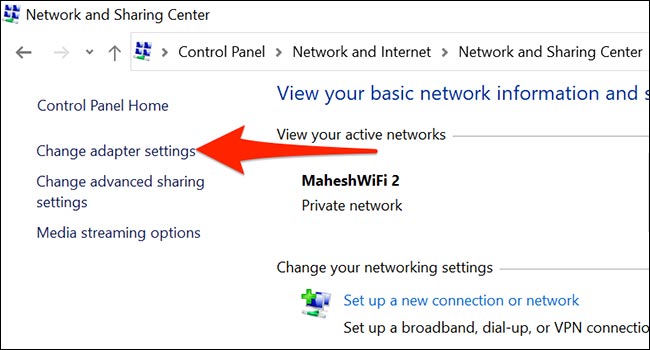
In the Network and Sharing Center section window, look at the sidebar menu and select “Change adapter settings“.
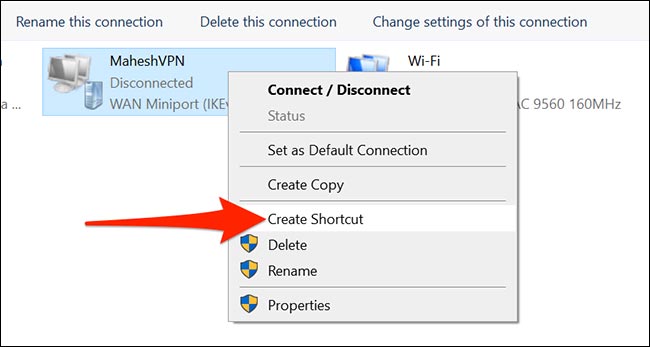
Find your VPN (looks like a two-screen icon). Right click on that VPN and select “Create Shortcuts”” from the menu that appears.
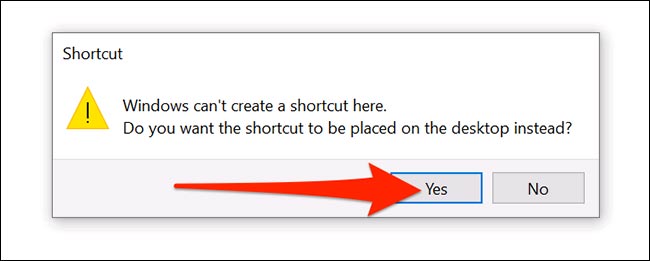
Windows will display a warning saying you cannot create a desktop here. Please click “Yes” in this warning box and Windows will place another shortcut on the desktop instead.
Thus, your newly created VPN shortcut is now visible on the desktop.

Source link: How to create a VPN shortcut on the Windows 10 desktop
– https://techtipsnreview.com/


