
Recently, Dell provided users with an update solution from TPM 1.2 to TPM 2.0 for its eligible laptop and computer models. This change will help Dell laptops and computers meet TPM 2.0 requirements when installing and updating Microsoft’s Windows 11.
Note 1: Before entering the main part of the article you need to be aware that BIOS-related changes, including TPM updates, are very dangerous. This process requires you to always connect your laptop or computer to a power source. If something goes wrong during the update process, it’s very easy to damage important hardware such as the mainboard, the damage will be very serious. Therefore, you need to consider carefully before deciding to upgrade the TPM or update the BIOS.
Note 2: Dell said that to update TPM 1.2 to 2.0 of the Precision series, you first need to update the device’s BIOS to the latest version. Please refer to TipsMake.com’s BIOS update article to better understand this issue.
Note 3: Dell laptops and computers shipped between 2015 and 2018 are equipped with TPM 1.2 and users can update to TPM 2.0 if desired.
Note 4: Dell laptops are being considered not compatible with Windows 11. Some users reported that their Dell laptops could not boot after upgrading to Windows 11.
How to update TPM 1.2 to 2.0
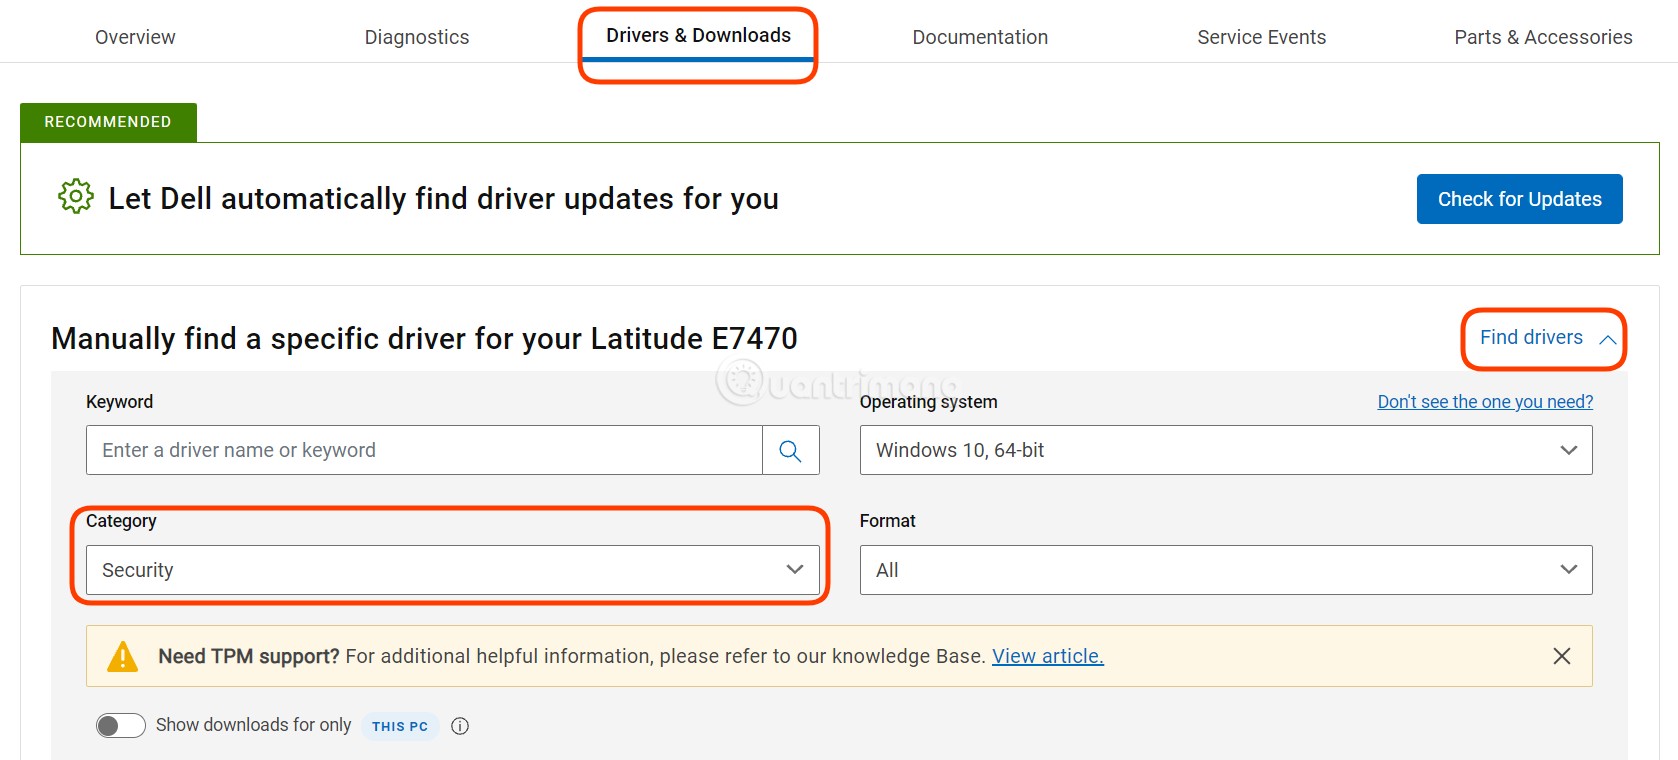
1. Go to Dell’s product support page.
2. Enter Service TAG of the machine or select the machine you are using from the Dell product list
3. Tap the card Drivers & Downloads, Press Find drivers
4. Select Security in the category menu
5. Search for firmware update file download Dell TPM 2.0. In case there are many TPM 2.0 files, you should choose the file with the most recent update date.
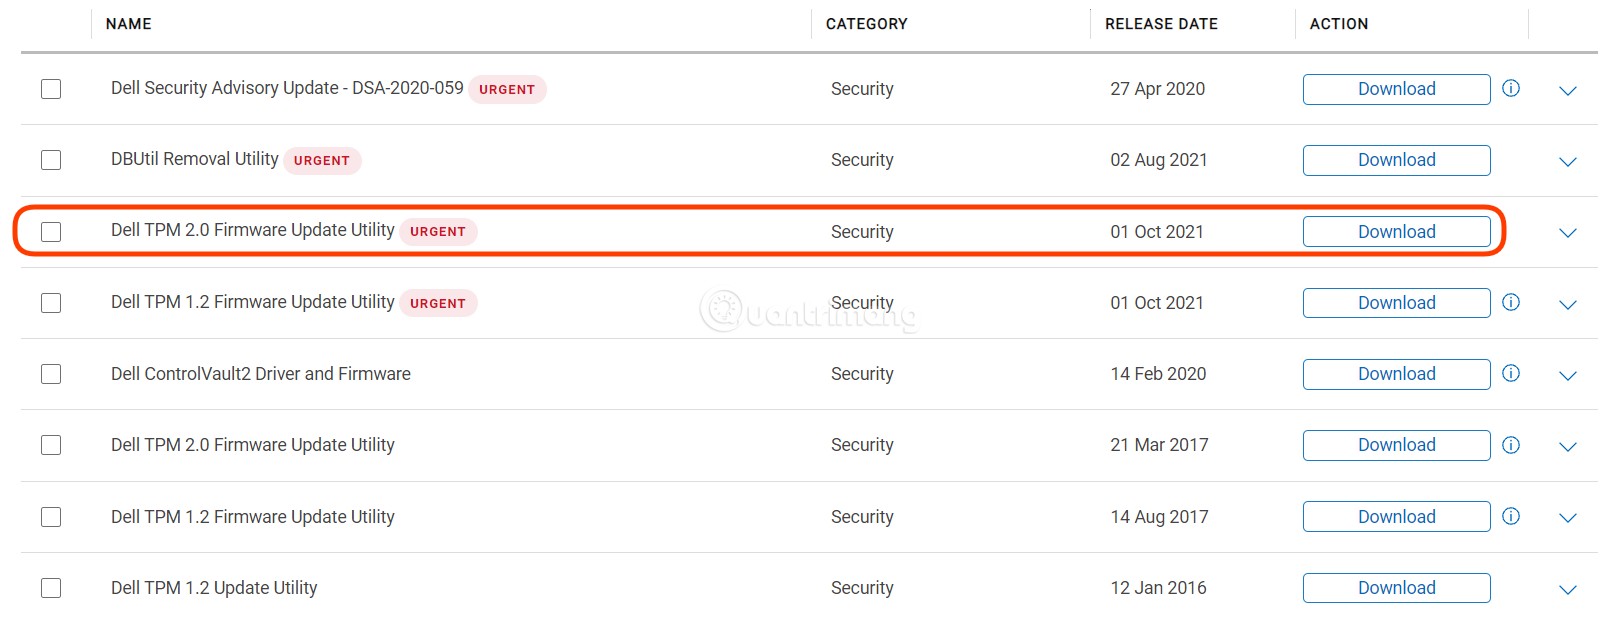
6. If found you can download
7. After downloading you double click to open and run the file
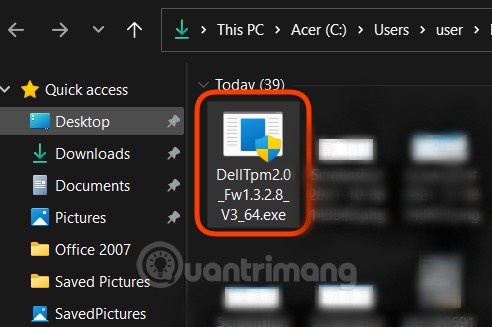
8. The machine will automatically update to TPM 2.0 after reboot
Fix “The TPM is Owned. Please Clear the TPM and try again” error
Every time the Windows 10 system with TPM is restarted, Windows 10 will automatically take over the TPM. Updating to TPM 2.0 or downgrading to TPM 1.2 both requires releasing control of the TPM to be successful.
If you do not release the TPM, you will receive the error message “The TPM is Owned. Please Clear the TPM and try again” when running the update or downgrade file.
How to release control of TPM
1. Run PowerShell under control Administrator by pressing the . button Start then enter PowerShell then right click to select Run as Administrator.
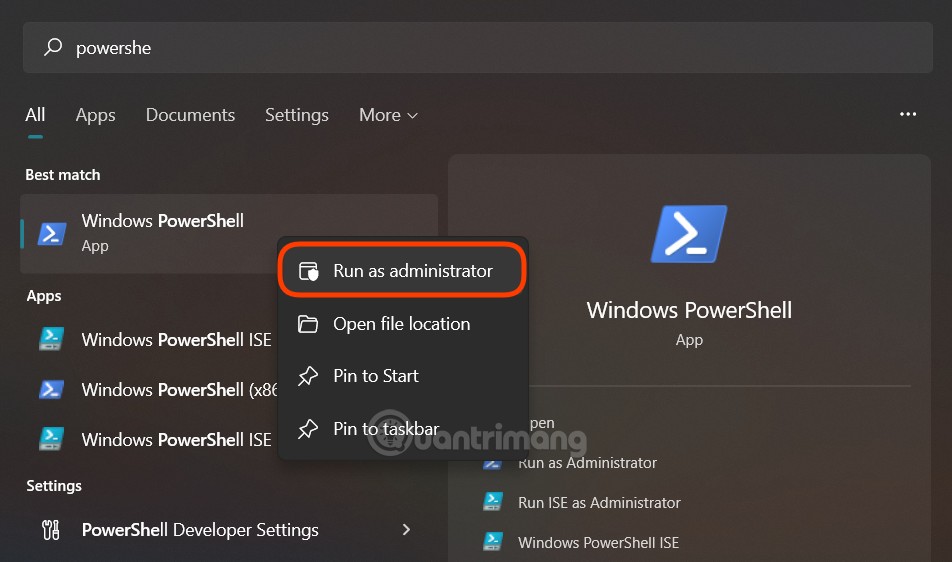
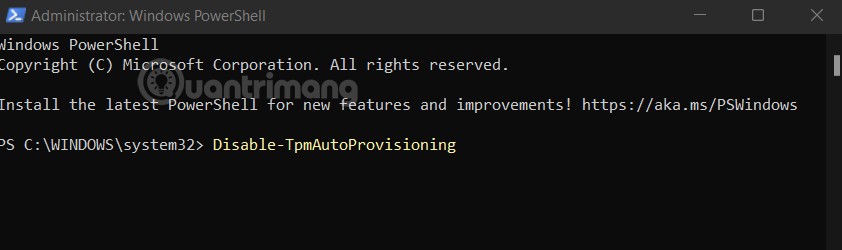
2. In PowerShell, you enter the command Disable-TpmAutoProvisioning then press Enter.
3. If the feature Dell Data Protection (DDP) is installed, you need to perform the following additional steps:
- Press the button Start then enter services.msc already Enter to open Services Desktop App.
- Service Setup Windows DellMgmtAgent to mode Disabled.
- Stop (Stop) the service Windows DellMgmtAgent.
- Service Setup Windows DellMgmtLoader to mode Disabled.
- Stop (Stop) the service Windows DellMgmtLoader.
- Redo the operations to release control of the TPM.
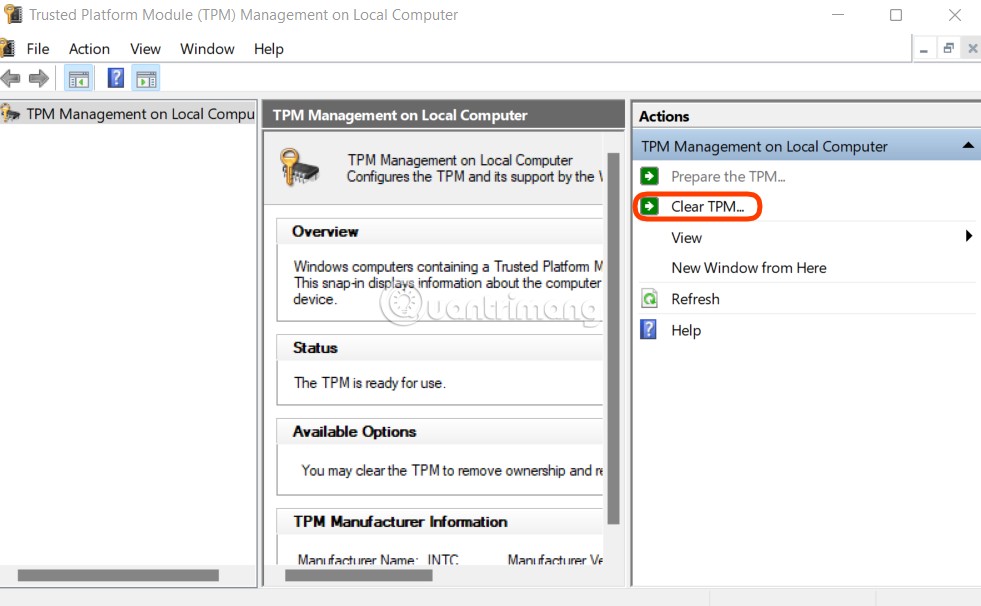
4. Press Start then enter tpm.msc already Enter to open the TPM management window.
5. Select Clear TPM in the rightmost frame.
6. The system will automatically reboot to complete the change.
7. Don’t access the BIOS, let the computer access Windows again.
8. Rerun TPM 2.0 update file (or downgrade TPM 1.2) with power always plugged in
9. If Dell Data Protection (DDP) is installed, you need to perform the following additional steps:
- Press the button Start then enter services.msc already Enter to open Services Desktop App.
- Service Setup Windows DellMgmtAgent to mode Automatic.
- Start (Start) the service Windows DellMgmtAgent.
- Service Setup Windows DellMgmtLoader to mode Automatic.
- Start (Start) the service Windows DellMgmtLoader.
Dell laptops and computers can be upgraded from TPM 1.2 to TPM 2.0
You can click to enlarge the image and then find out if your Dell computer can upgrade from TPM 1.2 to TPM 2.0:
Latitude series:

Precision Series

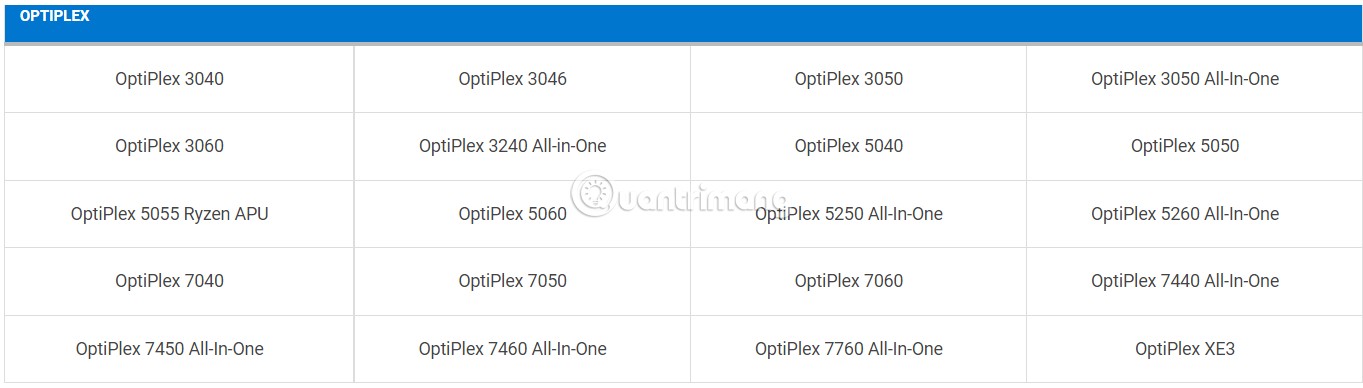
OptiPlex series
XPS series

Other models

As mentioned in the note at the top of the article, upgrading TPM, updating BIOS is quite risky. In addition, Dell latpop is also considered to be not compatible with Windows 11. Therefore, you need to consider carefully before following the instructions in this article.
TipsMake.com will not be responsible if your computer encounters any problems. Good luck!
Source link: How to update TPM 1.2 to TPM 2.0 for Dell laptops, Dell computers
– https://techtipsnreview.com/


