You are an accountant, an online marketer, you specialize in affiliate marketing, customer care or you are simply the leader of a certain team..
Well, if you are in charge of such tasks, it is inevitable that sending promotional emails, marketing or announcing an event to all members and partners is inevitable. .
Unlike sending mass emails like regular documents, sending emails to a list of members, partners.. you cannot use the same content.
Actually, it is, but it is very unprofessional and in many cases, you cannot apply this method. Because it is related to the full name, phone number, salary or bonus ….. more.
With emailing to such a large number of people, plus heterogeneous content will definitely take up a lot of your time here.
Tired of fumbling around with each person’s email to enter and send them messages? If you are feeling tired and stressed at work, this is a great article for you.
And that will be a thing of the past now because in this article I will show you how to send bulk Emails through the Microsoft Office toolkit. Specifically, we will use three applications in this Office suite that are MS Excel, Word and Outlook.
With these applications, you can send mass emails with separate content for different emails in an extremely fast and professional manner.
#first. How to Merge Mail to Send Bulk Emails
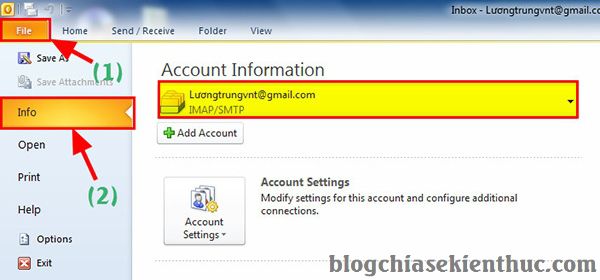
+ Step 1: First, turn on the Outlook application. Click select File => choose Info as shown below.
Note: If you have not yet configured Email to Outlook, you can review the tutorial on how to install Gmail management on Microsoft Outlook that I have instructed before.
If you have already configured Email on Outlook, then OK, you can immediately start merge mail.
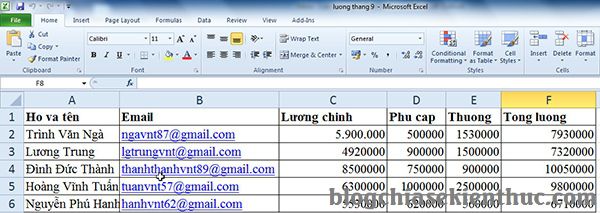
+ Step 2: You prepare an Excel File with fields including the recipient Emails. And some content fields to submit.
For example, here I will Demo a salary statistics for employees in the month with necessary information such as different salaries, bonuses, and allowances.
Next you can leave the whole Họ Tên of the recipient or just put a common noun (Name), this depends on the nature of your work. Then save the Excel File again.
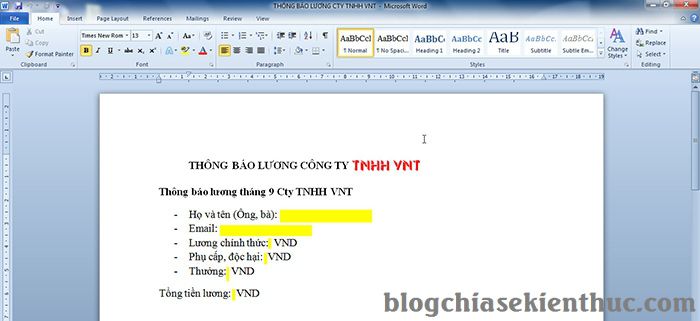
+ Step 3: You turn on your MS Word application and enter the basic information.
In there you will leave all the fields that you have already created in Excel, For example in the Họ và tên (Ông, bà) then you leave it blank so that after the mail merge, it will take information from the Excel table and enter this space.
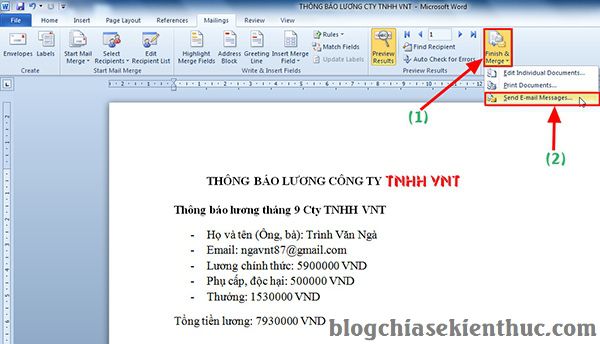
For example, here I do Demo an Email of September salary message sent to all employees. The blank sections are highlighted in yellow, you should leave the fields like Full name, Email, and salary fields blank.
+ Step 4: Next you choose Tab Maillings => choose Select Recipients and click Use Existing List...
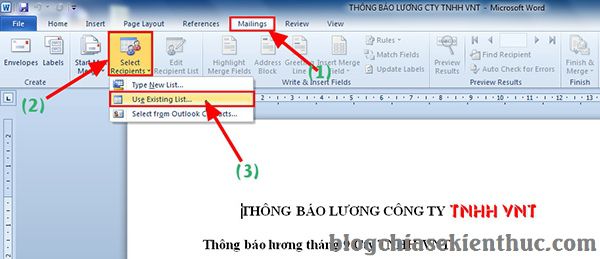
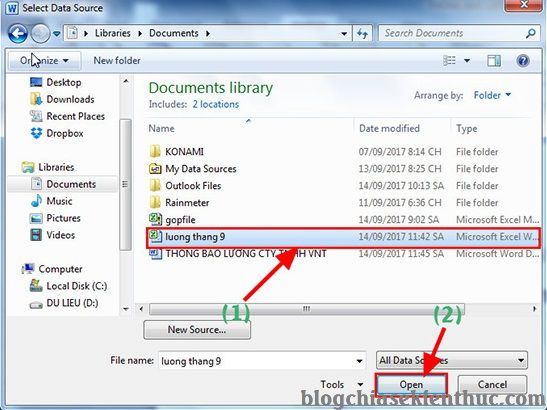
+ Step 5: Then you find the Excel File containing your content fields (The Excel file you prepared in Bước 2 there). And click select File => choose Open to add to the Word file.
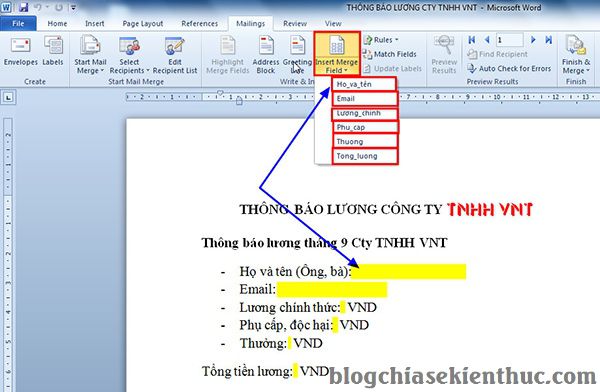
+ Step 6: Then you click on the empty fields => then click on Insert Merge Field to select the corresponding fields as shown below.
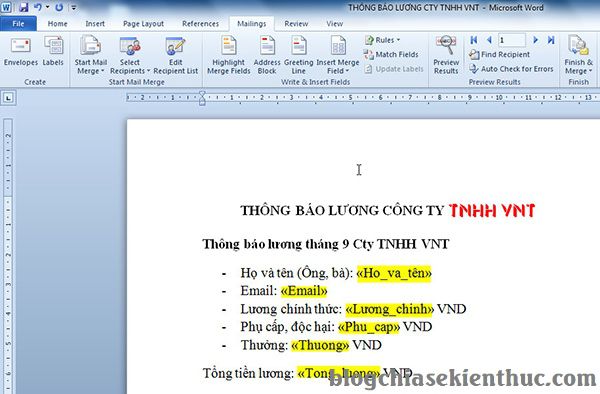
After selecting, we will get a Word file as shown below.
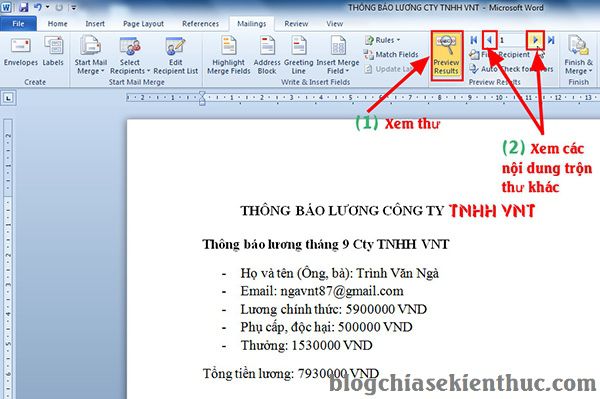
+ Step 7: After successfully entering the fields, select the tool Preview Results to preview the content and fields you want to send to each Email.
=> You can click on the two arrows as shown to see other Email fields.
+ Step 8: Next you choose Finish & Merge => then click Send Email Messanges.
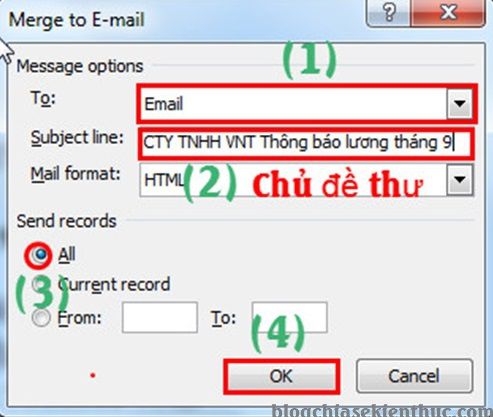
+ Step 9: At the window Merre to Emailyou choose:
- Big is Email.
- Subjec line is the Subject of the Email you want to bulk send.
=> Then tick the box All to select send all and click ok to start the sending process.
Now you can see that your Word is Loading information on different fields, to send to each specified Email in Excel.
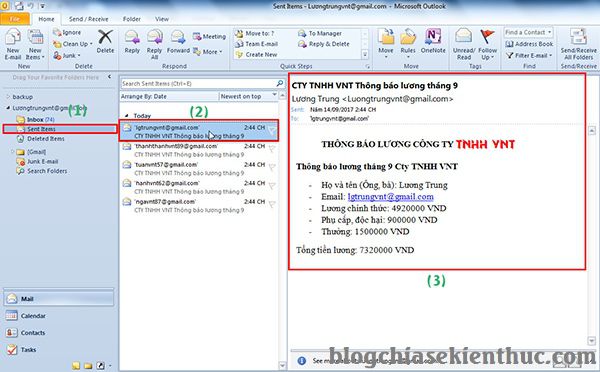
To check you can go to the Outlook application and click on the Sent Items and click on the newly sent email you will see the content that you have just sent to them.
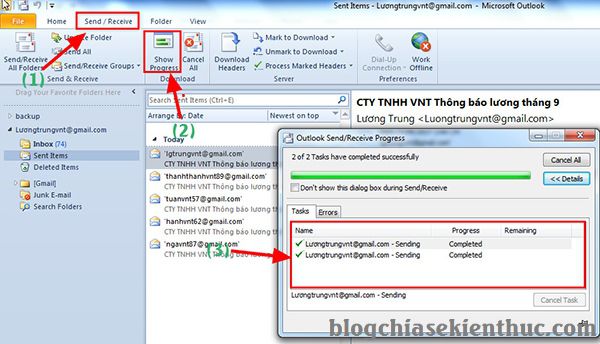
If in case you send Email too large number, can’t check in the above way, please click on Send/Receive => click select Show Progress.
In the window Outlook Sen/ Receive Progress have display Completed it looks like you’ve finished sending the mass mail
Now I will log into a Gmail on the browser I created Demo in that group to see how the results are.
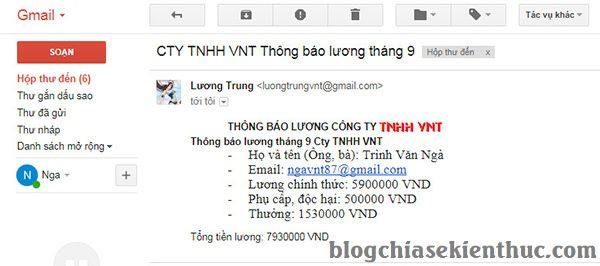
Ok very good isn’t it, you should note that changing the content of these Email fields, depends mainly on how to arrange and handle your original Excel File, the subject fields on Excel like, Last name and name or email….
You should not enter accented letters to avoid errors. This method can also be applied similarly on Microsoft Office 2007, 2010, 2013, 2016 versions.
#2. Epilogue
Okay, so I just shared with you email merge skills to send bulk mail to your customers, colleagues and partners.
This is actually a pretty essential skill, it can be applied to a lot of jobs and in many other cases.
You can apply and be creative to ease your work load, and at the same time you will become more professional than ever.
Hopefully this article will be useful for you. Good luck !
CTV: Luong Trung – techtipsnreview
Note: Was this article helpful to you? Don’t forget to rate the article, like and share it with your friends and family!
Source: Instructions to merge mail, merge data in Excel to send bulk Emails
– TechtipsnReview