
- Instructions for connecting Samsung Galaxy J7 2016 phones to computers and laptops
- How to change Dns Samsung Galaxy J7, J5
- Compare Samsung Galaxy J7 Plus and Samsung Galaxy A7 2017
- On hand Samsung Galaxy J7 Pro, new design, upgraded Camera
- Should you buy Samsung Galaxy J7 Duo?
We have just gone through the steps of unboxing, or in the hands of Samsung J7 Pro, but to be able to experience the most accurate and standard Samsung J7 Pro in hand, we will go together to learn the setup steps. Initially, Samsung Galaxy J7 Pro follows the operations that TechtipsNReview.com will introduce in this article for the best effect when experiencing or using it.
Samsung Galaxy J7 Pro Initial Setup Guide
We will have the following steps to perform the initial setup of Samsung J7 Pro:
Step 1 : You start the Samsung J7 Pro application by Press and hold the Power button on the right hand side of the device screen after one to 2 seconds the device vibrates and starts the device.
Step 2 : Once the boot process is complete, we will proceed to the Samsung Galaxy J7 Pro initial setup steps.
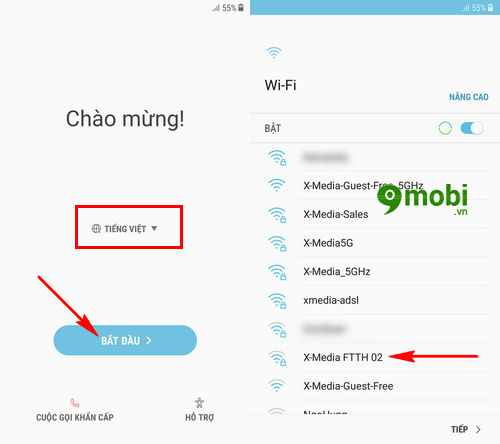
Here you guys language selection equipment and Click Start then we will select access to Wifi network to install the next initial settings.
Step 3 : After you have successfully established Wifi network access, we will Need to confirm Agree with all with the terms of use of the device.
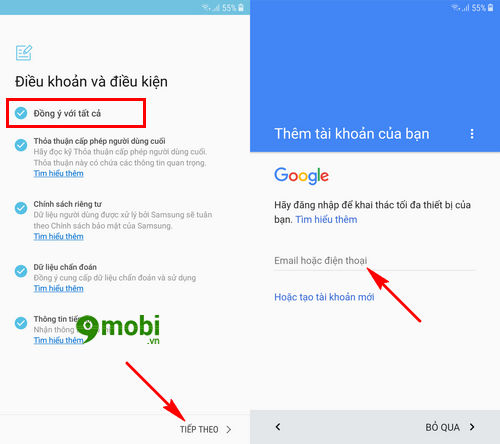
Next we will need to proceed to the Steps to enter email account on the device, friends You can click Skip so as not to skip this operation.
Step 4 : However, to help you have a better experience, TechtipsNReview.com stillWe recommend that you do a Gmail login this on the device to get the standard and stable Samsung J7 Pro initial setup steps.
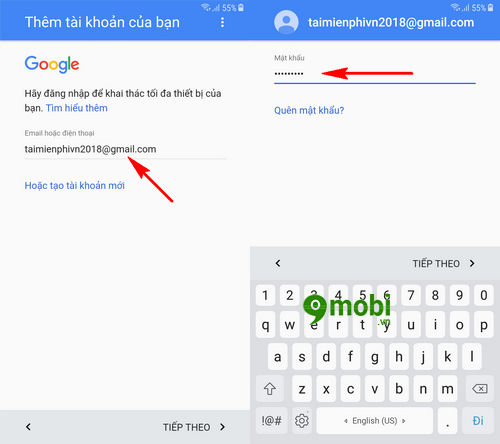
You will need Enter your account name and account password and click Next for the system to check and confirm.
Step 5 : When the email account login process is complete, we Click OK to confirm with the device’s policies and terms of service.
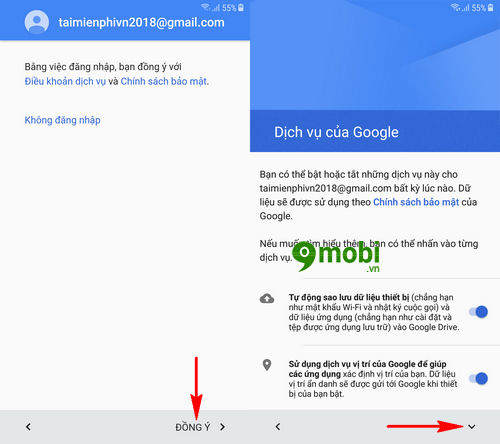
Next we will choose Google services on our device, such as automatically backing up data using location services… you can press the arrow icon for a further list of these features.
Step 6 : Then you can click to deactivate any feature that you do not want to use on the device, and select Next to continue with the initial setup Samsung J7 Pro.
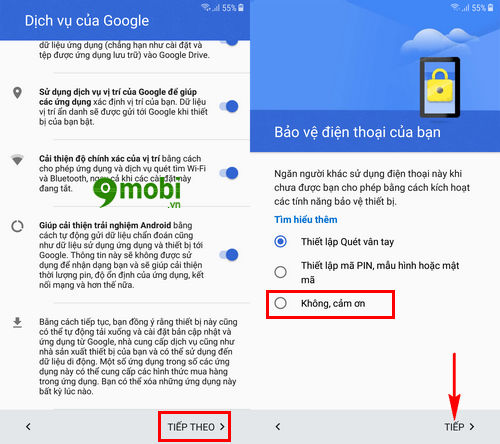
The next step the system will proceed to ask you to choose to set up security on the device such as Fingerprint scanning, Security Pin code …, if you do not want to do this, we will. Click No, thank you and select Next .
Step 7 : To complete the initial setup of Samsung Galaxy J7 Pro we cannot skip the setup steps Sign in to Samsung Account on the device, we can click Sign In.
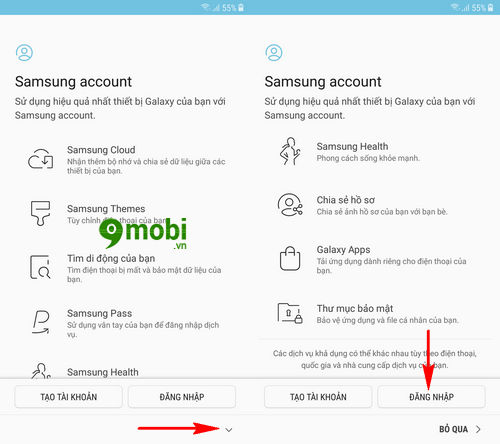
If you do not have a Samsung account, you can choose Register to create a Samsung account. Or you can review the article how create Samsung accountto do this.
Step 8 : Finally, after setting up the Samsung Account on the phone is complete, we will Click Finish as shown below to finish the initial setup of this Samsung J7 Pro.
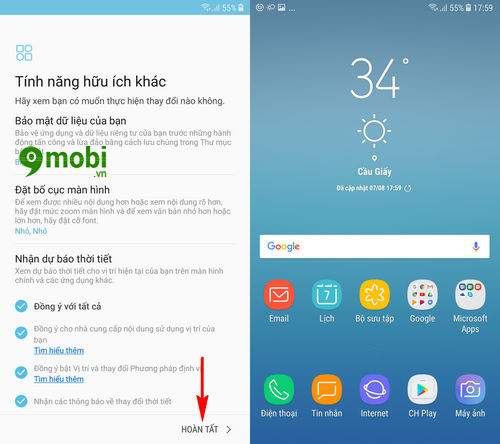
And this is the main interface of the Samsung Galaxy J7 Pro device after successfully setting up the initial installation with the latest Android 7.0 operating system that you can use today.
https://TechtipsNReview.com/thiet-lap-ban-dau-samsung-galaxy-j7-pro-19641n.aspx
Above is an article that guides you through the initial setup steps of Samsung Galaxy J7 Pro, believe that through this article you have also completed the initial installation steps of the device, in addition you can choose choose to set up Always On Display mode on Samsung J7 Pro through the article on how to Turn on Always On Display Samsung J7 Prohas been guided by TechtipsNReview.com in previous posts.
Source: Samsung Galaxy J7 Pro Initial Setup
– TechtipsnReview


