
- How to save photos to the memory card when taking pictures on Android phones
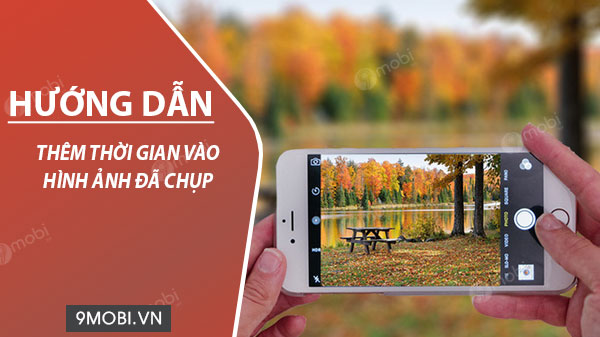
- How to take a photo showing the date and time with PhotoStamp Camera
- How to turn off and on the location feature when taking photos on Samsung Galaxy phones
- Watch commemorative videos on iPhone, Play Memories
- Instructions for taking photos of Android phones on the computer
The guide to the time stamp on the photo after taking it on the phone is how users can easily add the timestamp icon in the photo for their device. If you want to make it easier to store, enter the timeline into the photo.
How to add a timeline to a photo?
How to add a timeline to a photo?
To be able to add a timeline to the photo after taking it on the phone, we have the following steps:
=> Link Download Timestamp Camera for Android![]()
Step 1 : You download and install the Timestamp Camera application for Android to your device here:
Step 2 : When the download is successful, we will start this application, at this interface we will press select Start to begin.
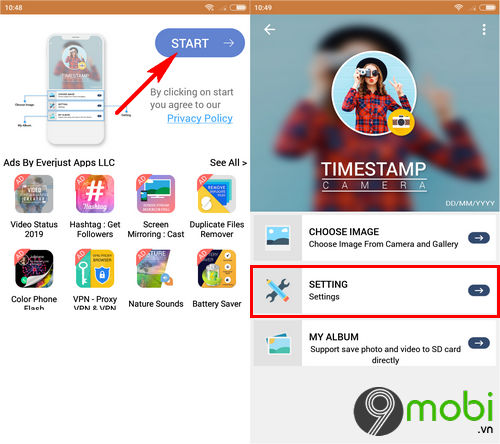
At the main interface of the application Timestamp Camerawe will choose Settings firstly.
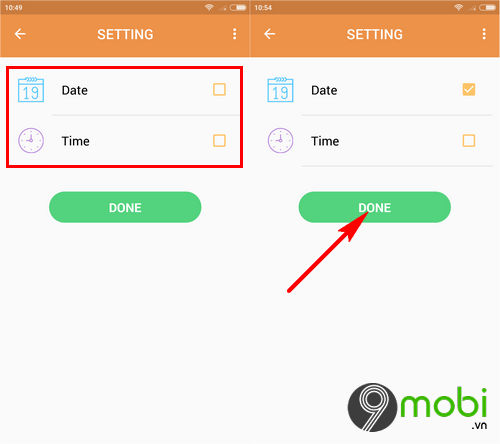
– Now to be able to add a time stamp to the photo after taking it on the phone, we will choose to add the date time or the time when the photo was taken and press choose Done To confirm
Step 3 : Next, we will click Choose and Camera to be able to add a timeline to the photo after taking it on the phone. Or Click on Gallery to select a previously taken photo
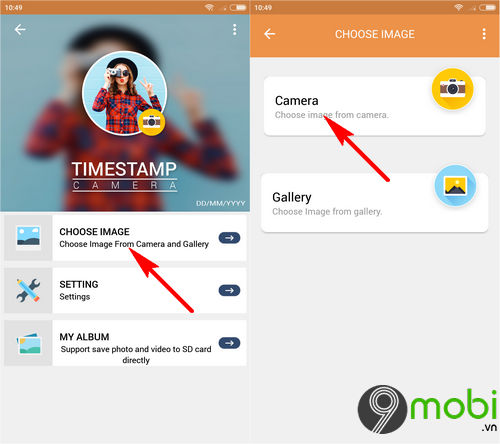
– At this point, the system will switch us to the camera interface on the phone, take any photo you want.
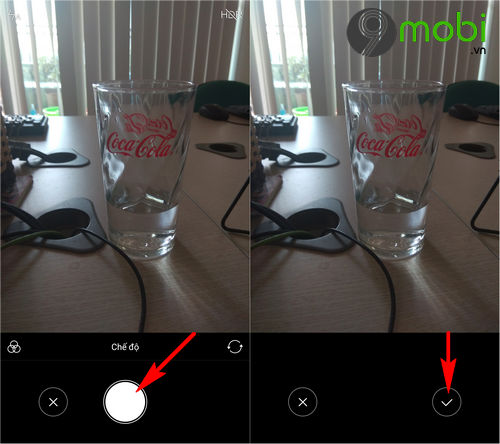
When the photo is taken successfully, we will press the icon Confirm at the Camera interface.
Step 4 : Immediately after that, the system will switch us to the image editing interface, the first is to crop the image accordingly.
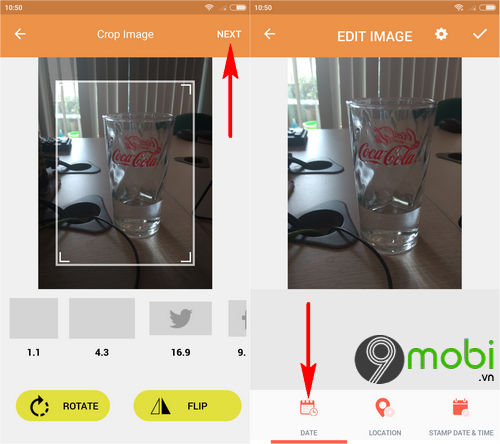
And to be able to add a timeline to the photo after taking it on the phone, we will look for the Date function as shown above.
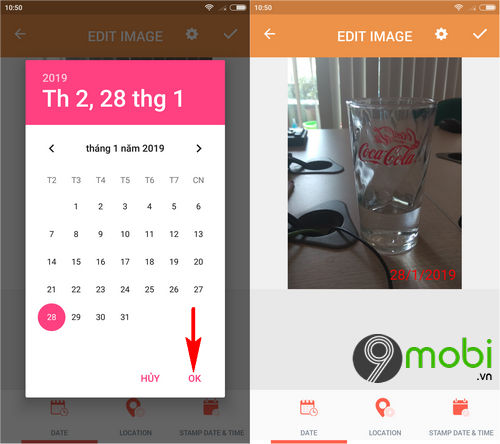
Step 5 : On the phone screen will now display the date stamp for you to choose, press OK to confirm, and immediately we can add the time stamp to the photo after taking it on the phone.
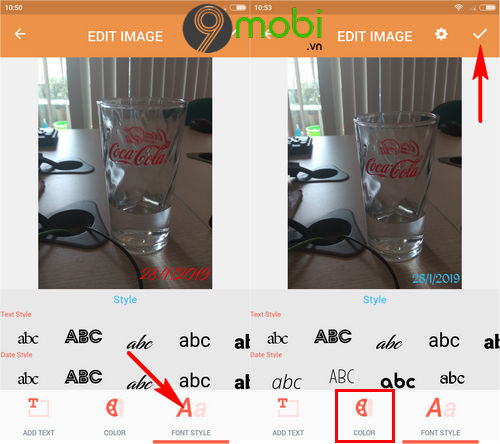
Step 6 : In addition, you can also decorate the time stamp on the photo after taking it on the phone by clicking the Font item to change the display style of the timeline in this photo.
– Font styles: Change the font check, there are many options for you, you swipe the text to the two sides to choose the right font.
– Color: Change the color of the text.
– Add Text: Add text, text to the image.
Finally we will click Confirm to save this image.
Thus, we have just come together to learn about the steps to add a timeline to a photo after taking it on the phone so that users can easily remember and store beautiful, and worthy images. miss.
https://TechtipsNReview.com/huong-dan-moc-thoi-gian-vao-buc-anh-sau-khi-chup-tren-dien-thoai-24433n.aspx
In addition, TechtipsNReview.com would also like to introduce you to the top steps of the hottest photography apps today with Film color filters that are extremely loved by young people, which have been compiled through the article. Film color photography application on a super beautiful phone for you to choose and use on your device.
Source: Instructions on how to put a timeline on the photo after taking it on the phone
– TechtipsnReview


