vMicrosoft Office (MO) is one of the important software that everyone needs in their computer. This Office suite includes very familiar applications that you are still using every day, such as MS Word, Excel, PowerPoint ….
Thus, in the process of working, if you can optimize the Office suite, it means that you have optimized your working time and effort and increased your work efficiency.
Therefore, in this article, I will summarize and guide you with a few tweaks to make your work easier.
I will guide you on the Word application, you guys, the other applications you do are completely similar.
1/ Turn off the annoying spell check feature
After installing Office, open the Word file and turn off the spell check feature on Word.
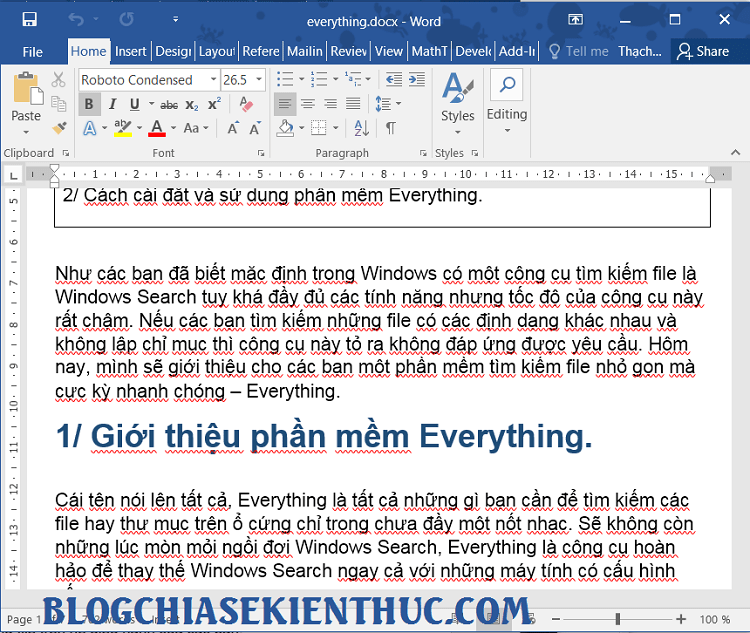
In the process of working with Word, PowerPoint files… you will often see red and blue lines appear at the bottom of the letters, right.
If you work with a small text file, or in other words, not too long, you may not find it uncomfortable, but with a document up to hundreds of pages, it is very confusing and unsightly.
For example, the following text:
OK, and here I will show you how to turn off this spell check feature, you do the following in turn:
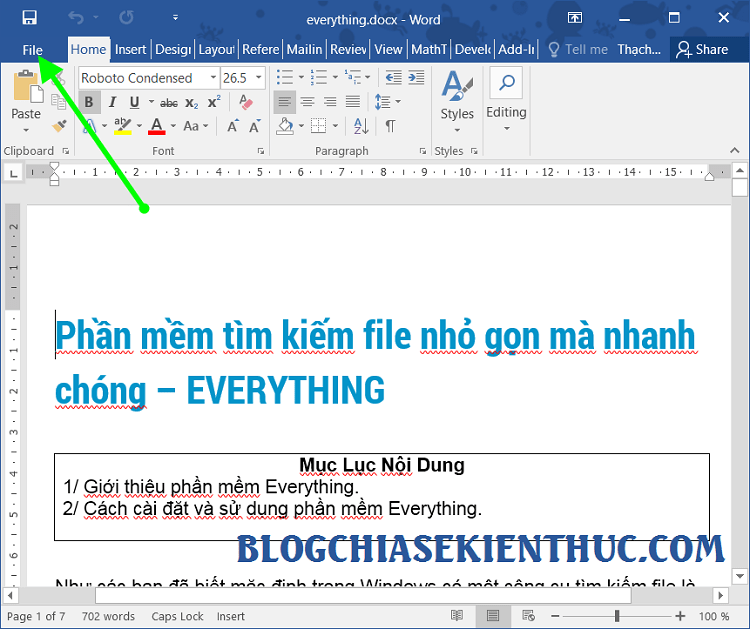
+ Step 1: From the Menu bar, go to File.
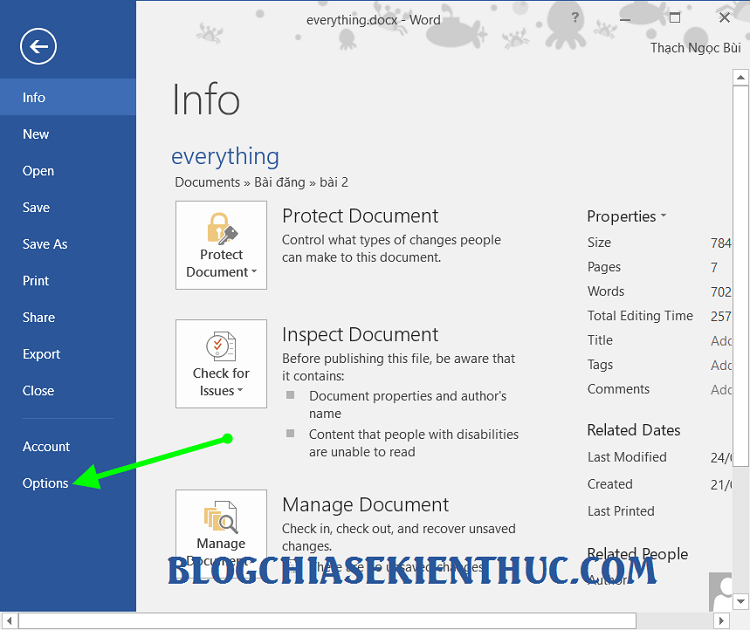
+ Step 2: Go to Options
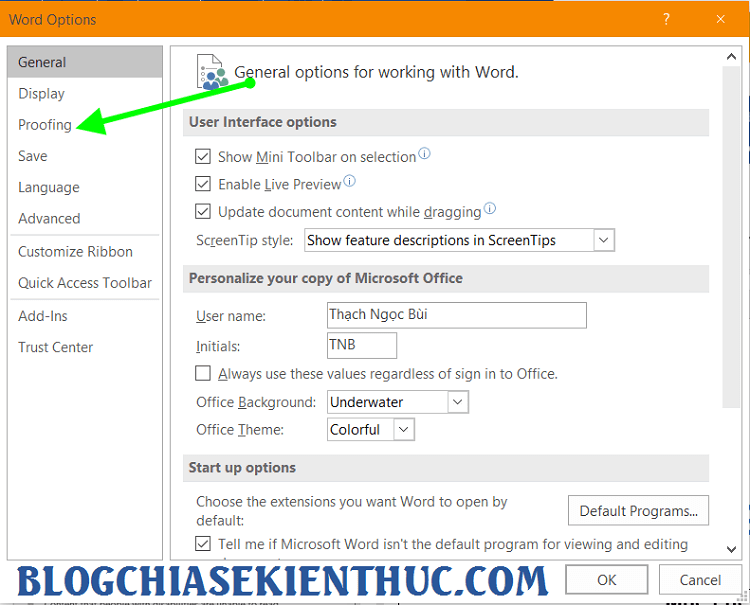
+ Step 3: From the screen of Options you choose tab Proofing.
+ Step 4: You scroll down to find the section When correcting spelling and grammar in Word as shown below => Remove all ticks in these boxes => Then press OK.
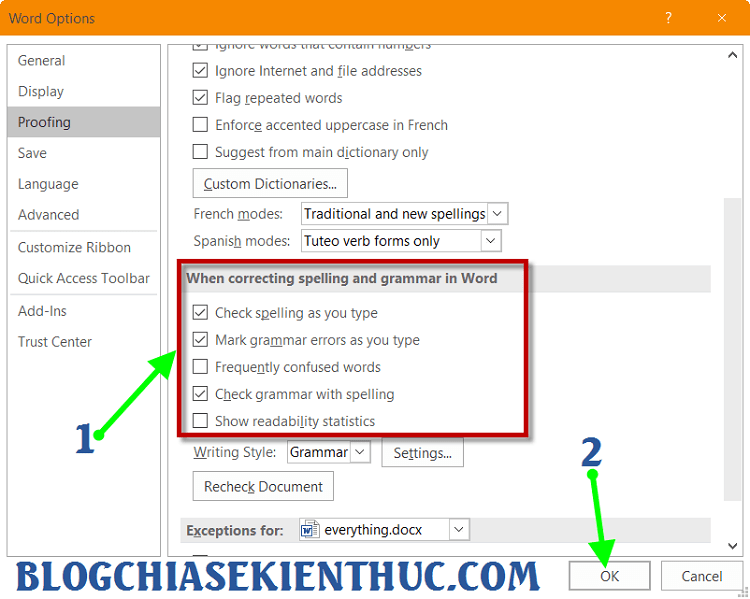
Done. You can open any Word, PowerPoint file to check!
2/ Change the path to save the file automatically (your lifesaver)
Maybe you are looking for:
By default, Word saves the draft in the drive C (operating system drive). Now we will change the directory where this file is stored to another drive.
Perform:
+ Step 1: You also enter File => choose Options => select tab Save.
+ Step 2: You pay attention to the part Save documents:
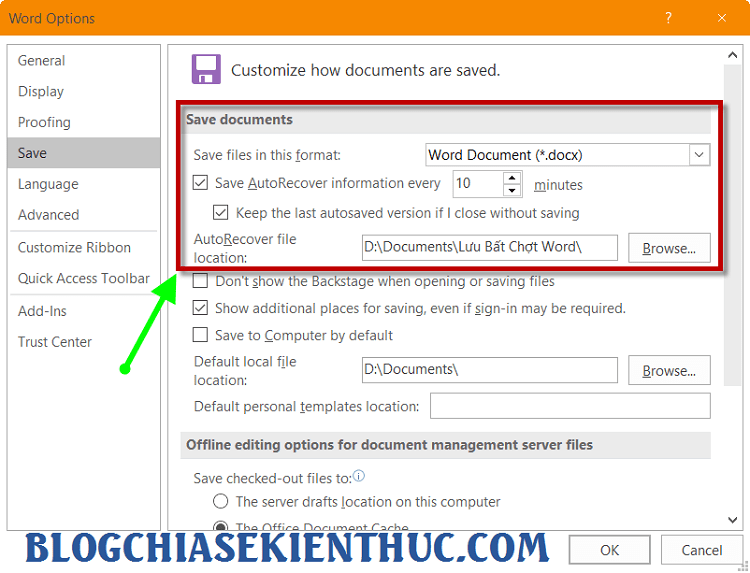
+ Step 2: Please correct it Save AutoRecovery information every Fort 1 minute, which means it will automatically save for 1 minute. You will be completely assured to work without worrying about losing data when there is a sudden power failure or the computer suddenly fails anymore…
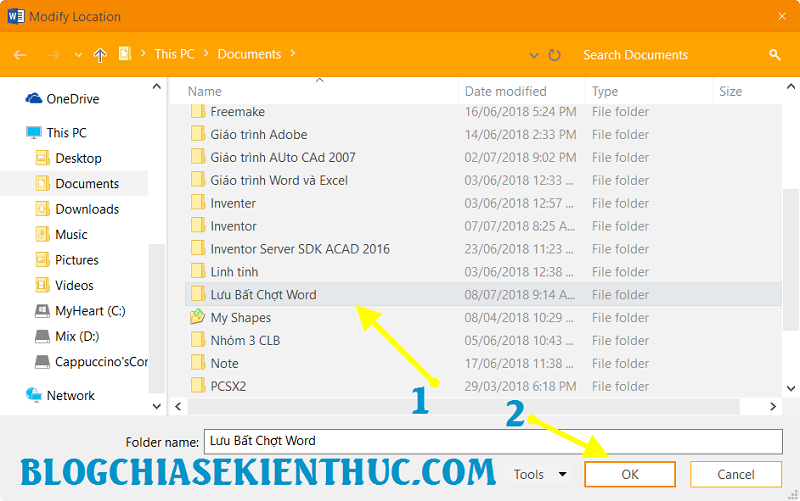
Next ! Please press the button Browse... and choose a path to another drive partition. An example is the drive D like me, for example, to retrieve the saved file automatically when needed.

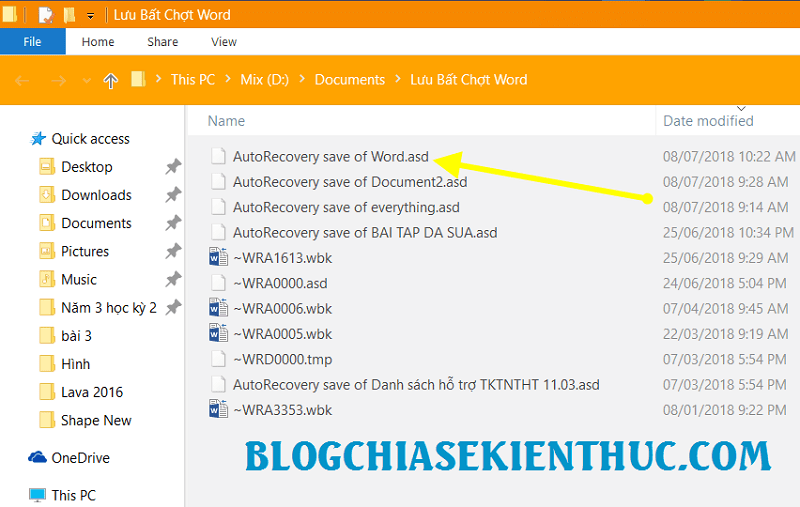
+ Step 3: Select the folder where you want to save the file. Choose a folder that’s easy to remember. This is the folder where the file is automatically saved when you edit.
TIP: You can find the selected folder and see there are .asd files. This is the automatically saved document file that you are editing. You can open this file in Word to read it.
3/ Adjust the unit of measure in Word and show the Ruler bar
You are also in File => choose Options. In the window Word Option you choose tab Advancedand then do:
a, Adjust the unit of measure
+ Step 1: You scroll down to find the section Display. In section Show measurements in units of You choose as shown below to adjust the unit Centimeters (The default is usually the unit inches).
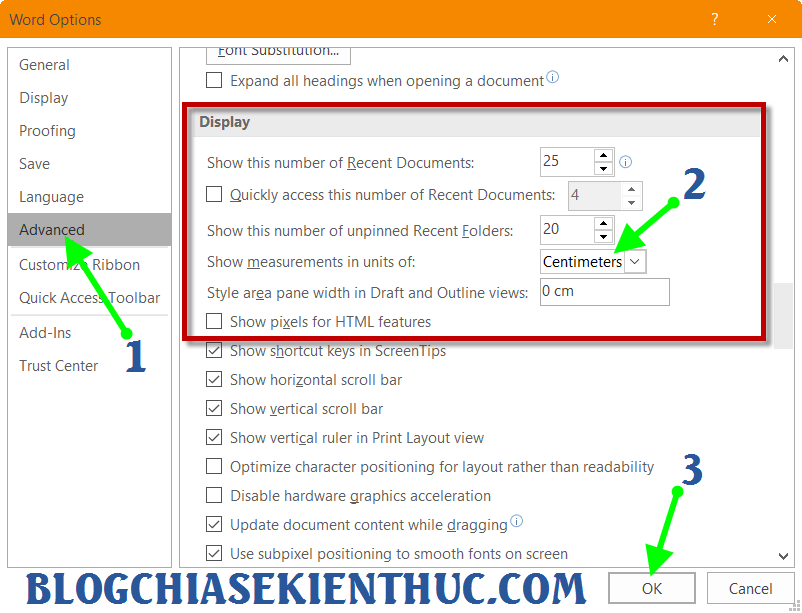
Then press OK. It’s done !
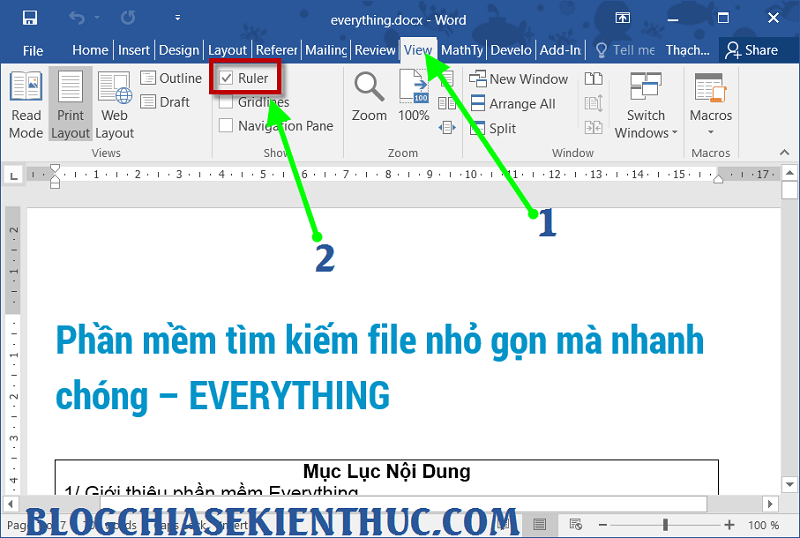
b) Show Ruler bar
+ Step 1: You from the working screen of Word => find the tab View => tick Ruler as shown is OK.
4/ Change Theme to your liking
If you are too bored with the default interface of Word, Excel … then you can change its interface to look fancy and work more exciting.
Perform:
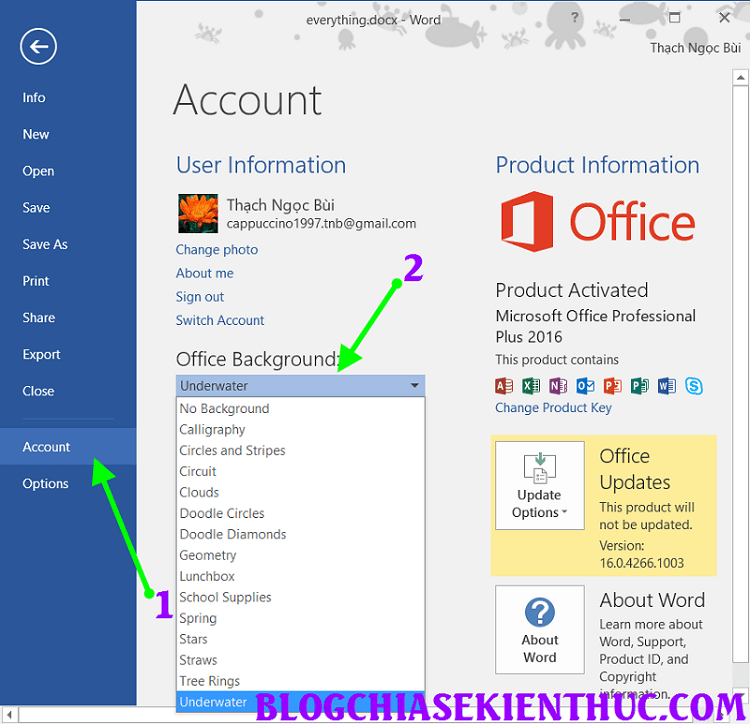
+ Step 1: From the Menu bar, click on File => click select tab Account => then navigate to Office Bacground.
Here you can choose your favorite wallpaper and color tones.
+ Step 2: Select the part Office Theme => Choose a theme that suits your eyes
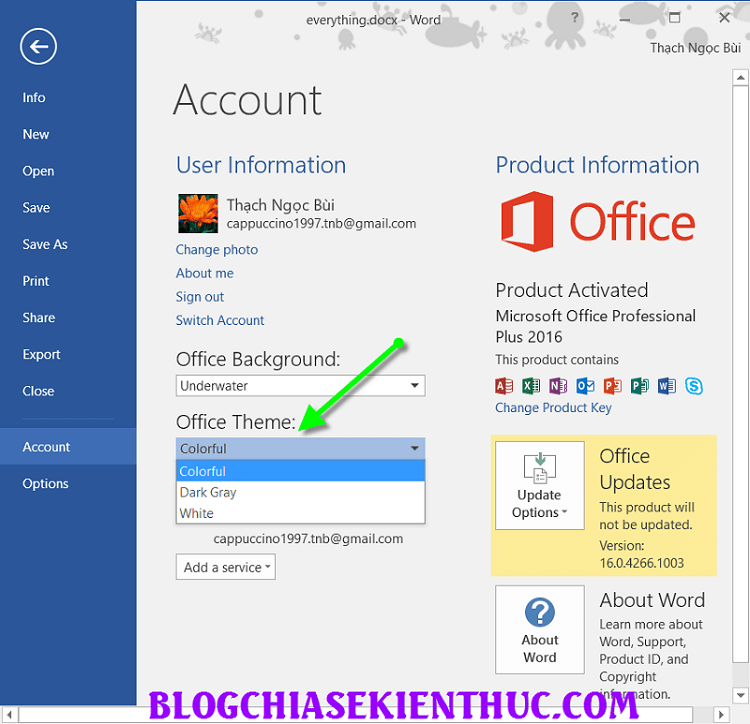
Demo results are as follows:
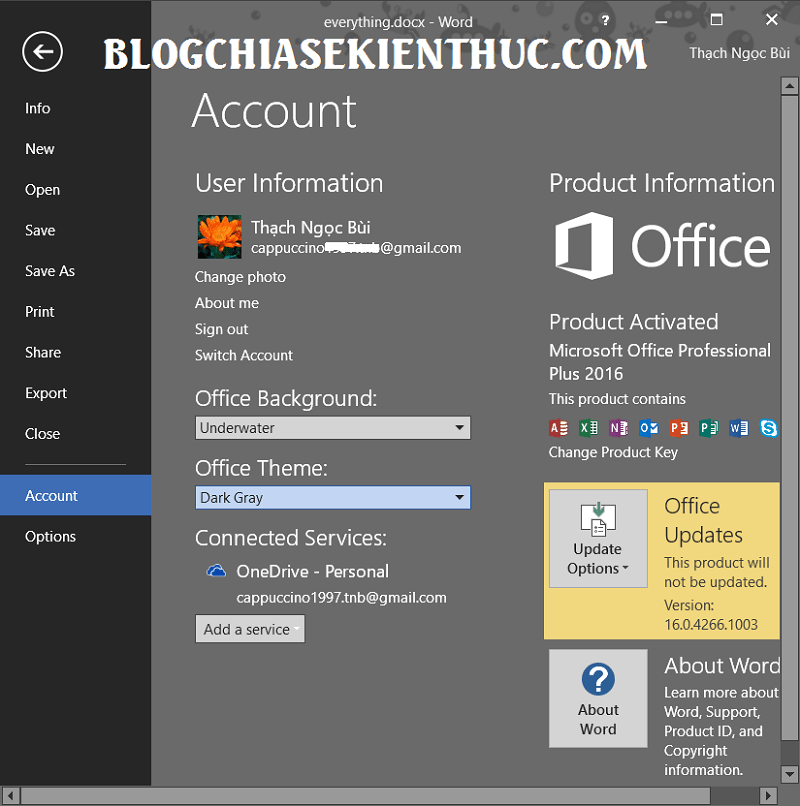
Looks very fancy, isn’t it 😛 I usually choose dark colors because working for a long time on Word will reduce eye strain.
Epilogue
Today I have finished guiding you through a few small settings for the applications included in the Office suite, but these are all necessary settings that you should know. Hopefully this article will help you use the applications in the Office suite more professionally.
Good luck !
CTV: Thach Ngoc – techtipsnreview
Note: Was this article helpful to you? Don’t forget to rate the article, like and share it with your friends and family!
Source: What to set up after installing Microsoft Office?
– TechtipsnReview